


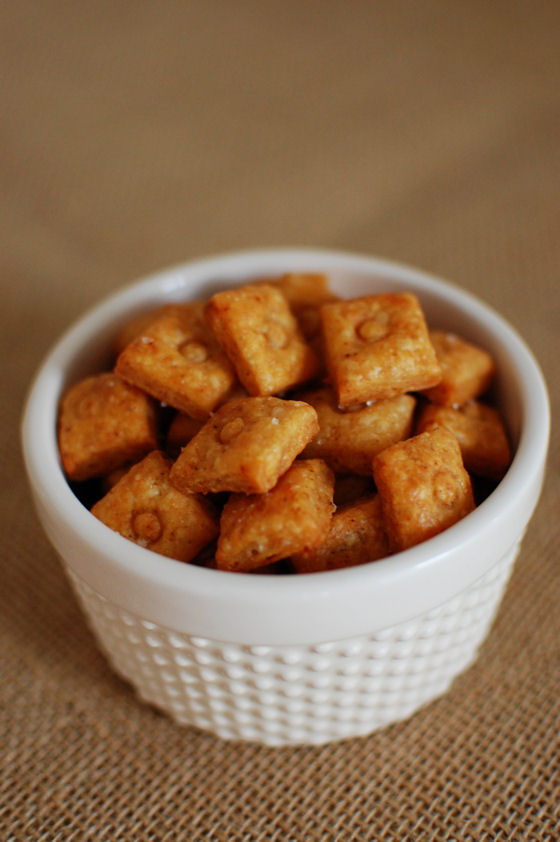
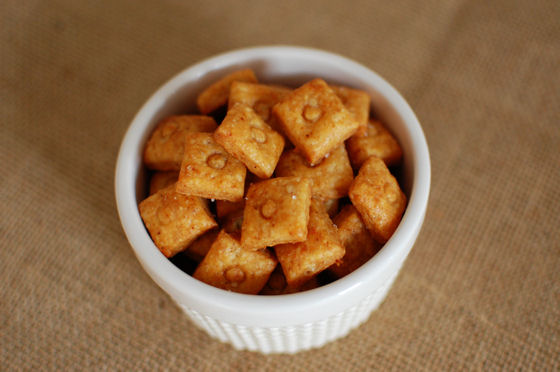
Chipotle Cheez-Its
Remember those Homemade Cheez-Its I posted last week? Yea, I’m back. With more Cheez-Its. You see, after making that first batch, Hubby would not stop talking about them. And I may have made the mistake of mentioning that they were really easy to make…
So I agreed to make another batch but wanted to mix it up this time. I know that Rachel threw some red pepper flakes into her crackers when she made them, so I opened up my spice cabinet. It’s actually in a really sad state these days. Since moving in to our apartment, we’ve been just buying spices as we need them, so my options were limited.
I will say though, that those options are high quality options. We have a Penzey’s literally across the street from our apartment. And I figure if I’m going to restock a spice cabinet, it might as well be with the good stuff!
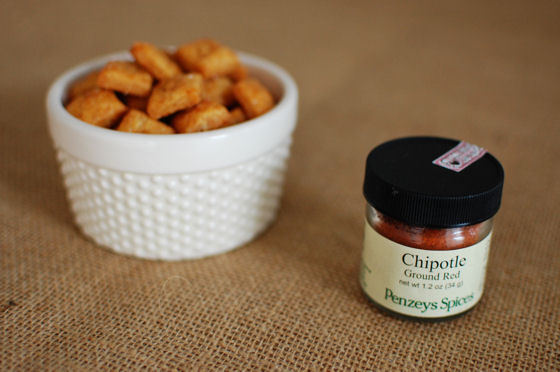
On a recent trip to Penzey’s, this ground chipotle caught Hubby’s eye, so we grabbed some. You can smell the smokiness the second the jar is opened. What you can’t smell is the heat that kicks in after the smokiness.
To say Hubby loved these Chipotle Cheez-Its would be the understatement of the century. Since them the other day, I’ve already made them a second time… And, he’s told anyone who will listen about how amazing they are. So if you were even *thinking* about making Homemade Cheez-Its after last week’s post, you definitely have to make them now!
One Year Ago: Pumpkin and Gingerbeer Biscuits and Mango Salsa
Two Years Ago: Brasato al Barolo (Beef Braised in Wine) and Pomegranate Cranberry Quinoa Salad
Three Years Ago: Gooey Bars and Gingerbread Apple Upside Down Cake
Four Years Ago: Crockpot Tamale Pie and Inauguration Day Cupcakes
Five Years Ago: Clam Chowder


Chipotle Cheez-Its
Yield: ~12 dozen crackers
Ingredients:
8 oz sharp cheddar cheese, shredded
3 Tbsp butter, softened
1 Tbsp vegetable shortening
1/2 tsp salt
1 cup flour
2 Tbsp cold water
1 tsp ground chipotle
Course sea salt for sprinkling
Directions:
In the bowl of a stand mixer, combine cheese, butter, shortening and salt on medium-high speed. Reduce speed to medium, slowly add flour and water. If adding chipotle, do so now.
Continue mixing until dough is smooth.
Divide dough into two, creating discs and wrapping in plastic. Chill for at least 30 minutes.
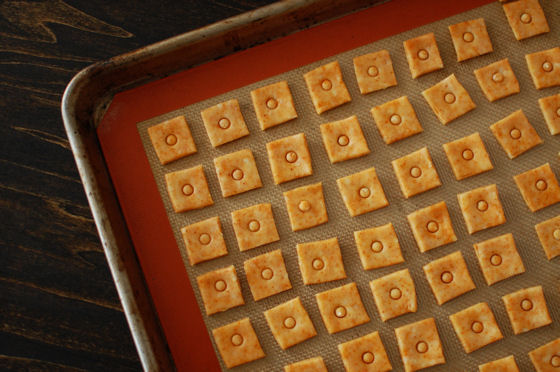
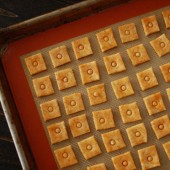
Preheat oven to 375 degrees. Prepare two baking sheets with silicone baking mats or parchment paper.
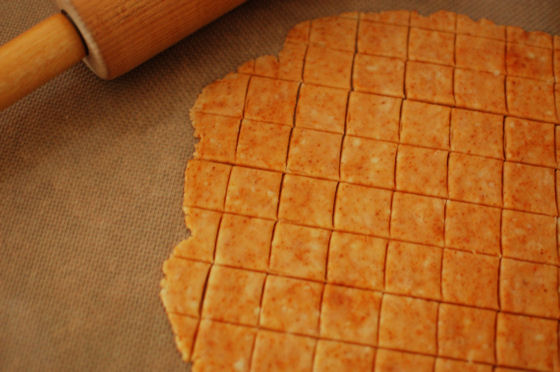
Roll out dough to 1/8″ thickness. Dough will be approximately 10"x10". Using a ruler as a guide, cut long 1" horizontal strips. Rotate ruler to slice vertically, creating 1"x1" squares. Carefully transfer individual squares to prepared baking sheet. Repeat process with remaining dough.
Using a toothpick or cake tester (I used a straw), create holes in the center of each square.
Sprinkle with course salt. Sprinkle with pepper if using.
Bake for 10-15 minutes. I removed mine at 12 minutes. The time will depend on the thickness of your squares as well as the crispness you prefer. Watch your oven closely from 10 minutes on.
Best eaten the same day. Store remainder in an airtight container.
Recipe adapted from ReadmyMade Magazine


 I am Jen the Beantown Baker. Engineer by day and baking maven by night. Hubby serves as my #1 fan and official taste tester. We got hitched back in 2006. Barefoot. In the sand. With the waves crashing behind us. It was one of the best decisions we’ve ever made.


I was going to go online and look for a recipe for pretzels! thanks so much!
They look awesome! I am so glad that you enjoyed them. I need to make them soon myself.
1 point each?????? i’m SO there.
I just made these…they were SO good and DH has no idea they were weight watchers. Thanks!!
Made the Garlic Parmesan version of these last night and absolutely loved them! They are ALL gone already! 🙂 Thanks for sharing them!!
Heres the link if you want to check them out on my blog:
http://ashleyscookingadventures.blogspot.com/2010/04/30-things-to-make-before-i-turn-30.html
From what i figured they are close to 3 points each. The flour alone is going to give you 48 points plus they 5 points for the brown sugar divided by the 24 servings is over 2 points. This is from using the weight watchers app….as I wrong???