


Marbled Chocolate Chip Bundt
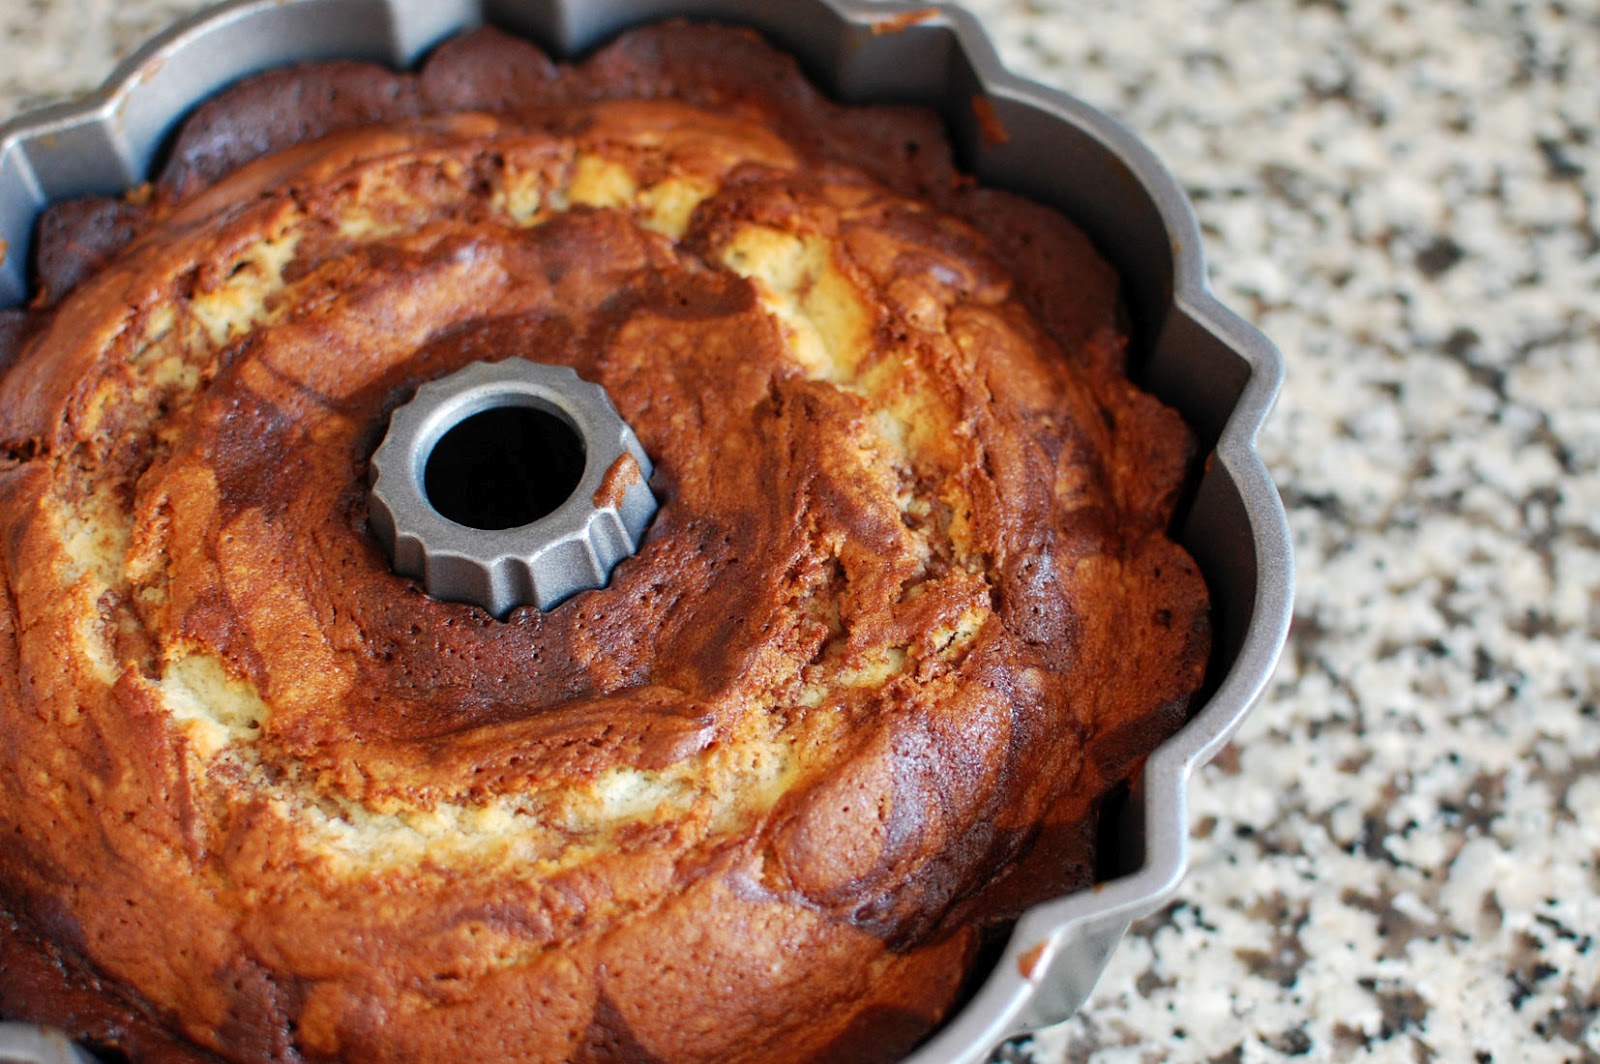
Bundt cakes are so much fun. I just love the pretty curves. And the crackly surface before you flip the bundt pan over. I was working from home a couple weeks ago and got an itch to bake.

I browsed for a recipe that wouldn’t require a trip to the grocery store. I was in a super lazy mood and didn’t want to deal with frosting but I wanted something cakey. This recipe fit the bill in all categories. The Marbled Chocolate Chip Bundt came out very moist and tender. It had just enough chocolate to be chocolatey, without being overwhelmingly chocolatey.
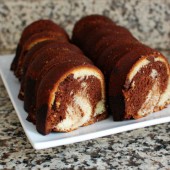
And check out this fun way to serve a bundt cake. I always think it needs to be served on a round cake stand or plate. But it doesn’t. I saw Bridget post a picture of a bundt cake where she cut and served it like this. It was one of those AHA moments where something seems so obvious I don’t know why I never thought of it myself. Just slice your bundt like always, then place them on a rectangular plate by alternating the direction of the slices of cake. So simple and elegant.

One Year Ago: Crunchy Apple Slaw
Two Years Ago: Spring M&M Pretzel Treats
Three Years Ago: Goat Cheese and Sundried Tomato Appetizers and Fauxstess Cupcakes
Four Years Ago: Summer Sqaush


Marbled Chocolate Chip Bundt
Perfectly moist and chocolatey, this cake is great for breakfast, an afternoon snack, or dessert.
Yield: 12 servings
Ingredients:
For the Chocolate Syrup
1/2 cup sugar
1/4 cup light corn syrup
1/2 cup hot water
1/2 cup unsweetened cocoa powder
1/2 tsp vanilla
For the Cake Batter
2 2/3 cups flour
2 tsp baking powder
1/2 tsp salt
1 cup (2 sticks) unsalted butter, at room temp
2 cups sugar
4 eggs, at room temp
2 tsp vanilla
1 cup chocolate chips
1 cup milk, at room temp
Directions:
For the Chocolate Syrup
Whisk together 1/2 cup of the sugar, corn syrup, the hot water, and the cocoa powder in a small saucepan. Stirring occasionally, bring the mixture just to a simmer.
Remove the pan from the heat, whisk in 1/2 teaspoon of vanilla, and set aside to cool.
For the Cake Batter
Making sure the rack is in the lower third of the oven, preheat the oven to 350 F. Butter and lightly flour a 12-cup bundt pan and set aside.
In a medium mixing bowl, whisk together the salt, flour, and baking powder.
In the bowl of a stand mixer (or using a hand mixer) cream the butter and sugar until pale and fluffy (approximately two minutes).
Beat in the eggs, one at a time. Scrape down the bottom and sides of the bowl and beat in the vanilla.
With the mixer speed reduced to low, beat in a third of the flour mixture just until the flour begins to disappear into the batter. Add the milk and the rest of the flour mixture, alternating additions. Beat just until the batter is smooth, making sure not to over-process the batter. Gently fold the chocolate chips into the batter.
In a mixing bowl, divide out a third of the batter and whisk with the chocolate syrup. Set the chocolate batter aside. Pour a third of the vanilla-chocolate chip batter into the prepared bundt pan and smooth the top with a spatula.
Top the layer with the chocolate syrup batter, smoothing again with a spatula. Repeat the process with the remaining third of the batter. Using a knife or wooden skewer, lightly swirl the batters using a continuous figure 8 motion until there is a marble effect.
Bake approximately 60-70 minutes, or until a toothpick inserted into the cake comes out clean and the cake springs back when lightly touched. Cool the cake completely on a wire rack. it is important that the cake is completely cool or there may be cosmetic damage when it is inverted. Invert the cake onto a serving platter and serve.
Recipe from Burning Down the House, originally adapted from Buttercake Bakery and the Los Angeles Times

 I am Jen the Beantown Baker. Engineer by day and baking maven by night. Hubby serves as my #1 fan and official taste tester. We got hitched back in 2006. Barefoot. In the sand. With the waves crashing behind us. It was one of the best decisions we’ve ever made.


These are amazing!!! Have become a huge hit amongst coworkers & friends :).
Loving your Oreo cookie round-up! They’re my fav :).
what do you put on top??
Oh yum! These sound amazing!!!
I didn’t put anything on top… I put large chunks of Oreos in the batter.