


Amped Up Rice Krispies Treats
You know how certain foods can just take you back. Whether it’s to a time or place, sometimes even the scent of a food can really trigger a memory. One random memory I have is eating applesauce to the tune of Jeopardy. Every time I see a jar of applesauce, that song just runs through my head. I think it’s because Jeopardy was on around dinner time growing up. And I hated applesauce. Blech. But my sister Brooke loved it. She ate it by itself, one her hamburgers, on her spaghetti. She’s weird.

Anyways, the whole reason for my tangent was thinking how Rice Krispies treats take us all back to our childhood. But these Amped Up Rice Krispies Treats, a family recipe from my friend Cara, really kick things up a notch by adding a variety of flavors all into one bite. I threw some cinnamon chips into the mix because I had some on hand. I loved the combination of butterscotch, cinnamon, and chocolate.

Two Years Ago: Butternut Squash and Spinach Casserole
Four Years Ago: White Chocolate Mocha Cupcakes – take two
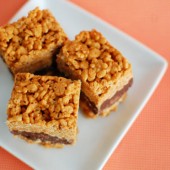


Amped Up Rice Krispies Treats
Ingredients:
2 cups (1 12oz bag) butterscotch chips
1 cup cinnamon chips
1 1/2 cups creamy peanut butter
12 cups (1 12oz box) crisp rice cereal
4 cups semi-sweet chocolate chips
1/2 cup butter, cubed
2 cups powdered sugar
4 Tbsp water
Directions:
Line the bottom of a 9×13 pan with parchment paper and spray the sides of the pan with nonstick cooking spray.
In a large saucepan over medium-low heat, melt the butterscotch chips, cinnamon chips, and peanut butter, stirring. When smooth, remove from heat and add the crisp rice cereal. Stir to coat. Place half of the cereal mixture into the pan and pat down evenly. Place in the refrigerator to let it firm up a bit while preparing the chocolate.
Place the chocolate chips and butter in a microwave safe bowl. Melt together in the microwave over medium-low heat, stirring every 60-90 seconds, until smooth. Mix in the powdered sugar and water.
Spread the chocolate evenly over the cereal layer in the pan, then gently pat the remaining cereal mixture evenly on top. Refrigerate for at least two hours, then cut into squares with a sharp knife.
Recipe from Cara's Cravings


 I am Jen the Beantown Baker. Engineer by day and baking maven by night. Hubby serves as my #1 fan and official taste tester. We got hitched back in 2006. Barefoot. In the sand. With the waves crashing behind us. It was one of the best decisions we’ve ever made.


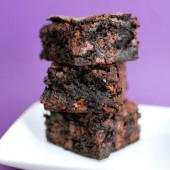
This is my go-to brownie recipe also. I made them for Christmas this year and people said they were the best brownies they’d ever had. They really are as good as advertised!
Yum ! Love the pictures. This recipe reminds me of our trip to vermont last fall.
I’m always more likely to opt for a tangy, fruity dessert over a chocolatey one, but I love brownies as a midday snack 🙂 These look sooo good!
What kind of cocoa powder?
beantownbaker — March 3rd, 2013 @ 11:13 am
Any kind will work. I like to use Ghirardelli or Scharffen Berger
My absolute favourite brownie recipe – easy to make, absolutely delicious and always go down a storm.
I like to freeze mine in smaller batches for weekend treats 🙂
beantownbaker — December 26th, 2013 @ 10:58 am
I do the same thing! I always double the recipe and throw the extras in the freezer. Nothing beats a tiny bite of frozen brownie goodness!