


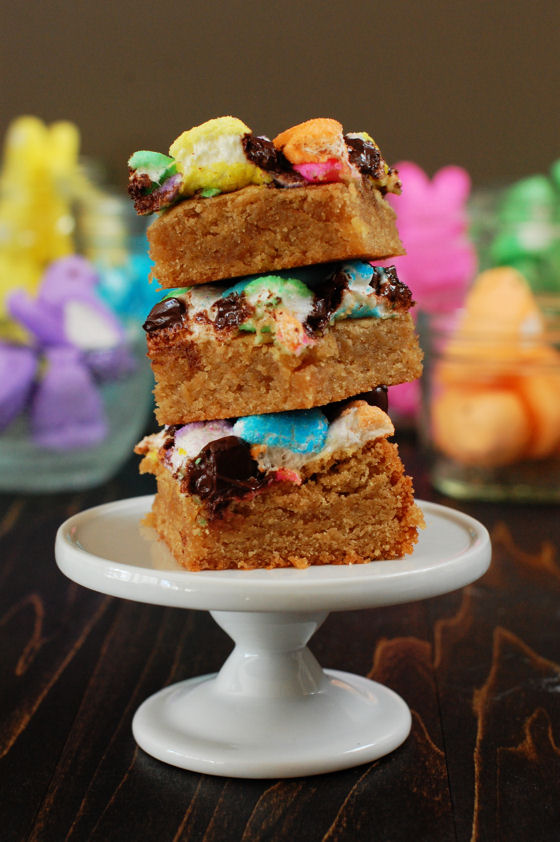
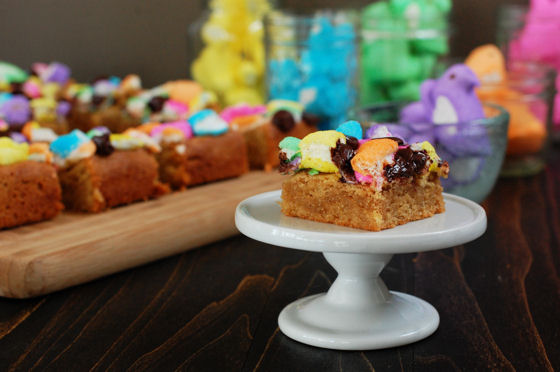
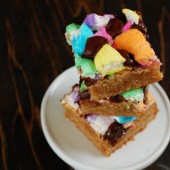
PEEPs Fluffernutter Blondies
Blondies made with PEEPs®, chocolate and peanut butter turn a childhood favorite sandwich into a portable dessert, perfect for any holiday!
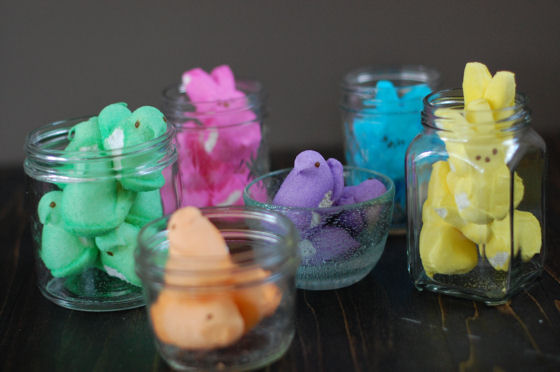
Easter is just around the corner which means one thing for me – PEEPS®!!! How do you like your PEEPS®? I like to let them get a little stale before enjoying them. I open the packaging and let the PEEPs sit around for a few days, which is torture, but always worth the wait. I also like the chicks more than the bunnies. No idea why, I just do (sorry bunnies).
So this year, when the guys at PEEPs & Company asked if I’d like some samples to play with in the kitchen, I was more than excited. I started brainstorming ideas of what I could create from these colorful candies and my mind instantly went to a fluffernutter sandwich.

I had my first fluffernutter a few years ago with a friend in Boston. Since I grew up in the Midwest, I had never heard of a fluffernutter. The combination of smooth salty peanut butter and gooey marshmallow cream is just right and it’s no wonder kids go crazy for those sandwiches! Using the fluffernutter as an inspiration, I came up with these PEEPs Fluffernutter Blondies which are made from a peanut butter blondie, topped with chocolate chips and chopped up PEEPs®.
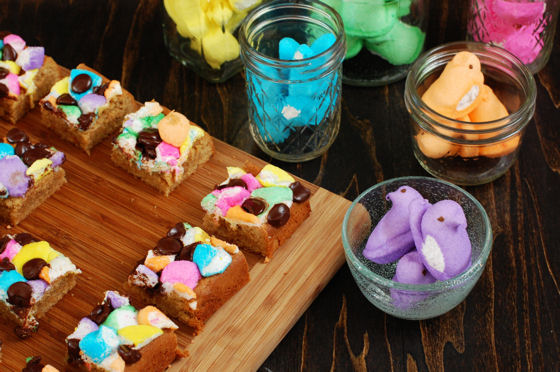
Since PEEPs® have their signature colored sugar coating, I decided to cut out some of the sugar in the blondies. The chocolate is there because, well, chocolate. I posted this pic on Instagram that day since I was having so much fun. The stickiest part of this whole baking adventure was just cutting up the PEEPs®.
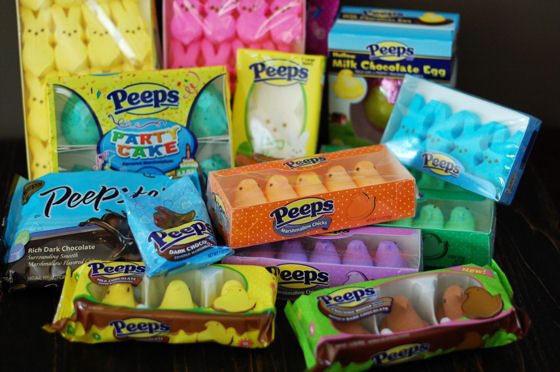
While I had a lot of fun playing in the kitchen with these flavors, I had even more fun exploring the goodies that the PEEPs® team had sent me. After I opened my box of goodies, I instantly recognized the iconic colorful chick and bunny PEEPs® and was intrigued by some new (to me) products as well. There were chocolate dipped PEEPs®, chocolate mousse flavored PEEPs®, large PEEPs® bunnies, Peepsters® and my new favorite – the chocolate covered PEEPs®. It’s a yellow chick PEEP® dipped in dark chocolate.
Be sure to check out www.marshmallowpeeps.com for recipe ideas, products, and the Express your Peepsonality contest!
Disclaimer: The PEEPs were sent to me at no charge. The opinions stated in this post are all mine.
Two Years Ago: Rack of Lamb with Mint Relish and Rustic Walnut Tart
Three Years Ago: French Toast Bread Pudding and Coconut Layer Cake
Four Years Ago: Breakfast Burritos and White Cupcakes
Five Years Ago: Sugar Cookie Bars


PEEPs Fluffernutter Blondies
Blondies made with PEEPs®, chocolate and peanut butter turn a childhood favorite sandwich into a portable dessert, perfect for any holiday!
Yield: 16 bars
Prep Time: 15 minutes
Cook Time: 35 minutes
Total Time: 50 minutes
Ingredients:
1/2 cup peanut butter (not Natural Peanut Butter)
1/3 cup butter, at room temp
1/2 cup sugar
1/2 cup brown sugar
2 eggs, at room temp
1 Tbsp vanilla
1 cup flour
1 tsp baking powder
1/2 tsp salt
10-12 PEEPs
1/3 cup bittersweet chocolate chips
Directions:
Preheat oven to 350 degF. Prepare a 8x8" pan with parchment paper and/or baking spray.
Cream peanut butter and butter in the bowl of a stand mixer until smooth and thoroughly combined. Scrape bowl and beater.
Add the sugars and vanilla. Beat until well mixed. Scrape bowl and beater again.
Add the flour, baking powder, and salt and mix until almost combined. Use a spatula to stir batter until flour is completely mixed in.
Bake for 30 minutes until blondies are almost done. While they are baking, use kitchen shears to cut PEEPs into bite-size piecces. After the 30 minutes are over, sprinkle chopped up PEEPs and chocolate chips on top of blondies. Return to oven and bake for 4-6 minutes, until PEEPs have begun to puff but aren't toasted. Remove from oven and allow to cool completely before cutting.
When ready to cut, warm a large knife in a glass of hot water. Dip and dry with paper towel prior to each cut (the PEEPs will be gooey and sticky!)
Recipe from Beantown Baker


 I am Jen the Beantown Baker. Engineer by day and baking maven by night. Hubby serves as my #1 fan and official taste tester. We got hitched back in 2006. Barefoot. In the sand. With the waves crashing behind us. It was one of the best decisions we’ve ever made.


