


Peppermint Patty Cookies
York peppermint patties are one of my favorite candies. I love the minty-chocolatey goodness that you can get biting into on little patty. I have seen recipes to make them from scratch, but haven’t crossed that bridge yet…

I’m not going to lie, I ate a LOT of cookies while I was at Hershey’s. These were hands down, my favorite of the entire trip. They’re awesome. I knew I had to make them at some point when I got home.
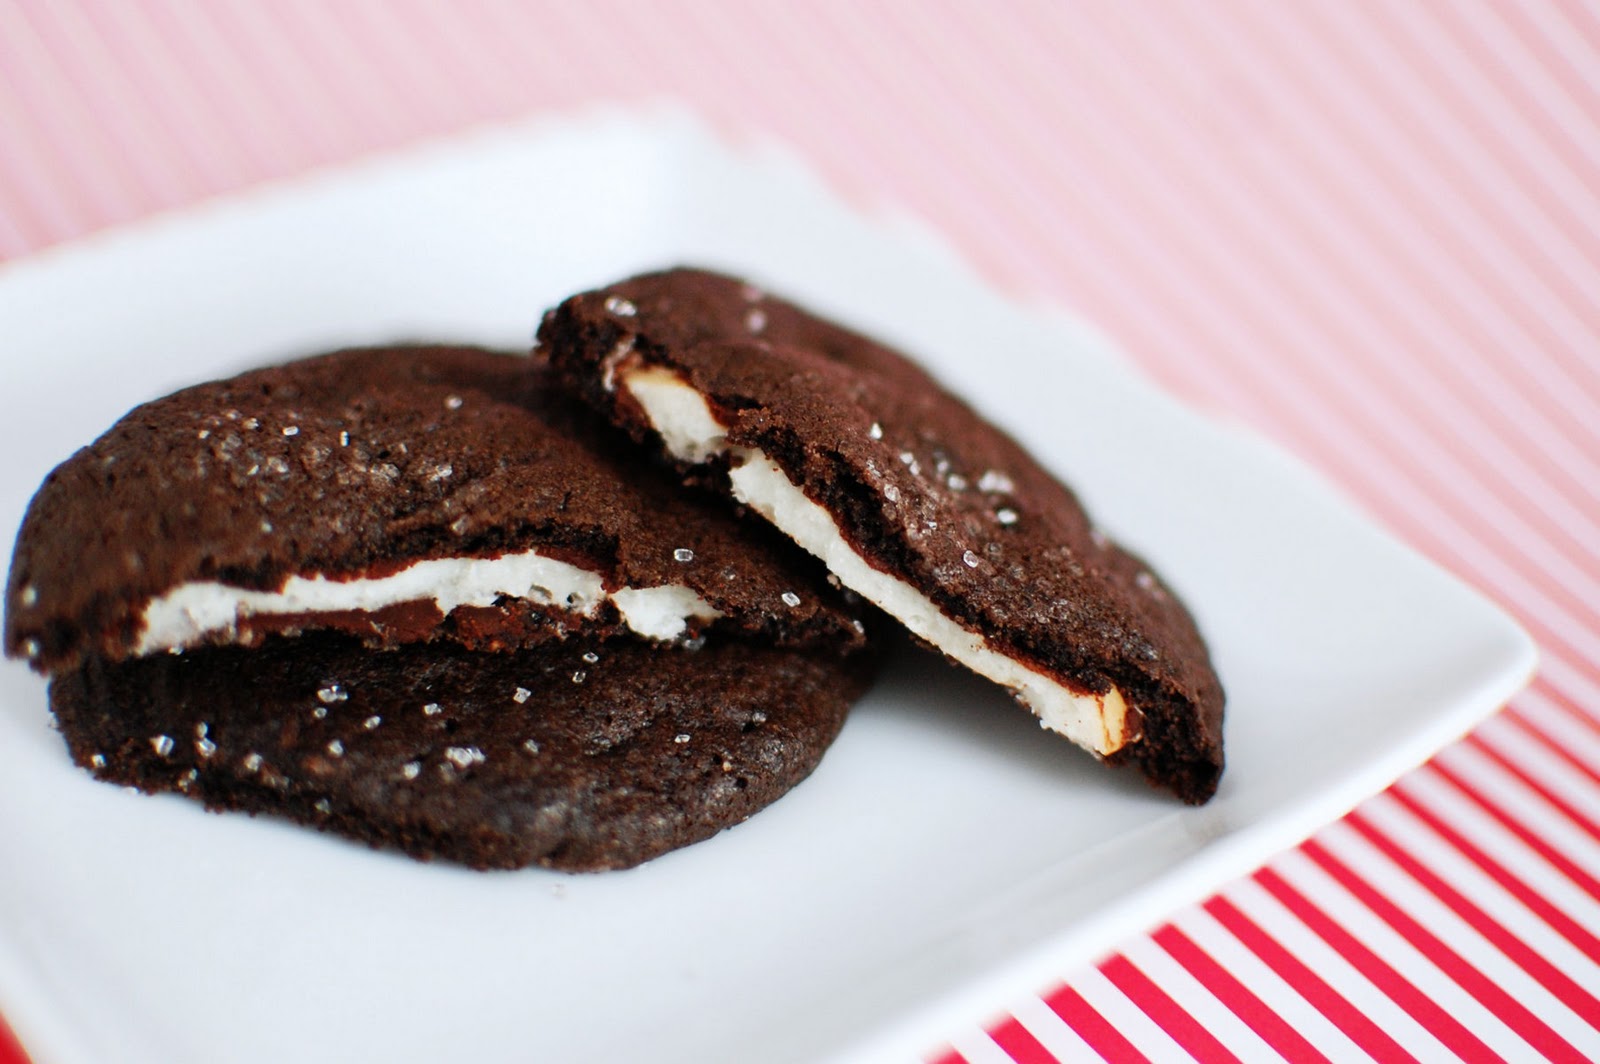
It wasn’t until after the holidays that I had time to make these delicious little cookies. The dough on my cookies seemed a little wetter and thinner than I expected. I’m not sure why that happened. The cookies were delicious even if they were really messy to assemble. I stored these in freezer and hubby and I enjoyed snacking on them straight out of the freezer! It made the smooth peppermint filling even more refreshing.
One Year Ago: Spinach and Artichoke Dip
Two Years Ago: Pork Chops with Blue Cheese Gravy


Peppermint Patty Cookies
Yield: 2 dozen
Ingredients:
2/3 cup butter or margarine, softened
1 cup sugar
1 egg
1 Tbsp milk
1/2 tsp vanilla extract
1-1/2 cups flour
1/3 cup cocoa
1/2 tsp baking soda
1/4 tsp salt
24 to 26 small (1-1/2 inch) York Peppermint Patties
White decorator's sugar
Directions:
Beat butter and sugar in large mixing bowl; add egg, milk and vanilla, blending thoroughly. Stir together flour, cocoa, baking soda and salt. Add to butter mixture, blending well. Refrigerate dough about 1 hour or until firm enough to handle. (Dough will be a little soft.)
Heat oven to 350. Lightly grease cookie sheet or line with parchment paper. Remove wrappers from peppermint patties.
Roll dough into 1-1/4 inch balls. For each cookie flatten ball slightly; press peppermint pattie into dough. Mold dough around pattie so that it is completely covered. Place on prepared cookie sheet. Using knife edge press star design into surface of each cookie; sprinkle with decorator's sugar.
Bake 12 to 14 minutes or until cookie is set; sprinkle with additional sugar, if desired. Cool slightly; remove from cookie sheet to wire rack. Cool completely. About 2 dozen cookies
Recipe from Hershey's


 I am Jen the Beantown Baker. Engineer by day and baking maven by night. Hubby serves as my #1 fan and official taste tester. We got hitched back in 2006. Barefoot. In the sand. With the waves crashing behind us. It was one of the best decisions we’ve ever made.


These are such an elegant treat especially for guests. I like using a cream cheese filling for them!
Yep, that’s how I’ve always seen it, with cream cheese filling. It’s definitely a great way to use up leftover frosting though. I’m sure any cream-cheese based frosting would be delicious.
I love the idea of an inside-out chocolate covered strawberry! I will definitely be trying this!
So pretty. I wonder if nutella would work too.
Michelle
http://oneordinaryday.wordpress.com/
These are so great! I love the idea (and the party theme is inspired). I posted a link for my edible crafts column to your blog at ediblecrafts.craftgossip.com. Hope to bring you a few more clicks! Thanks for sharing, Meaghan
Love it! I’m impressed by those that can keep “leftover” frosting around the kitchen – it’s usually eaten up by my housemates before any can be put away.
This comment has been removed by the author.
hey jen,
i’m thinking of making these for dad’s fourth of july party, along with the strawberry and blueberry cupcakes and of course the layered cookie cake we made last year. i’ll let you know what everyone thinks of them!
-lindsey