


Rustic Walnut Tart with Bourbon Whipped Cream
As silly as this sounds, until I saw my Rack of Lamb menu from the ATK Menu Cookbook, I never thought of making any sort of a nut pie/tart other than pecan. It was a definite A-HA! moment for me when I saw this recipe for the Rustic Walnut Tart with Bourbon Whipped Cream. I’m so glad ATK has this recipe in the cookbook.

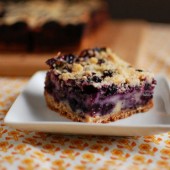
The tart dough is subtly sweet and crispy. The walnuts provide a great texture since they’re a softer nut. And the bourbon whipped cream? I was eating that stuff with a spoon. This would make another great addition to your Easter menu.
One Year Ago: Chocolate Chip Cookie Dough Cupcakes and Pina Colada Cupcakes
Two Years Ago: Lemon Cilantro Potato Salad
Three Years Ago: Black Bean and Butternut Squash Quesadillas and Cinnamon Biscuits
Four Years Ago: Dorie’s Perfect Party Cake
Rustic Walnut Tart with Bourbon Whipped Cream

Ingredients (serves 8)
For the Crust
- 1 cup (5 ounces) fl our
- 1/3 cup packed (2⅓ ounces) brown sugar
- 1/4 cup walnuts, toasted and chopped coarse
- 1 tsp salt
- 1/4 tsp baking powder
- 6 Tbsp unsalted butter, cut into ½ -inch pieces and chilled
For the Filling
- 1/2 cup packed (3½ ounces) brown sugar
- 1/3 cup light corn syrup
- 4 Tbsp unsalted butter, melted and cooled
- 1 Tbsp bourbon or dark rum
- 2 tsp vanilla
- 1/2 tsp salt
- 1 egg
- 1 3/4 cups walnuts (7 ounces), chopped coarse
For the Whipped Cream
- 1 cup heavy cream, chilled
- 1/4 cup bourbon or dark rum (optional)
- 1 Tbsp sugar
- 1/4 tsp vanilla
- Pinch salt
Instructions
For the Crust
Grease 9-inch tart pan with removable bottom. Process flour, sugar, walnuts, salt, and baking powder in food processor until combined, about 5 pulses. Sprinkle butter over top and pulse
until mixture is pale yellow and resembles coarse cornmeal, about 8 pulses.
Sprinkle mixture into prepared pan. Press crumbs firmly into an even layer over pan bottom and up sides using bottom of dry measuring cup. Set tart pan on large plate, cover with plastic wrap, and freeze for at least 30 minutes and up to 1 week.
Adjust oven rack to middle position and heat oven to 350 degrees. Set tart pan on baking sheet. Press double layer aluminum foil into frozen tart shell and over edges of pan and fill with pie weights. Bake until tart shell is golden brown and set, about 30 minutes, rotating sheet halfway through baking. Let tart shell cool slightly while making filling.
For the filling
Whisk sugar, corn syrup, butter, bourbon, vanilla, and salt in large bowl until sugar dissolves. Whisk in egg until combined. Pour filling evenly into tart shell and sprinkle with walnuts. Bake until filling is set and walnuts begin to brown, 30 to 40 minutes, rotating baking sheet halfway through baking. Let tart cool completely, about 2 hours. (Tart can be
refrigerated for up 2 days; bring to room temperature before serving.)
For the whipped cream
Using stand mixer fitted with whisk, whip cream, bourbon, if using, sugar, vanilla, and salt
on medium-low speed until foamy, about 1 minute. Increase speed to high and whip until soft peaks form, 1 to 3 minutes. (Whipped cream can be refrigerated for up to 8 hours; rewhisk briefly before serving.)
To serve, remove outer ring from tart pan, slide thin metal spatula between tart and tart pan bottom, and carefully slide tart onto serving platter or cutting board. Slice tart into pieces and serve with whipped cream.
Recipe from America’s Test Kitchen


 I am Jen the Beantown Baker. Engineer by day and baking maven by night. Hubby serves as my #1 fan and official taste tester. We got hitched back in 2006. Barefoot. In the sand. With the waves crashing behind us. It was one of the best decisions we’ve ever made.


Hi! I know this is kinda off topic however I’d figured I’d ask.
Would you be interested in trading links or maybe guest authoring
a blog article or vice-versa? My site discusses a
lot of the same subjects as yours and I believe we could greatly benefit from each other.
If you are interested feel free to shoot me an email.
I look forward to hearing from you! Wonderful blog by the way!
This is really interesting, You are a very skilled blogger.
I have joined your feed and look forward to seeking more of your
excellent post. Also, I’ve shared your site in my social networks!
Great recipe! Cookies are divine!
These turned out really nice