


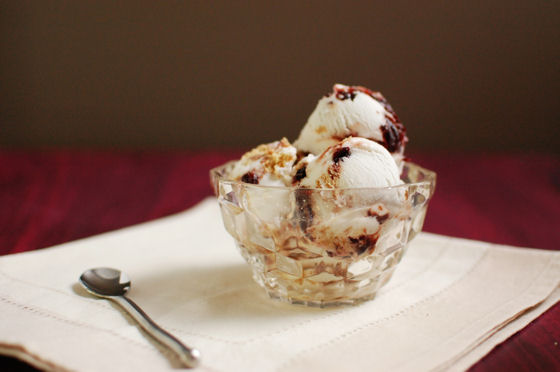
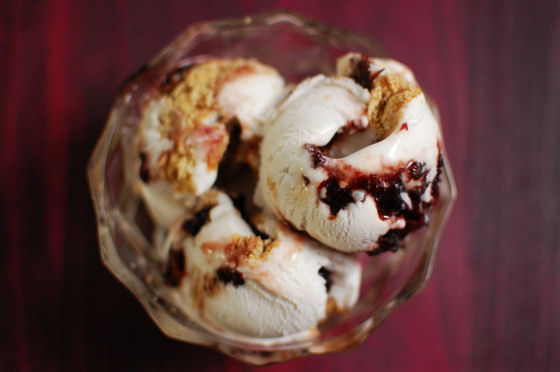
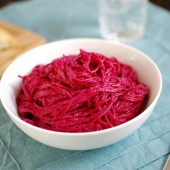
Caramelized Cherry Cheesecake Ice Cream
You guys. This ice cream. I don’t even know where to start.
When I got Jeni’s Splendid Ice Creams at Home, I knew I was going to be making this goat cheese ice cream. Obviously, I’m drawn to all things goat cheese.
After reviewing the recipe in more detail, it sounded a lot like the flavors in a classic cheesecake. So I decided to throw in some graham cracker chunks and increase the amount of roasted cherries.

Now when I set out to roast my cherries, I had a math mixup. I had enough cherries for 1.5x the recipe in the book, but instead of scaling the sugar appropriately, I tripled the amount of sugar. I seriously have no idea how that happened, but it did. In fact, I didn’t figure it out until a couple days later, after the sugary cherries bubbled over in my oven, burning to the bottom, and after I ran the clean cycle on our stove, which makes the house smell oh-so-lovely. As a result, my cherries were more caramelized than roasted and the sauce was extremely thick. I figured that wasn’t necessarily a bad thing and just went with it.
Hubby kept giving my glares when I told him the ice cream was going to be worth the hassle (and the smell). And then he tasted it. And all was forgiven. He officially proclaimed it was the best ice cream I’ve made (I know, he has said that before) and that I should only make this ice cream from now on (although he’d prefer me not to mess up my math and stink up the house). Spoiler alert, I have since made other ice cream recipes, but Hubby hasn’t claimed any of them as his favorite over this one.
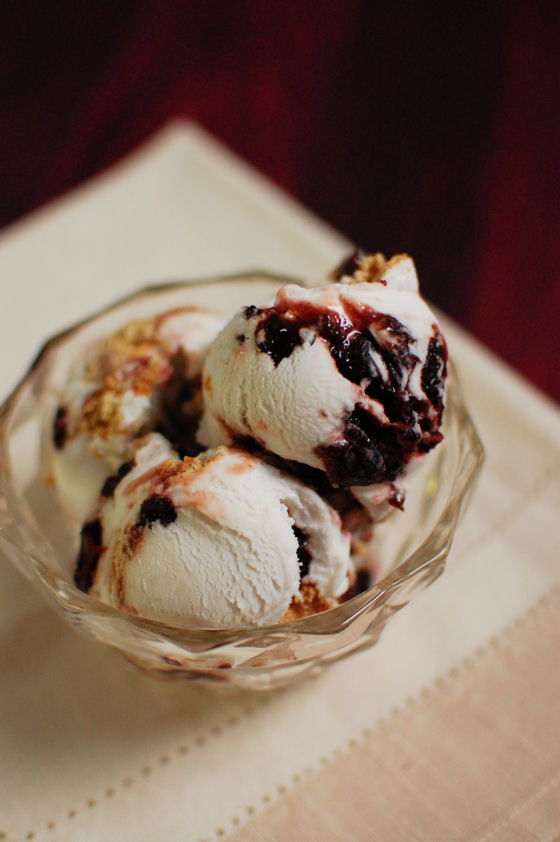
With all that tanginess from the goat cheese, and the familiar graham cracker flavor, it really did taste like a cherry cheesecake in ice cream form. I can’t wait to make this again with other fruit flavors. I’m thinking blueberry or blackberry would be equally amazing.

Two Years Ago: Homemade Mayo and Blueberry Salsa over Grilled Mahi Mahi
Three Years Ago: Burger of the Gods
Four Years Ago: Pink Lemonade Cupcakes and Crockpot Roast Beef


Caramelized Cherry Cheesecake Ice Cream
Yield: ~1 quart
Ingredients:
For the Roasted Cherries
3 cups pitted fresh or frozen (not thawed) red or black cherries
1 cup sugar
1 Tbsp cornstarch
For the Ice Cream
2 cups whole milk (I used coconut milk)
1 Tbsp plus 1 tsp cornstarch
1/2 cup (about 4 ounces) fresh goat cheese
1 1/2 ounces (3 Tbsp) cream cheese, softened
1/4 tsp fine sea salt
1 1/4 cups heavy cream (I used coconut milk)
2/3 cup sugar
1/4 cup light corn syrup
1 cup graham cracker chunks (~6 crackers, crushed)
Directions:
For the Roasted Cherries
Preheat the oven to 400F.
Combine the cherries, sugar, and cornstarch in a 9-inch square baking dish, tossing to mix. Roast for 30 to 45 minutes, until the juices are thickened and bubbly, stirring every 15 minutes. Let cool completely, then chill in the refrigerator.
For the Ice Cream
Mix about 2 tablespoons of the milk with the cornstarch in a small bowl to make a smooth slurry. Whisk the goat cheese, cream cheese, and salt in a medium bowl until smooth. Fill a large bowl with ice and water.
Combine the remaining milk, the cream, sugar, and corn syrup in a 4-quart saucepan, bring to a rolling boil over medium-high heat, and boil for 4 minutes. Remove from the heat, and gradually whisk in the cornstarch slurry. Bring the mixture back to a boil over medium-high heat and cook, stirring with a rubber spatula, until slightly thickened, about 1 minute. Remove from the heat.
Gradually whisk the hot milk mixture into the cream cheese mixture until smooth. Pour mixture into a bowl and refrigerate until completely cool, 4 hours or overnight.
Pour the ice cream base in to your ice cream maker and process according to manufacturer's instructions.
Pack the ice cream into a storage container, layering the ice cream base, graham cracker chunks, and cherries. Do not mix. Press a sheet of parchment directly against the surface, and seal with an airtight lid. Freeze in the coldest part of your freezer until firm, at least 4 hours.
Recipe adapted from Jeni's Splendid Ice Creams at Home


 I am Jen the Beantown Baker. Engineer by day and baking maven by night. Hubby serves as my #1 fan and official taste tester. We got hitched back in 2006. Barefoot. In the sand. With the waves crashing behind us. It was one of the best decisions we’ve ever made.


Oh that looks so yummy for summer! I can’t wait to try it! Thanks for entering 🙂
/Clara
Those look absolutely delicious!!
Looks fabulous with all the color! Thanks for sharing 🙂
Was the consistency like ice cream? It sounds cool and summery. Plus you probably get super brownie points for submitting so early!
YUM this is perfect for the sweltering summer months! i am all about frozen desserts right now!
The texture isn’t quite as creamy as ice cream… It’s more frozen than that(?) They are really good though!
Oh wow! I like these. What a cool idea and they look so good for the hot days of summer. Where do you live? Can I come pick some up? 🙂
Jen, these look yummy!
CONGRATS … You are the Cupcake Hero!!
I know this post is like a year old, but I followed a link from another page and found it. Question – do you have to keep them frozen until serving? We’re going to a pool party, so they might be outside for a while. Will they melt?
If I remember correctly, they will melt. They might be fine for a little while, but not all afternoon. Sorry I can’t be more help!