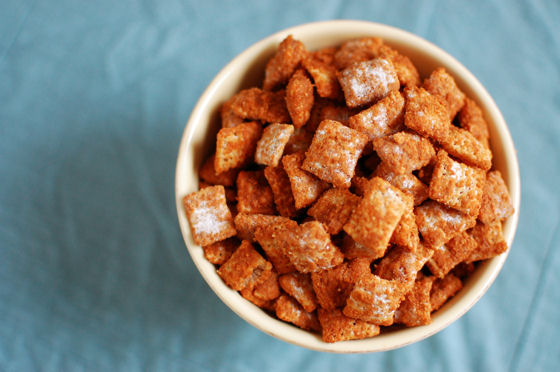
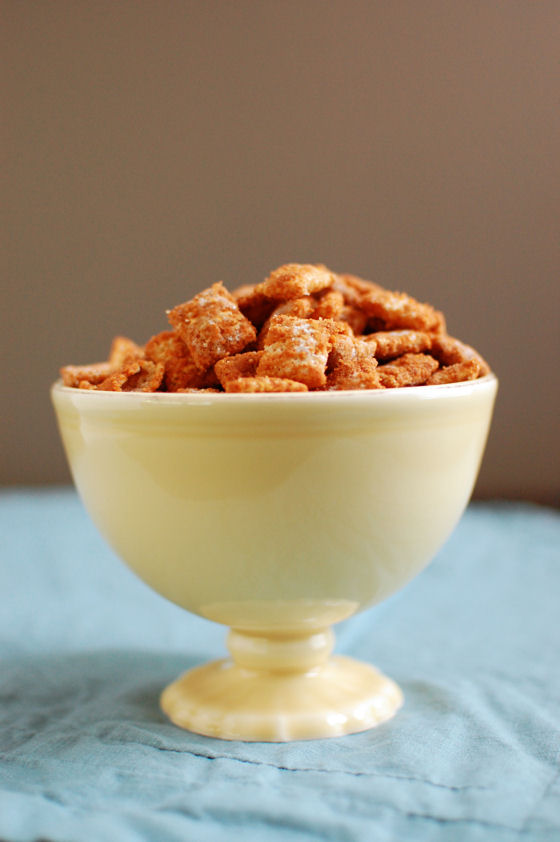
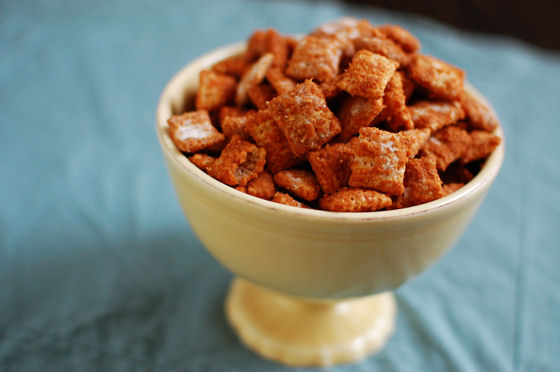
Cinnamon Puppy Chow

Last weekend, my sisters and mom came to visit me in Cincinnati. It was time once again for our annual girls weekend. The weekend was filled with some fun touristy activities, movies on the couch, and just lots of catching up. It also included some great food.

Cinnamon Puppy Chow

Since I was hosting, I got to go all out and show off my grilling skills (Hubby disappeared for the weekend to give us the full girls weekend experience). I also whipped up some ice cream, some sorbet, and some snacks. My family is a big snacking family and Puppy Chow is one of our all time favorites.

Cinnamon Puppy Chow

In fact, one of the first holidays I spent with Hubby, I whipped up a batch of Puppy Chow for his family. They had never heard of it, but devoured it just the same. This Cinnamon Puppy Chow is absolutely addictive. As a clan, we demolished the first batch on Thursday night. So we whipped up another batch on Saturday night for the second round of chick flicks.

Cinnamon Puppy Chow

Whether it’s for girls weekend, hanging with the kids, or just for yourself, you want to make this Cinnamon Puppy Chow.

One Year Ago: Roasted Cherry Brownie Cheesecake
Three Years Ago: Blueberry Almond Cake with Lemon Drizzle
Four Years Ago: Chocolate Peanut Butter Cupcakes
Five Years Ago: Rum Punch Cupcakes

Print Save

Cinnamon Puppy Chow

If you like Puppy Chow, you're going to love this cinnamon version. It's down-right addictive!

Yield: 4 cups

Ingredients:

4 cups Chex cereal
2/3 cup cinnamon chips
4 Tbsp butter
1/4 cup powdered sugar
2 Tbsp sugar
3/4 tsp cinnamon

Directions:

Pour the Chex cereal into a medium bowl.

Melt the cinnamon chips and butter in a microwave save bowl. Microwave for 30 seconds and stir. Heat for another 15 seconds and stir until completely smooth.

Pour cinnamon chip mixture over Chex cereal. Stir to coat cereal completely. I found that using my hands to gently toss with cereal was the best way to completely coat the cereal.

Mix the powdered sugar, sugar, and cinnamon in a gallon sized Ziplock bag. Add cinnamon coated Chex and toss.

Recipe from Fabtastic Eats

    Pin It

18 Responses to “Shipping Cupcakes in a Jar”

  1. #
    1
    CB — November 9, 2008 at 4:22 pm

    I love it! Where did you get the jars? Now I totally wanna do this for xmas gifts!
    /Clara

  2. #
    2
    Jen — November 9, 2008 at 4:23 pm

    I looked everywhere and just couldn’t find them. I ended up ordering them from Amazon. They weren’t very cheap so that was a bummer…

  3. #
    3
    CB — November 9, 2008 at 4:35 pm

    Ah bummer. What size are the jars? I wonder if Ikea would have them? Whats the amazon link?
    /Clara

  4. #
    4
    Jen — November 9, 2008 at 4:42 pm

    I ordered them from here. You want the wide mouth jars so the cupcakes fit and the 1/2 pint size is perfect.

    The yellow cupcakes didn’t rise much so I added more frosting to fill the jar and the chocolate ones rose quite a bit so they had less frosting. My sister said that the chocolate one had the perfect amount of frosting or could use a smidge more, so you want a cupcake that has at least a small dome.

  5. #
    5
    ttfn300 — November 9, 2008 at 7:29 pm

    haha, i’ve never seen that before 🙂 love it!

  6. #
    6
    Katie — November 10, 2008 at 1:14 pm

    OH FUN! I’ve seriously always thought about doing this and never did. I’m starring this post to remind myself at Christmas. Too cute!!

  7. #
    7
    Janna — November 11, 2008 at 2:46 pm

    I have been dying to try this ever since I saw it last year on someone else’s blog. They actually baked the cake in the jar and then iced it like a cupcake. I am going to have to order some of those iddy jars! Too cute!

  8. #
    8
    Beth — November 16, 2008 at 4:25 pm

    Hmmm…might have to do this for Christmas instead of those “ingredients in a jar” thing we were thinking of.

  9. #
    9
    Renée — March 12, 2009 at 3:24 pm

    I really want to try this, but I keep reading online that you shouldn’t put frosting in the jar because it will get moldy by the time it reaches its destination. I’m sure you would have heard if it was moldy when it got to your friend right? I would just be so embarrassed if that happened. Any help?

  10. #
    10
    Jen — March 12, 2009 at 3:30 pm

    Renee – I’ve done this twice and both times haven’t heard of any mold. I froze the cupcakes/frosting in the jars prior to shipping them. I also shipped in the winter. My one sister even didn’t go get her package from the office until a week after it arrived and it was still good. I would guess she ate her cupcakes about 10 days after I sent them. I’m not sure if shipping in warm weather will have an impact on potential mold…

  11. #
    11
    Renée — March 12, 2009 at 3:33 pm

    Alright I’ll definitely give it a try then. It will make for a very good Easter present for my faraway friends =)

  12. #
    12
    Jen — March 12, 2009 at 3:35 pm

    Oh that’s a good idea!! I might have to order some more jars and do the same myself…

  13. #
    13
    Hillary — June 5, 2009 at 3:25 pm

    What a clever idea! I would love to get a cupcake in the mail! 🙂 Maybe I’ll send out Valentine’s Day Cupcakesnext year!

  14. #
    14
    CuteCupcakesAllTheTime — May 6, 2010 at 5:39 pm

    This comment has been removed by the author.

  15. #
    15
    CuteCupcakesAllTheTime — May 6, 2010 at 5:40 pm

    Love these!! We have featured you on our blog. http://cutecupcakesallthetime.blogspot.com

  16. #
    16
    Pat — February 16, 2013 at 11:19 am

    Did you freeze them before shipping? The jars looked frosted…

    • beantownbaker — February 24th, 2013 @ 10:21 am

      I did freeze them. They defrosted as they were shipped. I’ve done it with and without the freezing depending on the weather and whatnot.

  17. #
    17
    PinkSuga — October 27, 2014 at 7:38 pm

    What shipping method did you use? Overnight or Express???

Leave a Comment