


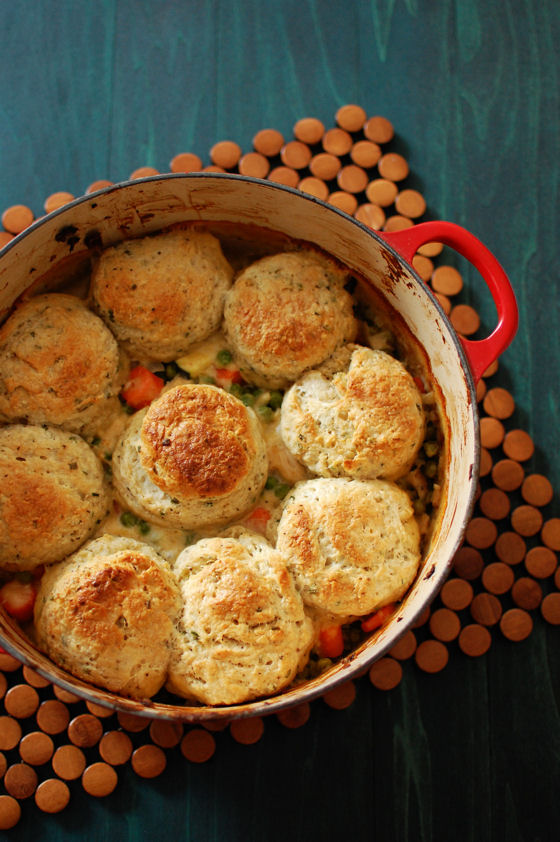
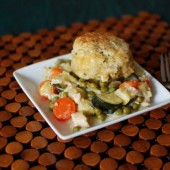
Chicken Pot Pie with Cream Cheese and Chive Biscuits
A couple weeks ago I came down with a nasty respiratory infection. It totally kicked my butt and all I ate for about a week was soup. Once I started feeling better, I was getting sick of soup, but still craving comfort food. I decided to whip up this chicken pot pie on a Sunday afternoon.
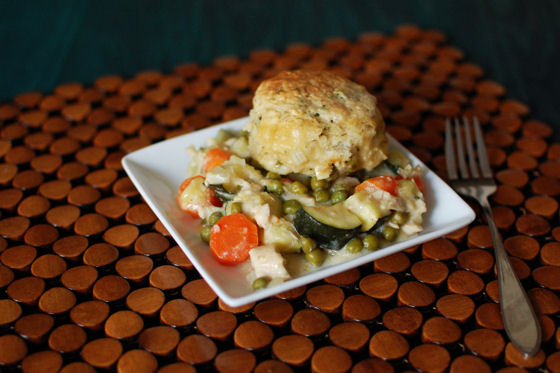
I made quite a few changes to the original recipe. Hubby and I follow the general rule that your plate should be half filled with vegetables before you put anything else on it when we’re eating at home. A lot of one-pot meals are lacking in the vegetable department if you ask me. As with many other recipes, I bumped up the amount of vegetables in this recipe. A lot.
Other than just wanting more veggies on our plates, I also hate when I buy veggies and a recipe only calls for 1 cup or 1 carrot or something. Instead of risking the produce going bad, I just throw the additional veggies in. It hasn’t ruined a recipe yet, and I doubt it ever will. This recipe definitely wasn’t ruined by being stuffed to the gills with vegetables.
In fact, I would almost call this vegetable pot pie with chicken since there are so many vegetables in it. Obviously, you can tailor this recipe to fit your tastes and cut out some of these veggies if you’d like, but I’m glad I went as veggie-heavy as I did.
Another added benefit of bumping the veggies is that it yielded more servings. Yay for more leftovers to enjoy! You might notice that I only got 9 biscuits out of the recipe instead of 12. Not sure why that is. I used the top of a glass to cut my biscuits, and it was bigger than 1.5″, which would be a tiny biscuit in my mind… My biscuits were more like 2.5″ across, hence having 9 instead of 12.
The last thing I changed was the flavor of the sauce. I added just a pinch of smoked paprika. Mostly because I love that stuff and can’t get enough of it, but also because as I was seasoning the sauce, I felt that it needed something else. Nutmeg and paprika play nicely together and I’m glad I made the addition.
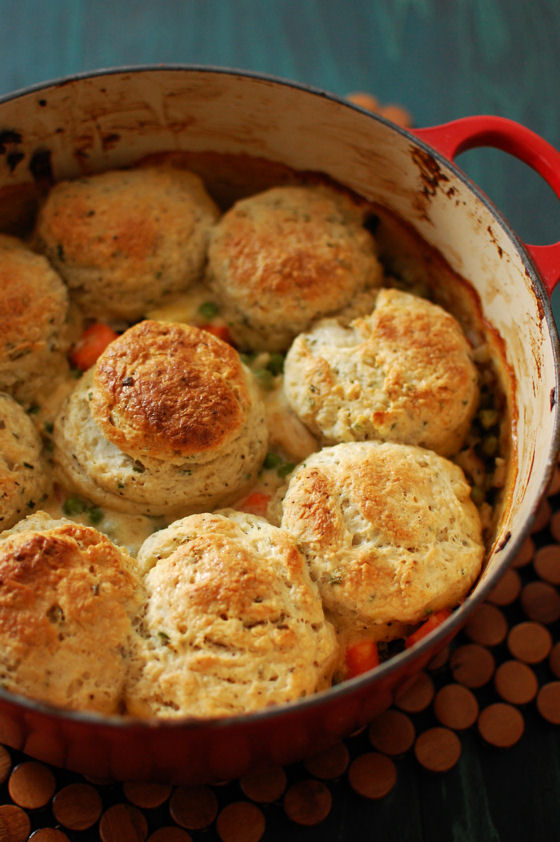
Even after all of the modifications I made, this recipe was still a winner (or maybe it’s because of the modifications I made – you pick). It reheated nicely in the oven (or toaster oven at work) and fed us for a few days. I think this would be a perfect meal to serve for Easter brunch. I would even make it a day in advance, then just reheat it that day. Then you don’t have to be fussing in the kitchen when you have guests over.
One Year Ago: Breakfast Casserole
Two Years Ago: French Macarons – Hazelnut with Chocolate Ganache and Margarita CupcakesThree Years Ago: Chocolate Almost Candy Bars
Three Years Ago: Mocha Brownies
Four Years Ago: March Madness Crinkle Sugar Cookies


Chicken Pot Pie with Cream Cheese and Chive Biscuits
Yield: Serves 8-10
Ingredients:
For the Biscuits
2 1/2 cups flour
1 Tbsp baking powder
1/4 tsp baking soda
1 tsp salt
1 tsp sugar
1/2 to 1 tsp coarsely ground black pepper (depending on how spicy you like your biscuits)
1/4 cup chopped fresh chives
1/4 cup (2 ounces) unsalted butter, cold and cut into cubes
4 ounces (half of a brick) cream cheese, cold
3/4 cup buttermilk, cold
For the Filling
1 small onion, diced
6 garlic cloves, minced
2 cups thinly diced carrots (1 lb)
4 cups diced zucchini (optional)
2 1/2 cups frozen peas (one 14.4 oz bag), thawed
4 Tbsp unsalted butter
1/2 cup flour
2 cups chicken broth
1 1/2 cups whole milk
4 ounces (half of a brick) cream cheese
salt and pepper to taste
1 Tbsp fresh lemon juice
1/8 tsp freshly ground nutmeg
1/4 tsp smoked paprika (optional)
3 cups shredded chicken
2 Tbsp butter or olive oil
Directions:
For the Biscuits
In a medium bowl, whisk together flour, baking powder, baking soda, salt, sugar, black pepper, and chopped chives.
Add butter and cream cheese to the dry ingredients. Use your fingers to quickly incorporate the fat into the flour. Break up the butter and cream cheese with your fingers until some of the fat is the size of oat flakes and some of the fat is the size of small pebbles.
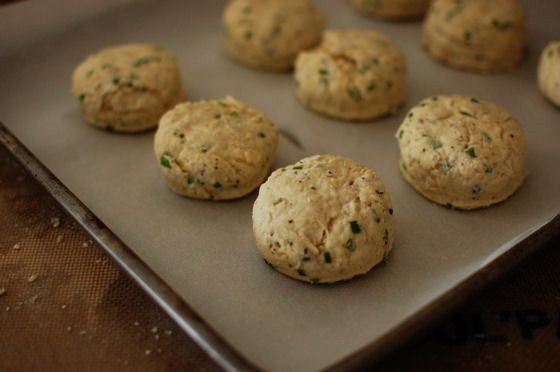
Make a small well in the center of the fat and flour mixture. Add the buttermilk. Using a fork, combine the wet and dry ingredients. Try to moisten all of the flour bits with the liquid. Dump the shaggy biscuit dough onto a lightly floured work surface. Knead together until dough forms a disk about 1 1/2 inches thick.
Use a round, 1 1/2-inch biscuit cutter to cut biscuits. Gather the dough scraps, knead for a few turns, and cut out more biscuits until no dough remains. Place biscuits on a small cookie sheet and place in the fridge until ready to bake.
For the Filling
Place a rack in the center of the oven and preheat oven to 375 degrees F.
Dice onion, garlic, carrots, zucchini, and thaw the frozen peas. Set aside.
In a medium saucepan over medium heat, melt butter. Whisk in the flour. Mixture will be very thick. Heat for 1 minute. Turn flame to low and add the chicken stock. Whisk until no flour bits remain. Whisk in the milk and add the cream cheese. Heat over medium low heat, stirring often, untilcream cheese has melted and the mixture is the consistency of warm, thick pudding. Add chicken, lemon, and nutmeg. Stir. Add salt and pepper to taste. Remove mixture from heat and set aside.
In a dutch oven over medium heat, melt butter (or olive oil, if using). Add onions and saute until translucent, about 3 minutes. Add minced garlic and saute for one minute more. Add carrots, zucchini, and peas. Cook for about 5 minutes. The vegetables will not be entirely cooked through. Remove from heat and add the creamy chicken mixture to the dutch oven. Stir to combine.
Remove the biscuits from the fridge and place them on top of the filling. Brush the tops of the biscuits with heavy cream, buttermilk, or egg wash.
Bake for 25-30 minutes, or until biscuits are puffed and golden, and the sides of the pot pie are bubbling. Remove from the oven and allow to cool slightly before serving.
To reheat, preheat the oven to 300 degrees F. Cover dish with foil and bake until warmed through, about 15 minutes. Serve.
Chicken Pot Pie will last, well wrapped in the refrigerator, for up to 4 days.
Recipe from inspired by cookingforengineers and kingarthurflour, as seen on Joy the Baker


 I am Jen the Beantown Baker. Engineer by day and baking maven by night. Hubby serves as my #1 fan and official taste tester. We got hitched back in 2006. Barefoot. In the sand. With the waves crashing behind us. It was one of the best decisions we’ve ever made.


