


How to Peel a Peach
You know how some cooking steps just aren’t worth the hassle? Like sifting dry ingredients. In most recipes, you can just run a whisk or a fork through them and call it a day. Others, are definitely worth the extra time and effort. Seeding tomatoes for salsa is must in my book. Then there are others that are just so darn simple, there’s no reason not to do them.
Peeling peaches falls into the last category. Sometimes it’s intimidating to see that you need to do an extra step, especially if you’ve never done it before. But I’m here to show you how simple it is to peel a peach.

First, get everything ready to go. You’re going to need a bowl with some ice water, a pot of boiling water, some fresh peaches, a paring knife, and a slotted spoon.

Set the water to boil. While it is heating up, cut an “X” into the bottom of each peach with your paring knife.

Once the water is boiling, drop the peaches into the boiling water. Make sure the peaches are fully submursed in the water. Boil for about 35-45 seconds.

Remove the peaches with a slotted spoon and immediately transfer to the ice bath to prevent cooking the peaches.

Now the skin of the peaches can be peeled off with your hands.

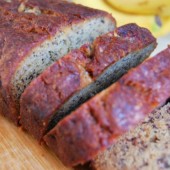
See! Wasn’t that simple? Be sure to come back tomorrow to see what I made with my peeled peaches.

One Year Ago: Massaged Kale Salad, Goat Cheese Cake with Peach and Blueberry Topping
Two Years Ago: Blueberry Peach Muffins
Three Years Ago: Eclairs
Four Years Ago: Cilantro Turkey Burgers & Sauteed Mushrooms

 I am Jen the Beantown Baker. Engineer by day and baking maven by night. Hubby serves as my #1 fan and official taste tester. We got hitched back in 2006. Barefoot. In the sand. With the waves crashing behind us. It was one of the best decisions we’ve ever made.


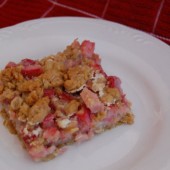
I’ve been anxious to try rhubarb but after many trips to the grocery store missed the season. (it sold out-FAST!) Did you use fresh or frozen rhubarb? I just saw the frozen kind and have been thinking about giving it a try.
~ingrid
Ingrid – I made this when I was home in the Midwest back in June. It seems easier to find out there than in the East Coast where I live. We use fresh and I’ve never used frozen although my dad does freeze his for the rhubarb rolls I made a few weeks ago too. I should have grabbed a ton and froze it myself…
I made these for a 4th of July party. we ran out of fresh and had to use frozen rhubarb, which tasted fine, we couldnt tell the difference (but we also had the fresh mixed in). Although I would suggest cutting the frozen pieces up a bit more- they came out of the bag huge! ~Jen’s older-younger sister
thanks little sis! Were they store bought or did Dad freeze them from fresh?
No kidding – those look like the best dessert ever!! I’m starring and making for sure!
Ya know what- I’ve never made anything with rhubarb! But those sure look yummy so I might have to try it 🙂
These look delicious!
I love rhubarb, what a great new way to use it;)
I really need to try rhubarb. I am afraid I won’t like it, but this looks like a great recipe!
Thank for the info Jen! I just may go ahead and give frozen a try otherwise its wait a year.
~ingrid