


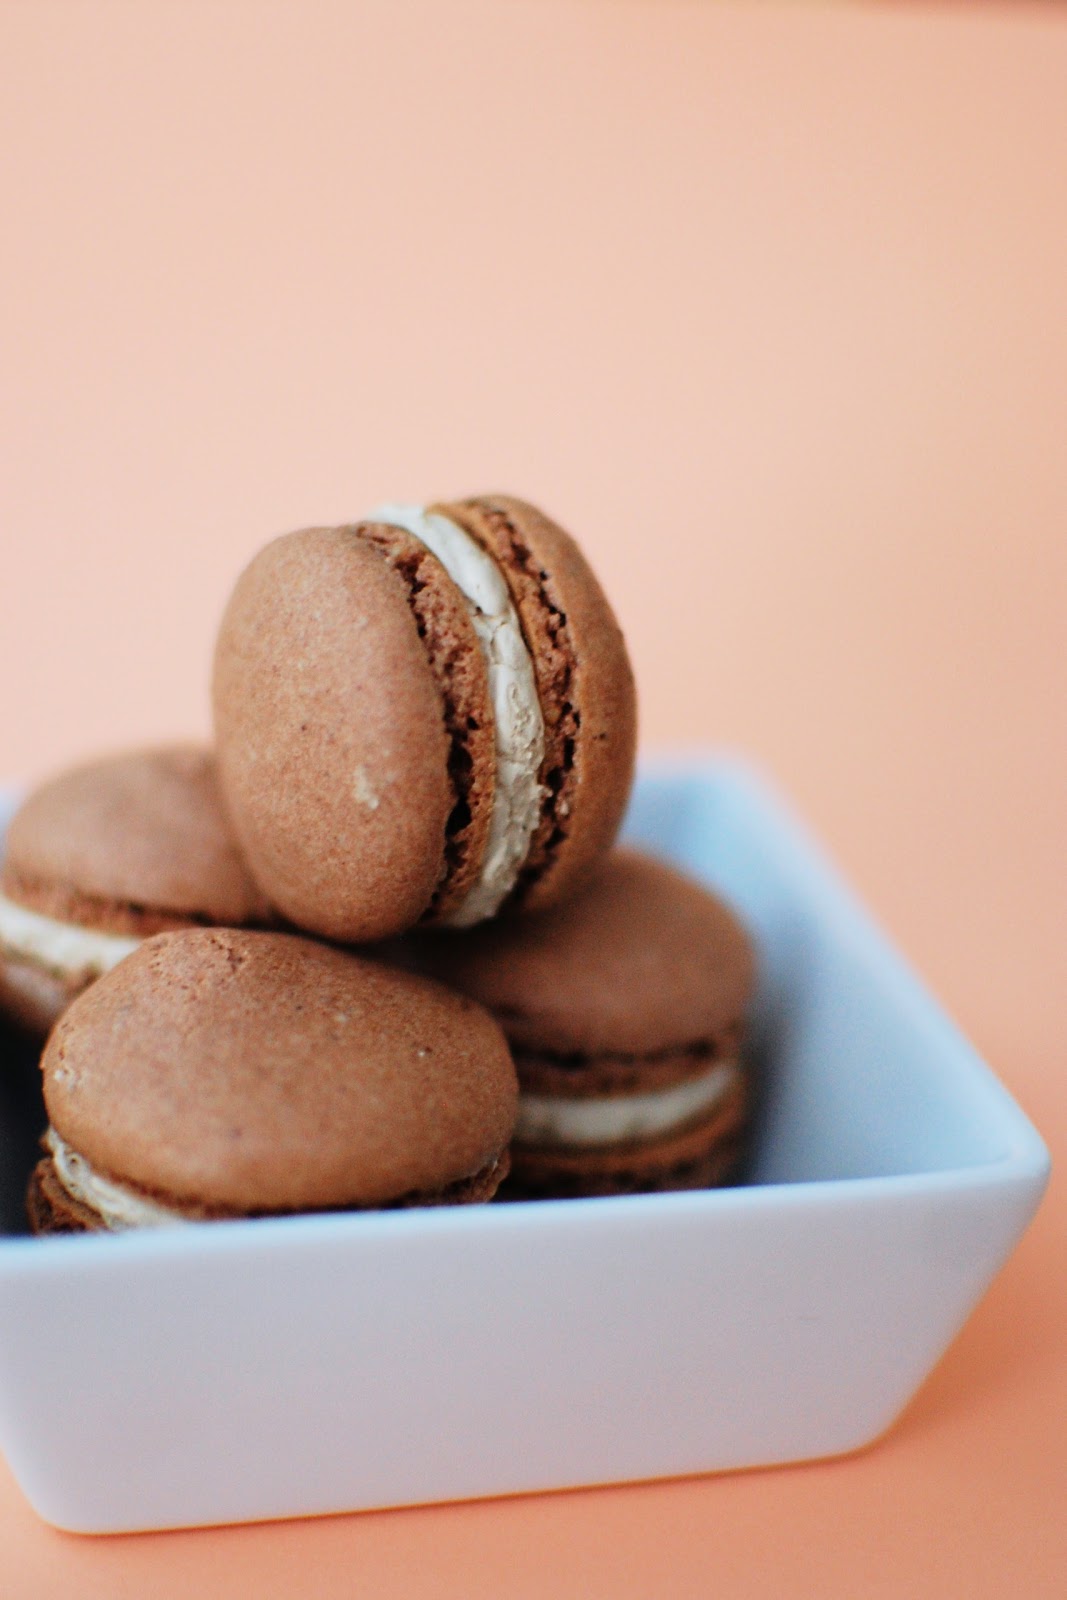
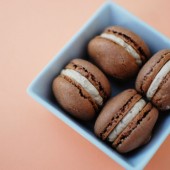
French Macarons – Chocolate with Espresso Buttercream
Oh the French Macaron. Such a cute little cookie that scares the crap out of most bakers… When Megan from Delicious Dishings and I decided to bake together a couple weeks ago, we each chose a recipe that we wanted to try. Megan chose the delicious chocolate hazelnut baklava and I chose French Macarons.
I had read online that macarons aren’t as intimidating as everyone says. And since I’ve been tackling kitchen challenges for a while now, I figured two baking enthusiasts like myself and Megan could handle it. When I told Megan what I wanted to do, she shared that she had tried making them and it hadn’t gone so well. That definitely didn’t instill a lot of confidence, but I stayed optimistic.
Megan just happened to have a recipe from Joanne Chang that is currently featured on the Fine Cooking website. Check out her video – I love hearing the word “macaron” pronounced WAY more correctly than I can do it. We decided to make two batches of macarons so that we could mix up some of the flavor combos. Today, I’m featuring the chocolate macarons with espresso buttercream. Be sure to check back tomorrow to hear about the second batch.

In preparation for our big day of baking, Megan and I did plenty of research on macarons. We read tons of articles online and I have to admit, I started to notice them in quite a few blogs I read. The stars were aligning for us!
Even the day of, after doing all of our research, we still read the recipe a couple times each before making them. We used a timer to time the various steps. I think if you made these on a regular basis, you’d get more of a feel for what to expect, but like I said, we were both nervous about how they’d turn out.

As you can see from the photos, our macarons had feet!! We were both very excited to see them. I’m not going to lie, I actually had never tried a macaron before baking them that day at Megan’s place. And I’m glad we made them because they’re really tasty! They have a crisp outter shell with a softer more delicate texture on the inside. If you are like I was, and think macarons are intimidating, I highly recommend making them!
One Year Ago: Rocky Ledge Bars
Three Years Ago: Lemon and Key Lime Curd


Chocolate Macarons with Espresso Buttercream
Yield: 30
Ingredients:
For the Chocolate Macarons
1 cup (100 grams) almond flour
3 tablespoons cocoa powder
1 1/2 cups (210 grams) confectioners' sugar
4 egg whites (120 grams), at room temperature and at least a day old
4 tablespoons (50 grams) sugar
For the Espresso Buttercream
3 egg whites (90 grams)
¾ cup (150 grams) sugar
12 tablespoons (168 grams, 1 ½ sticks) unsalted butter, at room temperature, cut into 6-8 pieces
1 tablespoon instant espresso powder dissolved in 1 tablespoon water
1/8 teaspoon kosher salt
Directions:
For the Chocolate Macarons
Line a clean, flat cookie sheet with a Silpat, and set it aside.
Preheat oven to 325 degrees and place rack in middle of oven.
Sift together almond flour, cocoa powder, and confectioners' sugar, and set aside.
In a spotlessly clean stand mixer bowl, whip whites on medium speed until they are foamy and you can start to see the tines of the whip leaving a trail in the whites, about 1 to 2 minutes.
Add 1 tablespoon of sugar, and continue to whip for about 30 to 45 seconds. Add another tablespoon of sugar, and whip again for another 30 to 45 seconds. Repeat with the third and fourth tablespoons of sugar.
When all of the sugar is mixed in, whip the whites for about another minute or two until they become glossy and shiny. Remove from mixer.
Fold in about half of the almond flour/confectioners' sugar mix; when most of it is folded in, add the rest of the dry mix. Fold until mixture is smooth and a little stiff -- it should drop smoothly off of the spatula.
Using a piping bag and a small round tip, pipe out small rounds of macaron batter about 1 inch in diameter. Try to pipe straight down and quickly pull away when you are done to minimize peaks. Pipe until you’ve used up all the batter.
Rap the cookie sheet several times to flatten out the mounds and to pop any bubbles that might be in the batter.
Let cookies rest for about 15 to 30 minutes, until they are no longer tacky to the touch.
Place in oven, and immediately turn oven down to 300 degrees. After 8 minutes, rotate the cookie sheet. Depending upon your oven, cookies take from 15 to 20 minutes. Remove from oven, and let cool.
Remove the meringues from the parchment and pair them by size.
For the Espresso Buttercream
In a small metal or other heatproof bowl, whisk together the sugar and egg whites to make a thick slurry.
Place the bowl over (not touching) simmering water in a saucepan and heat, whisking occasionally, for 6 to 8 minutes, or until the mixture is hot to the touch. It will thin out a bit as the sugar melts.
Remove from the heat and scrape the mixture into the bowl of a stand mixer fitted with the whip attachment. Whip on medium-high speed for 6 to 8 minutes, or until the mixture becomes a light, white meringue and is cool to the touch.
Turn down the speed to low and add the chunks of butter one at a time. The mixture will look curdled at first, but don’t worry. Increase the mixer speed to medium and beat for about 3 to 4 minutes until the buttercream is smooth. Add the espresso and salt.
Buttercream may be used immediately or stored in an airtight container in the refrigerator for up to 4 days. Remove from fridge about 3 to 4 hours before using, and using the paddle attachment of the mixer, paddle the buttercream until it becomes smooth enough to use.
Fill the cookies
Using a piping bag with the same tip used to pipe the cookies, pipe 1 to 1-1/2 teaspoons of the filling onto half of the cookies—you want to use just enough filling that it spreads to the edge when topped but doesn’t squish out much when bitten. Top the filled halves with their partners. The cookies are best the day they’re made, but you can store them in an airtight container at room temperature for up to 1 day or in the freezer for up to 2 weeks.
Recipe adapted from Joanne Chang, as seen on Fine Cooking


 I am Jen the Beantown Baker. Engineer by day and baking maven by night. Hubby serves as my #1 fan and official taste tester. We got hitched back in 2006. Barefoot. In the sand. With the waves crashing behind us. It was one of the best decisions we’ve ever made.


I’ll take any leftovers! They sound amazing. I keep saying dessert recipes with bacon and bookmarking them, but I haven’t tried any yet. Adding this one to the list now too. 🙂
These look so terrific. I love the flavor combinations!
I’m intrigued!
interesting! I have a recipe for chocolate bacon fudge or maybe pb bacon fudge but I’m afraid to try it
The frosting sounds amazing. I honestly still can’t bring myself to get behind bacon in desserts. Maybe someday I’ll try a bacon cupcake if I’m given one though. 🙂 I can only resist so long.
YUM! These look so good! I haven’t tried the bacon / sweet combo yet, but I’m sure I would love it!
This looks delicious but I’ve got to ask….what is a pirate party?
Fun and Fearless – It’s exactly like it sounds… Everyone dresses up as a pirate (or something related – Hubby and I went as Treasure maps last year). They even hire this guy who looks like Captain Jack Sparrow to come and there’s a prize for best costume. One of the best parties of the year!
Sounds great! The problem I’ve seen with bacon is that sometimes it is chewy in cupcakes. That’s not good. I like that this recipe says to cook until crispy. Extra crispy for me!
My favorite candy bar is bacon chocolate!!! I can’t wait to try this 🙂
Wow, those look and sound amazing!
oh yum. after putting bacon in last years cookies this might need to be next 🙂
I’m so curious to try bacon in baked goods, but do you think turkey bacon would work?
Corrine – I’m sure turkey bacon would work if you could get it nice and crispy. I’ve heard that if the bacon isn’t super crispy, it has a really weird chewy texture in baked goods.
Thanks Jen! I’m going to give it a try!
This has just about everything that I would want to go together. Awesome recipe!
This is certianly a unqiue mixture of tastes and textures, but it comes together nicely. Definatly a must try!
Chocolate..caramel…bacon…PERFECTION.
I am infatuated with the perfect smoky/salty addition of bacon into sweet baked goods. So delicious. Of course, I’m kind of a fan of adding bacon into just about anything.
Great pics, def wanna try these out!
Sorry the cupcakes didn’t turn out like you wanted. Have you ever tried the bacon/chocolate cupcake at Cherry Bomb Bakery in Brighton? They are fantastic!