


Oreo Cupcakes – Third time is a charm!
First things first. Cupcake Camp Boston is tomorrow night. If you’re in the Boston area, be sure to stop by. We’re expecting about 2000 cupcakes and who knows how many people…

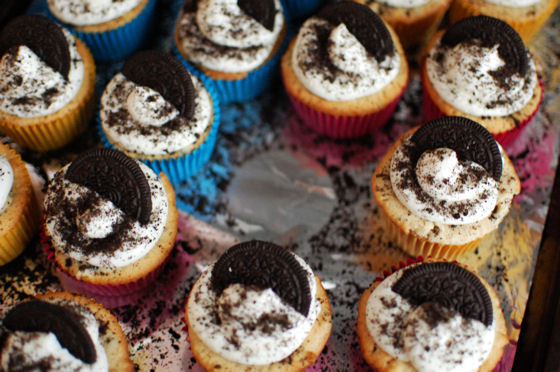
Now on to the cupcakes. This is by far Hubby’s favorite cupcake and my #1 requested cupcake to make. They’re pretty freaking amazing.
You might remember that I’ve actually made Cookies N Cream cupcakes twice before. Both recipes were a bit different but still delicious. I took my favorite parts of each on and combined them into an awesome Oreo Cupcake recipe.
Since developing this recipe last summer, I’ve probably made these five times. I never repeat recipes, so that’s definitely saying something. I just never got around to photographing the cupcakes to post on here. Until this spring. I’m going to be an aunt in a couple weeks and my sister-in-law requested these cupcakes. I happily obliged and made a point to take the pictures.
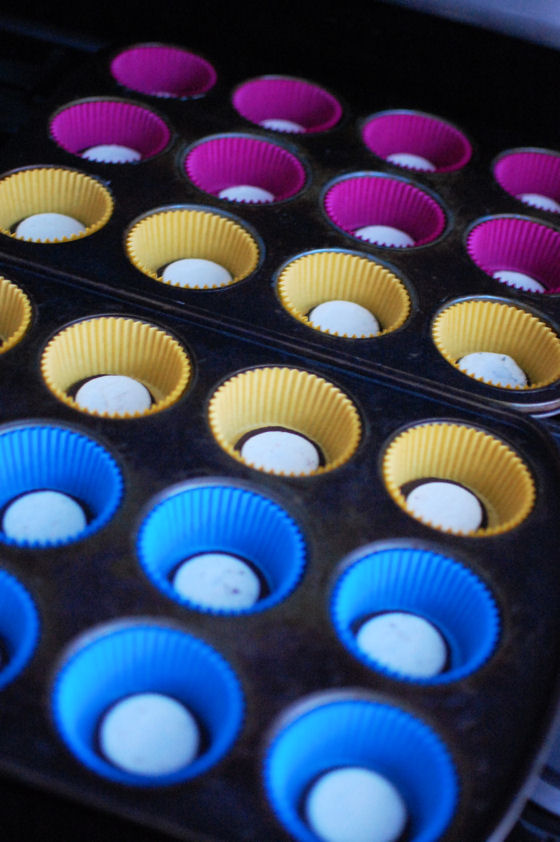
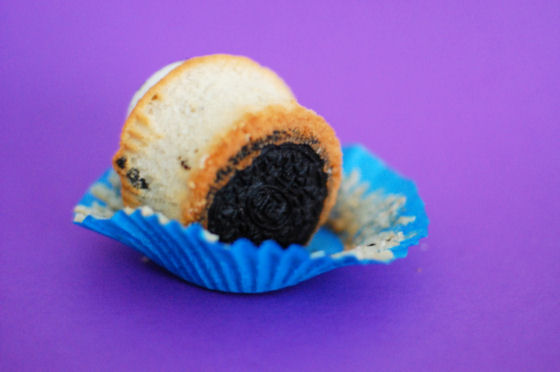
As I mentioned, this recipe combines our favorite aspects of the two recipes tried previously. You start with half of an Oreo at the bottom of the cupcake. I always twist the Oreo gently so that all the cream filling sticks to one cookie so you get that layer of cream in the bottom of your cupcake.
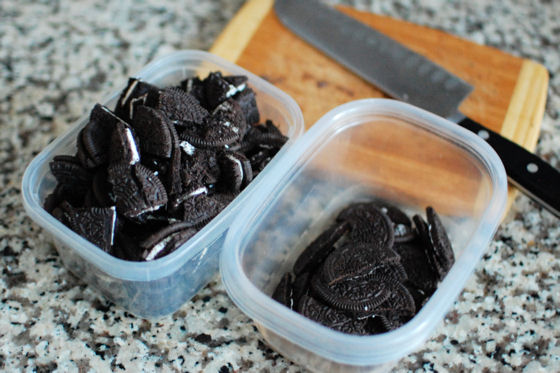
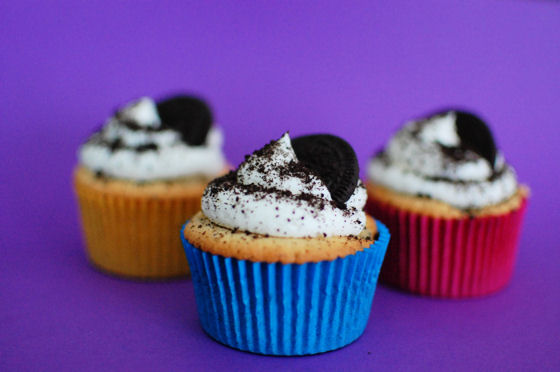
I take the tops of the Oreos that have no cream on them and cut some in half for garnishing. The rest get crushed, also for garnishing.
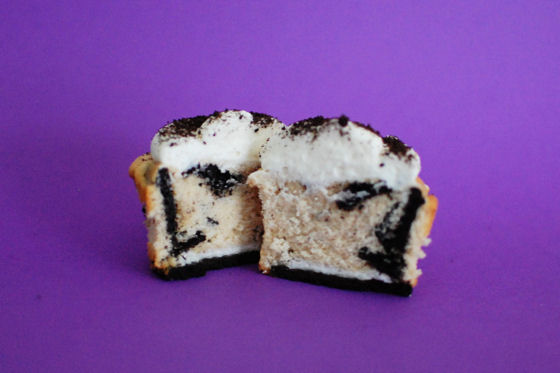
The part I love about the first recipe that I’ve tried is the made from scratch batter. This batter is amazing even before you pour in the Oreo pieces. And while we’re on the topic of those Oreo pieces… I cut mine fairly large. Actually, Hubby likes to do the cutting for me. He stacks them really tall and uses a super sharp knife to cut through the whole stack at once. He cuts them into quarters for me. I toss the quarters Oreos in a bit of flour so they don’t all sink to the bottom. I like having the big chunks as opposed to crushing them. It really enhances the Oreo flavor and adds some texture to the cupcakes.

For the frosting, I have tried out a variety of flavors. The one that I like best is just a simple cream cheese frosting. With the garnish of the crushed Oreo and the half Oreo, you still have plenty of Oreo flavor in every bite


Oreo Cupcakes
These Oreo cupcakes will knock your socks off!
Yield: 24 cupcakes
Ingredients:
1 stick unsalted butter, at room temperature
1 cup milk
2 tsp vanilla extract
2 1/4 cups flour, plus 2 Tbsp for the Oreo chunks
1 tsp baking powder
1/2 tsp salt
1 2/3 cup sugar
3 large egg whites, at room temperature
1 pkg Oreo Cookies (~45 cookies)
double batch of cream cheese frosting
Directions:
For the Cupcakes
Preheat oven to 350F. Insert liners into a medium cupcake pan.
Twist apart 24 Oreos. Place the wafer with filling on it, filling side up, in the bottom of each paper liner. Cut other wafers in half. Save 24 halves to place in the frosting. Crush the other wafer halves, also for garnishing.
Cut the remaining Oreo cookies into quarters with a sharp knife. Toss with 2 Tbsp flour and set aside.
In a large bowl cream the butter until fluffy, about 3-5 minutes. Add the milk and vanilla and mix to combine.
In a separate bowl mix together the flour, baking powder, and salt.
Add the dry ingredients to butter mixture. Mix until integrated. Stir in sugar. With an electric mixer on low speed, beat for 30 seconds. Turn the mixer up to medium speed and beat for 2 minutes. Add the egg whites. Beat for 2 more minutes. Stir in the quartered cookies.
Fill the cupcake lines three-quarters full. Bake for about 20 minutes or until a toothpick inserted in the center of cupcakes comes out clean. Cool cupcakes in the pan.
Assemble the cupcakes
Once cupcakes have cooled completely, frost with cream cheese frosting. Sprinkle with crushed Oreos and place 1/2 of an Oreo on the frosting of each cupcake.
Recipe from Beantown Baker


 I am Jen the Beantown Baker. Engineer by day and baking maven by night. Hubby serves as my #1 fan and official taste tester. We got hitched back in 2006. Barefoot. In the sand. With the waves crashing behind us. It was one of the best decisions we’ve ever made.


I have been looking for a great dip recipe, and this one looks delish! I’m glad you got your brother to share your recipe =)
Spinach and artichoke dip is my very favorite. I don’t make it often, but it’s one of those things my family expects at family events. My goddaughter even made me a special artichoke plate to serve it on!
Lucky you to get to share your brother’s secret recipe. Family recipes are the best.
Love this recipe and the fact that fresh spinach is used and not frozen! I love spinach and artichoke dip, but have always been intimidated to make it…. WHY!?!? It looks so simple. On my to-do list! 🙂
Yum…so trying this one on Sunday!! Thanks!!
One of my all time favorites! Yummy!
Yummy! This dip seems to be a favorite of almost everyone 🙂
Dear bean town baker
I’m afraid this isn’t the best way to cook corned silverside – it’s a very tough cut and needs to be braised in water and vinegar to get it tender. I add a range of aromatics and whole spices to the braising liquid – you can try fennel seeds, mustard seeds, star anise, any pickling spices …. But you are right that traditionally bay, peppercorns, cloves, allspice are the mainstays.
I add celery carrot and whole brown onion. I’ve also tried using ginger ale or coke for the braising liquid as suggested in a few online recipes (American) but I don’t think the expense is justified by the extremely subtle differ action in flavor. This is a dish for when you are low in funds after all.
The cut of silverside you get is also key … my mother would always ask the butcher for a piece of silverside from the H-bone – though todays butchers don’t always know what you are talking about when you ask for this!
Simmer it until the beef floats to the top (timing will depend on the size of the piece of beef but usually 3-5 hours). You pop in the carrots and spuds towards the end, and can also steam sliced cabbage over the pot in a colander which traditionally accompanied the dish. (I retrieve the whole onions from the braising liquid and add these to the cabbage along with butter, seasoning and occasionally a few sultanas). The small spuds, once tender, should be tossed with butter salt and pepper and parsley.
It’s crucial to cut the beef against the grain, and you must keep leftovers in the fridge submerged in the braising liquid or they will dry out.
Traditionally the dish is accompanied by a white sauce made from the braising liquid, cream, Dijon mustard (I also add horseradish) white pepper and (my own addition) a dollop of Mayo along with some parsley. It needs to be quite runny.
I hope this is useful to you. This is the way my family have been preparing corned beef for generations. The leftovers are terrific in sandwiches with mustard pickle and cheese.