


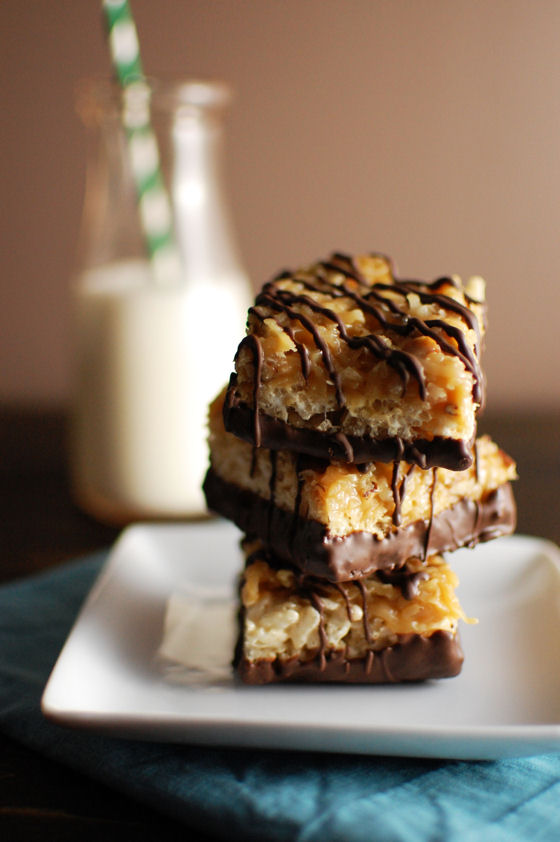
Samoas Rice Krispies Treats
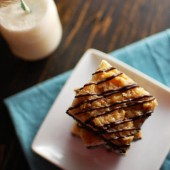
Samoas Rice Krispies Treats combine the beloved flavors of Samoas cookies and classic Rice Krispies treats. They are sure to please any crowd or that special someone in your life.
It’s that time of year again. When your coworkers ask if you want to buy cookies from their kids and you start to see young Girl Scouts outside the grocery store selling boxes of those classic cookies. Everyone has their favorites, and I have yet to meet someone who doesn’t enjoy some variety of Girl Scout cookie.
In our house, we’re big fans of Thin Mints (my favorite) and Samoas (Hubby’s favorite). When I was a Girl Scout, we called them Caramel Delites. Hubby calls them Samoas. (Btw, both names are correct, depending on which bakery your Girl Scouts troop gets their cookies from). Whatever you call them, there are a LOT of people out there who love them (they’re 2nd in sales behind Thin Mints).
Hubby loves Rice Krispies treats so when I saw this recipe, it was a no brainer that I’d be making it. Any time I can combine two of his favorite treats into one, I jump on it. The first time I made these was last summer. However, the chocolate glaze in the original recipe came out really grainy and thick. I brushed it off and figured I had burnt the chocolate since I didn’t use a double boiler.
Last week, I decided these would be the perfect treat to take to a Superbowl party. I had the same experience with the chocolate glaze again. Deciding it was unlikely that I had messed up a simple chocolate glaze twice, I moved on and decided to just use chocolate almond bark. It’s obviously a lower quality chocolate than the homemade glaze promised to offer, but it melts like a charm and sets up very quickly.
After the first taste, I knew this was the best decision I could have made. The somewhat artificial taste of the chocolate almond bark was reminiscent of the taste of those Girl Scout cookies that we all know and love.
It’s truly amazing how perfectly this recipe combines the beloved flavors of chewy Rice Krispies treats and Samoas cookies. It’s no surprise these were a huge hit at the Superbowl party. What was a surprise was that later that night, Hubby proclaimed them the best thing I had EVER made. Ever. I was shocked. I even reminded him of some of his previous favorites, and he still stands behind this proclamation.
Thanks to his proclamation, I decided to make them again last weekend when we celebrated his birthday with friends. At this celebration, our friend Justin said he could eat a whole pan of them if I let him.
So if you’re looking for a simple treat to make for someone special in your life, or someone who really likes Samoas/Caramel Delites, you have to try this recipe. It will not disappoint.
Two Years Ago: Amazingly Blueberry-ey Blueberry Muffins and Cardamom Candied Bacon
Three Years Ago: Triple Layer Oreo Cake
Four Years Ago: Mixed Berry and Cream Cheese Filled King Cake
Five Years Ago: Crockpot Red Curry Chicken with Butternut Squash


Samoas Rice Krispies Treats
Samoas Rice Krispies Treats combine the beloved flavors of Samoas cookies and classic Rice Krispies treats. They are sure to please any crowd or that special someone in your life. This recipe can be cut in half using an 8x8 pan.
Ingredients:
For the Rice Krispies
6 1/2 cups rice cereal
11oz mini marshmallows (~7 cups)
4-5 Tbs butter or margarine
For the Chocolate Coating and Drizzle
1 package chocolate almond bark (or similar dipping chocolate)
For the Caramel Topping
1 cup marshmallows
2 Tbs butter
11 oz bag of Kraft chewy caramel candy (about 30 candies)
pinch salt
2-3 cups coconut
1/2 cup finely chopped pecans
Directions:
For Rice Krispies Layer
On medium low heat, melt butter and marshmallows. Once fully melted add the rice krispies cereal and mix well. Pour mixture into a buttered 9x13 baking dish and press down.
For Caramel Layer
On medium low heat, melt butter, caramels and marshmallows. Once melted add salt and pecans and coconut. Layer Samoa mixture over Rice Krispies. Allow to set for 1-2 hours. Once set cut into squares.
Finishing touches
Melt chocolate in microwave, stirring every 30 seconds, until smooth.
Dip the bottom of each square in to the melted chocolate and turn upside down on to a cookie sheet until the chocolate sets. Once the chocolate has set up, turn the squares over.
Place a small amount of melted chocolate in a piping bag (or ziplock) and snip off the tip. Drizzle chocolate on the tops of the squares.
Recipe inspired by Curry and Comfort


 I am Jen the Beantown Baker. Engineer by day and baking maven by night. Hubby serves as my #1 fan and official taste tester. We got hitched back in 2006. Barefoot. In the sand. With the waves crashing behind us. It was one of the best decisions we’ve ever made.


U R awesome. i’ve been seraching high and low for a recipe for cookies that i can eat more than one but still be WW healthy. i will be making these ASAP!
now how many points in the oreo and peanut butter cupcakes?