


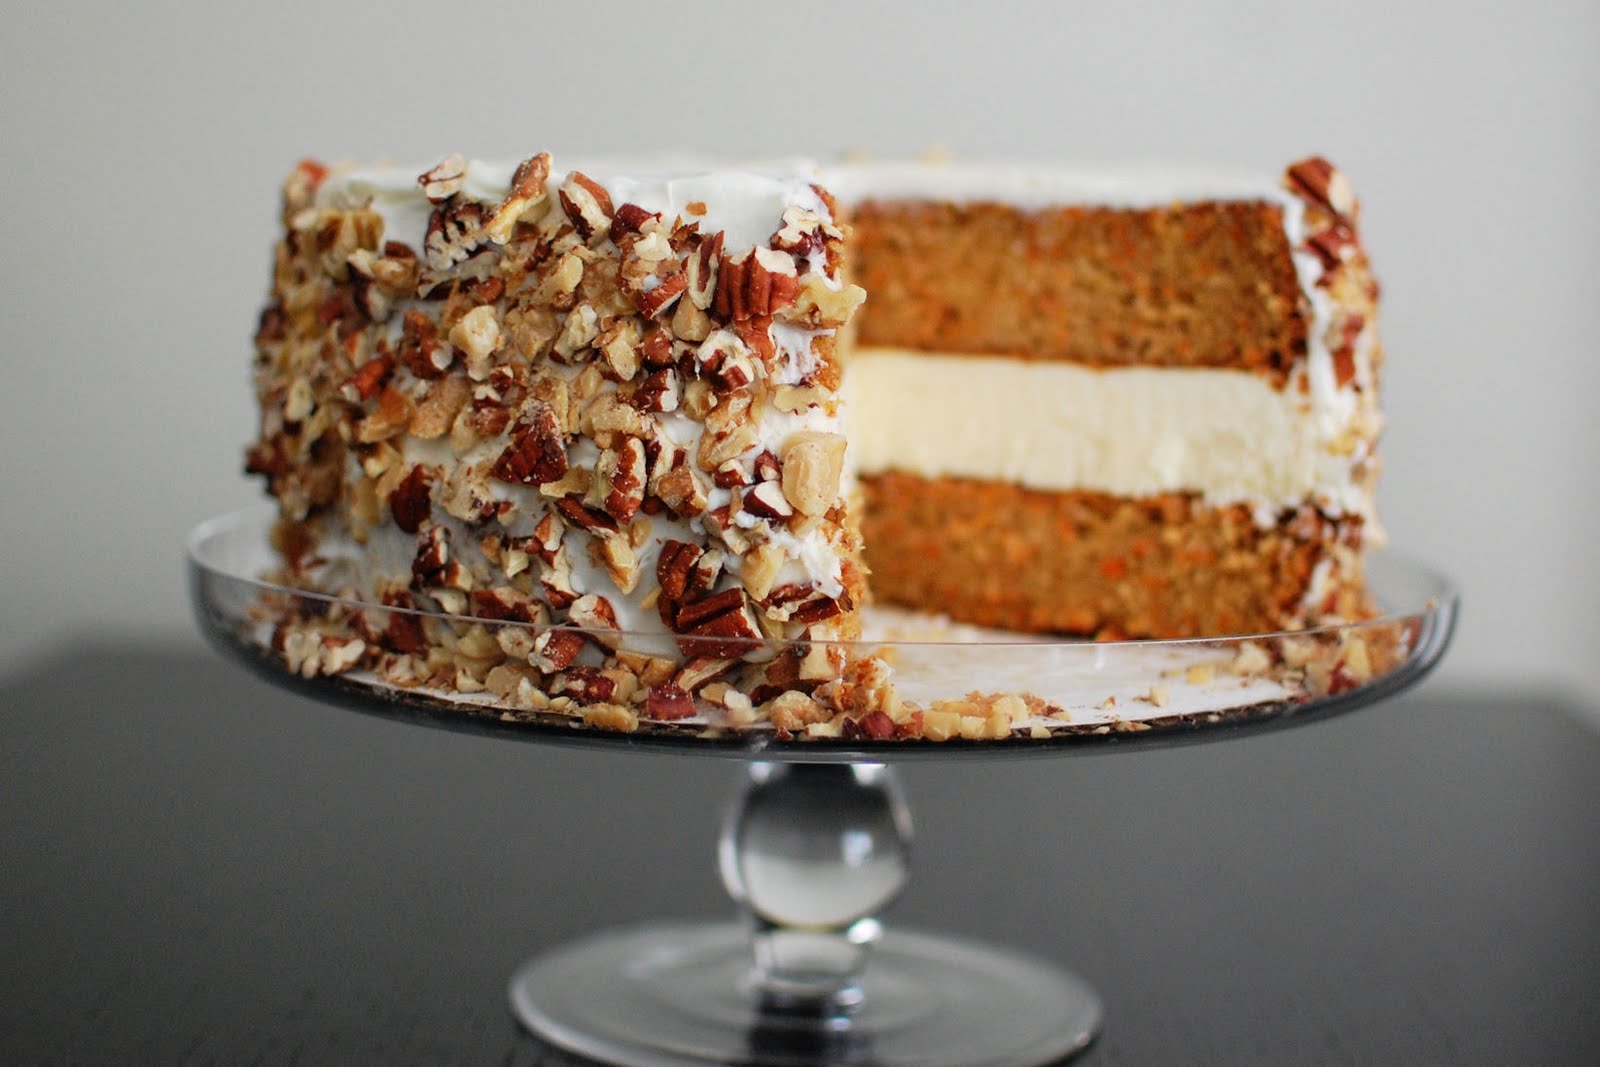
Carrot Cake and Cheesecake Cake
Remember that beautiful, flavorful, awesome, red velvet cheesecake cake that I made around the holidays? Well, a recent post on Erin’s Food Files got me thinking. You see, she made another cake with a layer of cheesecake in the middle.
After seeing that post, it got me thinking about what other flavors of cake could benefit from a layer of cheesecake in the middle. I realize there are probably very few cake flavors that wouldn’t benefit from a layer of cheesecake, but I digress…
Since Easter is coming up, I’ve been seeing carrot cake recipes all over the place. And we all know that carrot cake goes so well with cream cheese frosting, so it was a no brainer! Once I made up my mind, it was just a matter of finding the perfect carrot cake recipe.
I scoured the internet, my cookbooks, other blogs and every other resource to find a great carrot cake recipe. I decided I wanted a purists version of carrot cake, nothing with a bunch of additional fruit or nuts mixed in. I went with the Cooks Illustrated recipe and it’s really good. It does actually call for toasted walnuts, but I knew I’d be using them on the outside of the cake, so I left them out.

One of the best things about this impressive cake is that it can be broken up into small tasks that can be done over the course of a few days. I made the cheesecake on a Monday and once it was completely cooled, I wrapped it in two layers of plastic wrap, then two layers of foil and popped it into the freezer.
Then I made the carrot cake layers on Thursday night after work. The hardest part about this recipe is just peeling and shredding the carrots. After that, it comes together in minutes. Once the cake layers were cooled, I wrapped them in plastic and foil and popped them into the fridge.

Then on Saturday, I brought some leftover cream cheese frosting to room temperature and went to town stacking the cake. I once again took advantage of the fact that the sides didn’t need to be frosted very well since I was covering them with toasted nuts.

I did however have a harder time getting the nuts to stick to the cake than I did toasted coconut. I think it was a combination of two things. When I made the coconut and lemon cake, it was a 6″ cake that I could hold/tilt in one hand and use the other hand to smoosh coconut into the frosting. This cake was much bigger and heavier so I couldn’t hold it in my hand. It just sat there on the cardboard and I pressed nuts into the side of it.
The second thing is the nuts are bigger than the toasted coconut so it makes sense that they wouldn’t stick as well. The whole thing was a pretty messy process but I’m happy with the results. Hubby told me that I need to toast nuts more often because that was one of his favorite parts of the cake – the toasted nuts covered in cream cheese frosting.

If you don’t already have a dessert idea for Easter, OR, if you’re looking for a carrot cake recipe to impress someone, definitely consider throwing a layer of cheesecake in the middle. It’s just such a sweet surprise!
One Year Ago: My Go-To Vanilla Buttercream


Carrot Cake Cheesecake Cake
Yield: Serves 12-16
Ingredients:
Cheesecake Layer
1 1/4 pounds bar cream cheese (20 oz), room temperature
3/4 cups sugar
1/2 tsp finely grated lemon zest, plus 1/2 tablespoon fresh lemon juice
1/4 tsp coarse salt
2 eggs
1/2 cup sour cream
For the Carrot Cake Layers
2 1/2 cups flour (12 1/2 ounces)
1 1/4 tsp baking powder
1 tsp baking soda
1 1/4 tsp ground cinnamon
1/2 tsp freshly ground nutmeg
1/8 tsp ground cloves
1/2 tsp salt
1 lb medium carrots (6 to 7 carrots, yields 3 cups), peeled
1 1/2 cups sugar (10 1/2 ounces)
1/2 cup packed light brown sugar (3 1/2 ounces)
4 eggs
1 1/2 cup vegetable oil, safflower oil, or canola oil
To Garnish
Double batch of Cream Cheese Frosting
1.5 cups chopped, toasted pecan
Directions:
For the Cheesecake Layer
Preheat oven to 325 degrees. Set a kettle of water to boil. Using an electric mixer, beat cream cheese on medium until fluffy, scraping down side of bowl. Gradually add sugar, beating until fluffy. Beat in lemon zest and juice, and salt. Beat in eggs, one at a time, scraping down side of bowl after each addition. Beat in sour cream.
Cut parchment paper in a circle and line the bottom of the cheesecake pan. Wrap bottom half of pan in foil. Pour in filling; place in a roasting pan. Pour in boiling water to come halfway up side of springform. Bake until just set in center, about 45 minutes. Remove pan from water; let cool 20 minutes. Run a paring knife around edge; let cool completely. Cover; chill overnight, then wrap in plastic wrap and freeze.
For the Carrot Cake Layers
Adjust oven rack to middle position; heat oven to 350 degrees.
Spray two 9" round pans with nonstick baking spray with flour.
Whisk together flour, baking powder, baking soda, cinnamon, nutmeg, cloves, and salt in large bowl; set aside.
Shred carrots using large holes of box grater; transfer carrots to bowl and set aside.
In bowl of standing mixer fitted with paddle attachment, beat granulated and brown sugars and eggs on medium-high until thoroughly combined, about 45 seconds.
Reduce speed to medium; with mixer running, add oil in slow, steady stream, being careful to pour oil against inside of bowl.
Increase speed to high and mix until mixture is light in color and well emulsified, about 45 seconds to 1 minute longer.
Turn off mixer and stir in carrots and dry ingredients by hand until incorporated and no streaks of flour remain.
Pour into prepared pan and bake until toothpick or skewer inserted into center of cake comes out clean, about 40 minutes, rotating pan halfway through baking time.
Cool cake to room temperature in pan on wire rack, about 2 hours.
To Assemble the Cake
Place bottom layer on cake stand. Remove cheesecake from freezer, unwrap, and remove from metal bottom, then peel off parchment paper. Place cheesecake layer on top of the bottom layer of the carrot cake.
If the cheesecake is wider than the cake, and it is necessary to to trim it, wait approximately 10 minutes for the cheesecake to soften, then trim it with a knife. Place top layer of cake on top of the cheesecake, and coat with a generous layer of the cream cheese frosting to act as the crumb coat.
Refrigerate approximately 30 minutes, then frost with as much of the remaining frosting as necessary. Coat this sides of the cake with toasted pecan if desired
Refrigerate until ready to serve.
Cheesecake layer adapted from Martha Stewart, Carrot Cake layers from Cooks Illustrated

 I am Jen the Beantown Baker. Engineer by day and baking maven by night. Hubby serves as my #1 fan and official taste tester. We got hitched back in 2006. Barefoot. In the sand. With the waves crashing behind us. It was one of the best decisions we’ve ever made.


Yum yum YUM! I love blueberry anything. I love cheesecake anything. Heaven!
I think Katrina’a blog is Baking and Boys!
Yum. The chewy oat crust sound great. Good pick!
I want to smoosh a whole batch of them in my mouth! Yummers!
I have been admiring these crumb bars for quite some time! Great pick for the SRC – fun to participate in this event with you 🙂
These are amazing. I make them for everything, bake sales, holidays and potlucks, and you can easily substitute whatever berries you have on hand. I’ve done mixed berries, raspberry and blackberry with this recipe! Thanks so much for sharing!
Best cheese ball in the world! I’ve been coming back to this recipe for years- so good!
There are lots of food blogger like this But the best food recipe “Fudgey Banana Brownies” is yours. Thanks for giving me this wonderful blog. I will try to make it like you. Best car Detailing services in delhi.