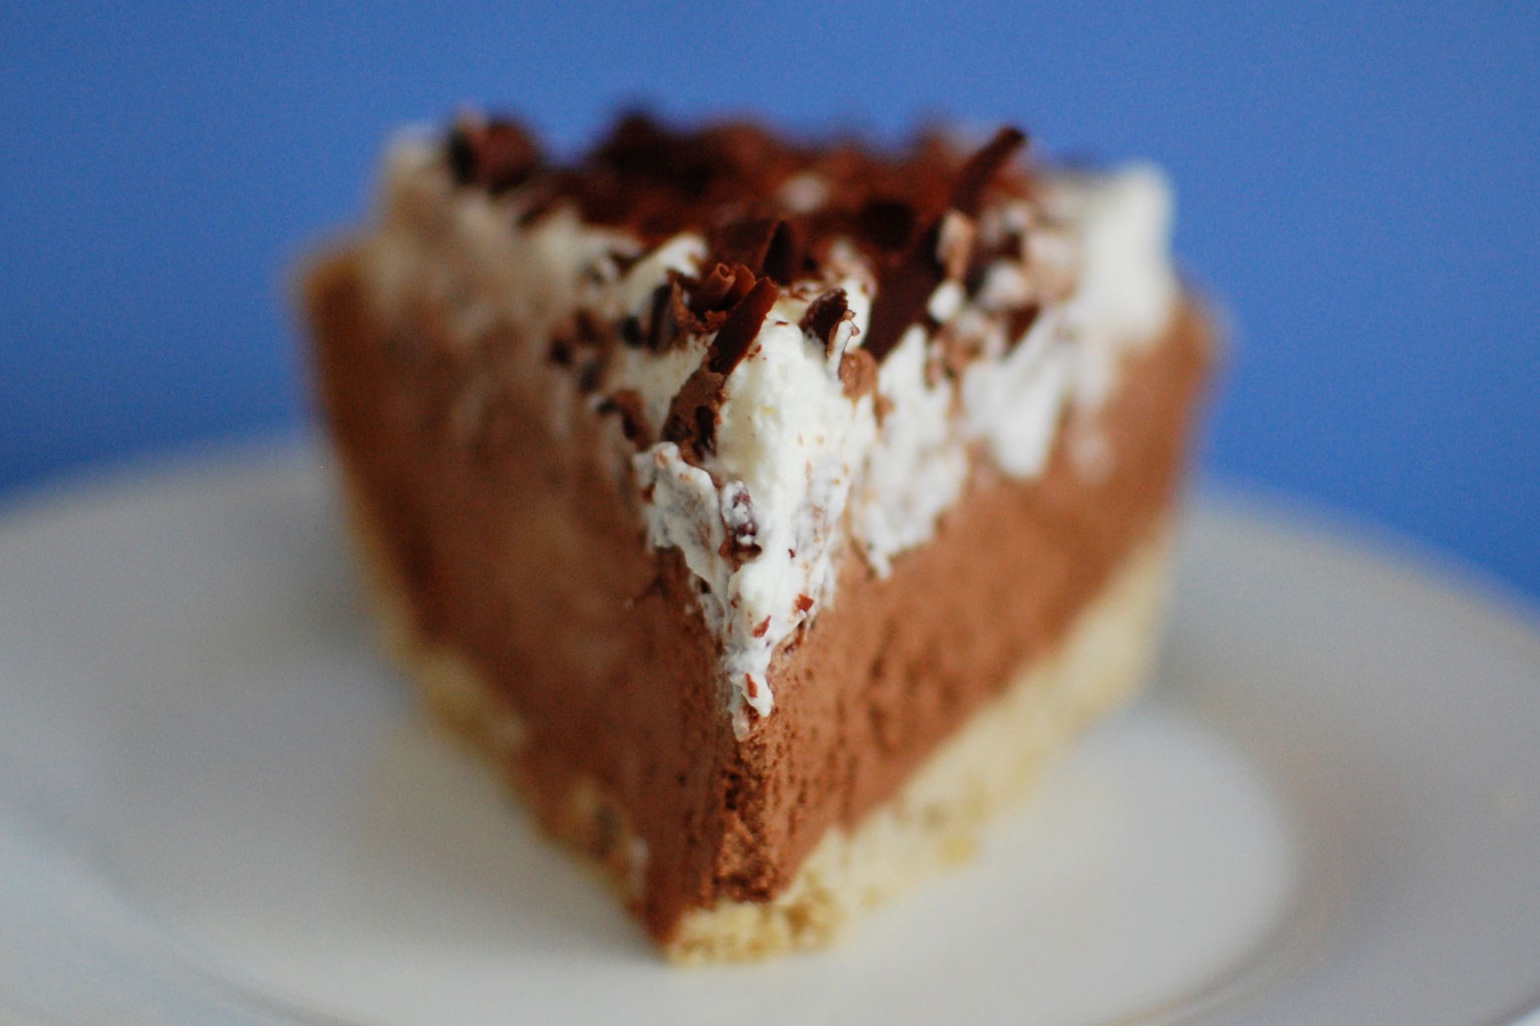
French Silk Pie

My little brother A came to Boston for a visit a couple weeks ago. Although, I suppose calling him my little brother is a bit misleading. He’s growing up fast and just graduated high school this past May. And he towers over the entire family at 6’4″.


As with most people who come to visit, I asked A if he wanted me to bake him something while he was here. He immediately responded “French Silk Pie”. Now I’ve never actually had French Silk Pie let alone baked one. Apparently, it’s A’s favorite dessert though. He’s even baked them himself in the past.


After I found out he had baked his own French Silk Pie, I decided it would be more fun to bake the pie together than for me to bake it for him. I figured we could get some quality sibling bonding time in the kitchen.


A and I had a good time making this pie. He had never made a crust from scratch before and this one was really easy. You just crush up some nuts, mix in some butter, and press it into the pie plate. It can’t get much easier than that!


We whipped up the mousse and filled the shell. Then came the painful part, letting it set. We ended up letting the pie chill in the fridge overnight. The next night after dinner, we topped it with some freshly whipped cream and chocolate shavings. I can’t comment on how this compares to other French Silk Pies out there, but everyone really enjoyed this pie. I’m pretty sure A had 3 pieces himself before heading back to the Midwest.

One Year Ago: Buttermilk Cupcakes with Chocolate Swiss Meringue Buttercream
Two Years Ago: Red White and Blue No-Bake Frozen Cupcakes

Print Save

French Silk Pie

Yield: 8

Ingredients:

For the Crust
8 Tbsp chilled salted butter, cut into pieces, plus more for pan
1/3 cup pecan halves
1 1/3 cups all-purpose flour
1/4 cup firmly packed light-brown sugar
1/4 tsp salt

For the Filling
12 Tbsp (1 1/2 sticks) salted butter, room temperature
1 cup sugar
3 ounces unsweetened chocolate, melted and cooled
1 1/2 tsp vanilla extract
3 eggs
Whipped cream, for serving
Chocolate curls, for serving

Directions:

For the Crust
Preheat oven to 325 degrees. Butter a 9-inch pie plate; set aside. Grind pecans in a food processor, or chop very finely with a knife. In a medium bowl, combine flour, pecans, sugar, and salt. Cut in cold butter with a pastry cutter until mixture resembles coarse meal. Press firmly into prepared pie plate. Bake until golden, 20 to 25 minutes. Transfer to a wire rack to cool.

For the Filling
In the bowl of an electric mixer fitted with the paddle attachment, cream butter and sugar until light and fluffy, about 2 minutes. With machine running, gradually add melted chocolate and the vanilla. Add eggs, one at a time, beating at medium speed for five minutes after each addition. Pour filling into cooled pie crust. Cover with plastic wrap, and transfer to the refrigerator to cool for at least 4 hours and up to overnight.

Just before serving, top pie with whipped cream, and decorate with chocolate curls.

Recipe from Martha Stewart

    Pin It

31 Responses to “Salted Dark Chocolate Truffle Cookies”

  1. #
    1
    Eva @ Eva Bakes — May 3, 2013 at 8:29 am

    Dark chocolate truffles in cookie form? Um, YES!!! I’ll take a dozen for myself and another dozen for later, please.

  2. #
    2
    Erica @ In and Around Town — May 3, 2013 at 10:52 am

    Wow – these sound good! and I truly do not understand how people can just “not be into chocolate!” It is my favorite!

    • beantownbaker — May 8th, 2013 @ 8:26 pm

      Yea, I really don’t get it either. Oh well, more for me!

  3. #
    3
    Rosie @ Blueberry Kitchen — May 3, 2013 at 12:38 pm

    Oh wow, chocolate truffle cookies sound divine! These look ridiculously good! Love that they’re salted too!

    • beantownbaker — May 8th, 2013 @ 8:27 pm

      I have been sprinkling salt on all of my cookies recently. It makes them much more adult and less super-sweet.

  4. #
    4
    Brooke Schweers — May 3, 2013 at 10:42 pm

    Yum these look divine!

  5. #
    5
    tracy {pale yellow} — May 4, 2013 at 8:21 am

    I’m always in need of a chocolate fix! I have several friends that claim they are not chocolate people, yet I find whenever I make something chocolate + salt, they are all over it!

    • beantownbaker — May 8th, 2013 @ 8:28 pm

      I definitely find that people who claim they aren’t chocolate people rarely say no to any homemade baked goods. Chocolate or otherwise.

  6. #
    6
    Nutmeg Nanny — May 5, 2013 at 4:16 pm

    Oh my! These look divine 🙂 I’d love to make these babies soon!

  7. #
    7
    Shannon — May 6, 2013 at 1:41 pm

    these look amazing!! and how thick that batter is 🙂 love the sea salt!

    • beantownbaker — May 8th, 2013 @ 8:29 pm

      The batter was basically ganache. You could have just made truffles from it directly.

  8. #
    8
    ErinsFoodFiles — May 6, 2013 at 4:15 pm

    I love any and all things dark chocolate. These look so decadent!

  9. #
    9
    best friend rings — May 7, 2013 at 11:07 am

    I’m curious to find out what blog platform you’re working with?
    I’m having some minor security problems with my latest blog and I’d like to find something
    more safeguarded. Do you have any suggestions?

  10. #
    10
    Jane — May 13, 2013 at 6:55 pm

    Wow! Those look so perfectly decadent! I’m practically drooling on my screen 😉

  11. #
    11
    Amy — May 16, 2013 at 9:29 pm

    Just made these. Worried I didn’t bake them long enough… however they still tasted divine. Waiting to get the verdict from my husband on them.

    • beantownbaker — June 10th, 2013 @ 12:11 pm

      I think underbaking these sounds like a great idea. I might have to do that next time.

  12. #
    12
    Rachita — June 4, 2013 at 11:09 pm

    Since I’m trying this recipe for the first time, can I halve the entire recipe?

    • beantownbaker — June 10th, 2013 @ 12:12 pm

      Sorry for not getting back to you sooner. I didn’t see this comment until now! I don’t see why you couldn’t make a half batch of these cookies. Did you try it? How did they turn out?

  13. #
    13
    Joan — June 9, 2013 at 10:08 am

    These are the most amazing chocolate cookies I have ever made. Everyone with whom I have shared them have gone absolutly nuts and want the recipe. I do not wet my hands when rolling the cookies into balls—too messy. I just let my hands get sticky and rinse and dry them after making several balls. This is one of the best recipes on Pinterest.

    • beantownbaker — June 10th, 2013 @ 12:13 pm

      Thanks for the kind words! So glad you enjoy these cookies. I was wondering if getting my hands wet actually helped with the messiness very much. Next time I’ll be sure to just go at it without dealing with the water.

  14. #
    14
    Rachita — June 18, 2013 at 9:31 am

    Hey! I tried halving the recipe…but it melted while in the oven. Became runny & all of them just stuck together 🙁
    I tried just one batch. Anything I can do to fix the remaining batter?

    • beantownbaker — June 18th, 2013 @ 4:01 pm

      Interesting… How did you account for half of an egg? And is your baking powder past it’s expiration date?

  15. #
    15
    Rachita — June 18, 2013 at 11:42 pm

    Ohh! Looks like I’ve added a lil too much egg. Damn! Any way I can fix the batter? Add more flour perhaps? Plz help!

    • beantownbaker — June 19th, 2013 @ 7:12 am

      I’d add a little more flour to see if you can balance out the extra amount of egg in there.

  16. #
    16
    Rachita — June 20, 2013 at 6:49 am

    I added 1/4 cup more flour & a teensy bit of baking powder to my messed up batter & they came out wonderfully! They’re so gooey & yumm that my husband & son (who never eats chocolate!) finished six cookies at one go!
    Amazing recipe!! Thank you so much for your help, I appreciate it !

    • beantownbaker — June 20th, 2013 @ 7:00 am

      Oh GOOD! So glad you were able to make them work. Aren’t they divine?

  17. #
    17
    Rachita — June 20, 2013 at 7:17 am

    U bet! They are sinfully delicious! Sent some in my son’s snack pack & I have mommies calling for these cookies!
    I’m officially ur No.1 fan now! 🙂

  18. #
    18
    Emily — June 27, 2013 at 6:59 am

    Hi, I was wondering if I could put them in the freezer instead of the fridge for a shorter period of time? If so, how long should I put them in the freezer for instead of the fridge?

    • beantownbaker — June 27th, 2013 @ 8:06 am

      Hm. You could definitely try it. I would think it’s still going to need an hour or so in the freezer since you want it to set up pretty well. Let me know how it turns out if you do.

Leave a Comment