


Alton Brown’s Stovetop Macaroni and Cheese
As I’ve mentioned many times before, Alton Brown is one of my absolute favorites. Hubby and I have been trying to make more recipes from my autographed copy of his latest cookbook. I love all the extra information provided in the cookbook about the episodes and recipes.

I was looking for a great mac and cheese recipe and instantly remembered the episode For Whom the Cheese Melts 2. I turned to my cookbook and found the recipe. He made a baked mac and cheese and a stovetop version. I opted for the stovetop version.
The next step was to set out to choose some cheeses to use in the mac and cheese. I didn’t want to use just plain old cheddar. I ended up using a mix of sharp cheddar, monteray jack, fontina, and gruyere cheese. The combination was fantastic.

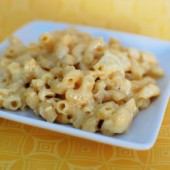
I doubled the recipe so I could use a whole can of evaporated milk and a full box of macaroni noodles. This is my kind of mac and cheese – ooey, gooey, and super cheesey. Of course I could only eat a couple bites because of my lactose intolerance, but those few bites were delicious.


Stovetop Mac and Cheese
Yield: 6-8
Ingredients:
1/2 pound elbow macaroni
4 Tbsp butter
2 eggs
6 oz evaporated milk
1/2 tsp hot sauce
1 tsp kosher salt
Fresh black pepper
3/4 tsp dry mustard
10 oz sharp cheddar, shredded - I used a combination of sharp cheddar, monteray jack, fontina, and gruyer
Directions:
In a large pot of boiling, salted water cook the pasta to al dente and drain. Return to the pot and melt in the butter. Toss to coat.
Whisk together the eggs, milk, hot sauce, salt, pepper, and mustard. Stir into the pasta and add the cheese. Over low heat continue to stir for 3 minutes or until creamy.
Recipe adapted from Alton Brown


 I am Jen the Beantown Baker. Engineer by day and baking maven by night. Hubby serves as my #1 fan and official taste tester. We got hitched back in 2006. Barefoot. In the sand. With the waves crashing behind us. It was one of the best decisions we’ve ever made.


I think that my raspberry cream recipe didn’t call for enough raspberry. Oh well. Yours looks fantastic! Such pretty colors.
Thanks!! The raspberry cream was a lot runnier than the vanilla, but it was tasty.
The raspberry cream has such a wonderful color! So bold against the neutral eclair.
Your eclairs turned out really well! I love the pink of the raspberry pastry cream against the glaze.
Wow… Your eclairs are adorable and look amazing!