


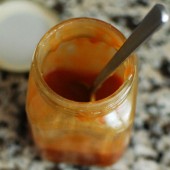
Salted Caramel Sauce
Caramel sauce might be one of Hubby’s favorite things ever. He will always choose a caramel treat over a a chocolatey treat. I’ve just recently gotten more comfortable making my own caramel sauce. It actually is so much easier than I thought it was. Having a candy thermometer is a must for making caramel at home. But that’s really all you need. If you haven’t made your own caramel sauce, do it. Trust me, it’s worth the minimal effort required.

I ended up making a triple batch of this salted caramel during the holidays. I ordered some cute jars online and gave them away as gifts to some family members. Hubby also enjoyed a bunch of this caramel sauce heated up over vanilla ice cream.

One Year Ago: Crunchy Nut Encrusted Chicken Tenders
Two Years Ago: BBQ Chicken Pizza Sticks


Salted Caramel Sauce
Salted caramel sauce is easier to make than you could ever imagine. And it makes a great gift!
Yield: 2 cups
Ingredients:
1 cup water
2 cups sugar
1 cup heavy cream
2 Tbsp cold unsalted butter
1 tsp fleur de sel
Directions:
Add water to a 2-qt saucepan. Gently add the sugar to the center of the pot - it will mound, that's fine. Cover the pot and bring to a boil over high heat.
Once boiling, uncover the pot and insert a candy thermometer. Continue cooking until the mixture registers 300 F and is just starting to develop some color, about 15 minutes.
Reduce heat under the pot to medium and cook until the syrup is amber and registers 350 F on the thermometer, about another 5 minutes.
Meanwhile, pour the cream into a small saucepan and bring to a simmer. If it simmers before the syrup is ready, just take it off the heat and set aside.
Remove the caramel from the heat and add about 1/4 of the warm cream to the pot. It will bubble furiously so be careful. Once the bubbling subsides, add the remaining cream. When it stops bubbling, whisk gently to incorporate fully. Add the butter and the salt and whisk to combine.
Refrigerate up to 1 month.
Recipe from Cook's Illustrated, as seen on Erin's Food Files


 I am Jen the Beantown Baker. Engineer by day and baking maven by night. Hubby serves as my #1 fan and official taste tester. We got hitched back in 2006. Barefoot. In the sand. With the waves crashing behind us. It was one of the best decisions we’ve ever made.


How awesome that you were on Leno! Are we allowed to ask what you were on for? I love your list and am raising two hands to vote for the Brownie Mosaic Cheesecake. I made it last fall (http://www.browneyedbaker.com/2008/10/11/brownie-mosaic-cheesecake/) and it is simply to die for. You won’t be sorry!!
Um yeah, totally meant Letterman. ::slaps forehead:: I’m sleepy 😉
What a cool blog event! I wish I had known about it before today, so I could participate. Is it a monthly thing? If so, I’m definitely in next time!
Michelle – I was the co-captain of a Rube Goldberg team (think of the game mouse trap but on a HUGE scale) in college. In 2003, Purdue won the national competition and they got us on the Letterman show. I was the “spokesperson” for the team and we had our machine on stage. It was an awesome experience. I’ve been trying to find pictures, but that was pre-digital camera for me so I can’t find any…
Annie – I believe it is a monthly event. I think she started it in May…
Thanks for the link to my site! I hope you try out the Chocolate Goat Cheese Truffles if you are a goat cheese fan. They were so delish.
yay for the best bookmarks ever! we have similar taste i guess bc i got some great ideas from this post and i’ve done some on your list. two quick notes on these bookmarks:
1) do the bagels at smitten kitchen. the cinna. raisin rock and it’s so rewarding to spend that much time and yield awesome results. i’m a new baker and it wasn’t very hard to do. definitely add the maple syrup or molasses to the water when you boil the bagels. dole makes plump raisins and they rock.
2) billy’s cupcakes will be your answer to vanilla cupcakes forever! i had issues with overflow so i’d reduce the baking powder from 3t (=1T) to 2.5 tsp.
Thanks for the tips Sweetie
OMG thanks for the shout-out!!! 🙂 where the HECK have i been!?? i’ve seen your facebook status updates and i never realized they were from YOUR blog!!! they are awesome! i’m SO proud of you!!!!!!!!!!!!!!!!!!!! talk soon!!! love, WALKER
ps: i have some pics, i’ll get them scanned. 🙂