


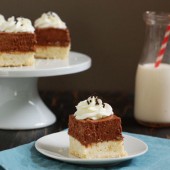
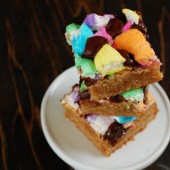
French Silk Pie Bars
French Silk Pie Bars have all the velvety chocolate flavor of a French Silk Pie, in the portable format of a dessert bar!
By the way, I hope you all had a great Labor Day weekend. In case you missed my big announcement, be sure to check it out on Instagram.
My little brother came to visit for the weekend. Of course, when I say little, don’t kid yourself. This guy towers over all of us at 6’4″. His favorite dessert is French Silk Pie. We really enjoyed this recipe I made before when he visited us in Boston a few years ago, but this time, I wanted to make something different.
And, let’s be honest, I didn’t want to make a pie. Pies are not my favorite thing to make. I know fall is coming right around the corner, which makes me think of pies, but I’m just not in to them. So bars it was.
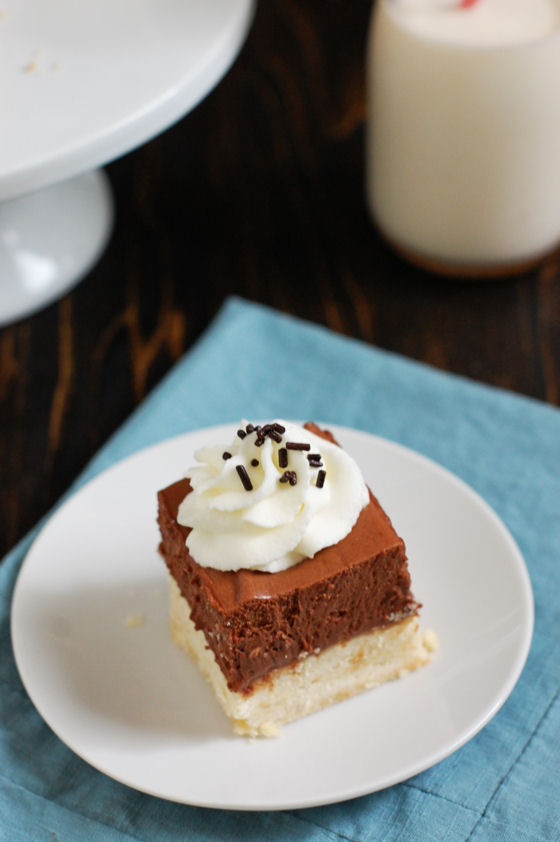
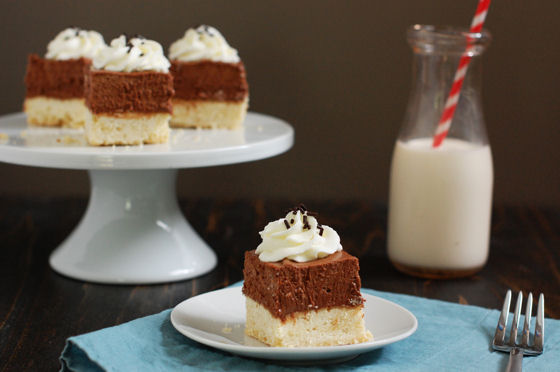
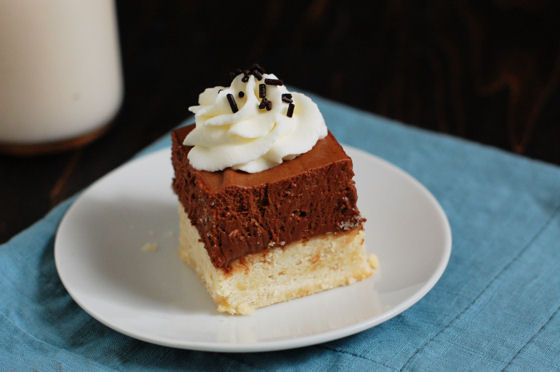
As you can see in the pictures, the crust to filling ratio is pretty high on these bars. When I make these again, I’ll reduce the crust recipe to 3/4 of the original. I have reflected the recipe below to reflect that change. The chocolate mousse filling in this recipe is amazing. I’m tempted to just make that part of the recipe again to eat it with a spoon.
Since the crust and filling were both really tall, I didn’t think my pan could handle the whipped cream topping, so I cut the bars and piped it on top. And piping the topping made it look all fancy and fun. I threw the sprinkles on top since I’m lazy and wasn’t in the mood to make chocolate curls… Next time you need a chocolatey travel-friendly dessert to impress your friends, remember these French Silk Bars.


French Silk Pie Bars
French Silk Pie Bars have all the velvety chocolate flavor of a French Silk Pie, in the portable format of a dessert bar!
Yield: 16 bars
Ingredients:
For the Crust:
12 Tbsp (1.5 sticks) butter
1 1/2 cups flour
1/3 cup powdered sugar
For the Filling:
8 ounces bittersweet chocolate, finely chopped
1 cup heavy cream
3 eggs
3/4 cup sugar
2 Tbsp water
1 Tbsp vanilla
8 Tbsp (1 stick) unsalted butter, at room temperature, cut into small pieces
For the Topping:
1/2 tsp gelatin
2 Tbsp cold water
1 cup heavy cream
4-5 Tbsp powdered sugar
Directions:
For the Crust:
Preheat oven to 350 degF. Line an 8"x8" pan with parchment paper.
Pulse crust ingredients in food processor 8-10 times until combined. Press crust in to bottom of pan.
Bake for 20-22 minutes or until lightly browned. Set aside to cool.
For the Filling:
Melt chocolate in a double boiler or in the microwave (use 30 second intervals at medium power). Set aside.
Beat the heavy cream to stiff peaks. Place in small bowl and chill in the fridge.
In the bowl of a stand mixer, beat together eggs, sugar, and water until pale yellow and slightly thickened (~6 minutes). Set bowl over saucepan of simmering water and heat mixture to 160 degF, whisking occasionally.
Put bowl on to mixer and beat on medium speed until cooled to room temperature and thickened, about 8 minutes. While beating, add in the chocolate and vanilla. Beat in butter, one piece at a time. Remove bowl from mixer and fold in whipped cream.
Pour mixture over cooled crust and smooth top. Cover and chill for at least 3 hours.
For the Topping:
In a small bowl, sprinkle gelatin over water to soften for 2 minutes. Head 15 seconds in the microwave and whisk to dissolve gelatin. Whip the cream to stiff peaks, adding the gelatin and powdered sugar while whipping.
Spread or pipe on top of bars and chill until set. Decorate with chocolate sprinkles or curls.
Recipe adapted from Willow Bird Baking


 I am Jen the Beantown Baker. Engineer by day and baking maven by night. Hubby serves as my #1 fan and official taste tester. We got hitched back in 2006. Barefoot. In the sand. With the waves crashing behind us. It was one of the best decisions we’ve ever made.


Ohh I love that it’s an all-natural mint flavor. So much better than the fake stuff.
beantownbaker — July 24th, 2013 @ 12:53 pm
I agree. Hubby likes to give me a hard time by calling me a food snob for trying to avoid fake stuff in everything we eat. I figure, it’s worth the effort. And the name calling 😉
Ohhh, I love mint chocolate chip! Love that you used coconut milk in it!
Yummy 🙂 my mother would love this, mint chip has always been her favorite! Can’t wait to try this recipe!
beantownbaker — July 30th, 2013 @ 5:48 pm
I can’t believe you’re commenting on blogs while at a blogging conference. Overachiever 😛
Love it! This is amazing 🙂
for some reason your blog stopped updating in feedly 🙁 corrected and now to catch up on all the deliciousness! i just made a fresh mint ice cream as well, but i like how you used coconut milk. will be doing that next time 🙂
beantownbaker — August 1st, 2013 @ 3:17 pm
I know – I realized that too. But it’s working again now. Not sure if it was a Feedly issue or something on my end…
Really good! I may have steeped the mint too long.. A little earthy. Will try again!
beantownbaker — August 1st, 2013 @ 3:18 pm
Oh bummer! I’ve never had ice cream that I’d call “earthy”…
Would you consider doing a mint chocolate chip ice cream with goat’s milk? Or do you think the “goaty” would show through too much?
beantownbaker — August 10th, 2013 @ 9:36 am
Interesting idea. I think it would be good. This ice cream was very minty, so I think it would mask the goatiness of the milk.