


Homemade Pumpkin Puree
As you all know, I love pumpkin flavored anything. If you didn’t know that, just check out all the pumpkin recipes I’ve posted since I started this blog. Normally, I’m perfectly content with just picking up a can of pumpkin puree at the grocery store and not thinking twice about it. I figured that making my own pumpkin puree probably wasn’t worth the effort.

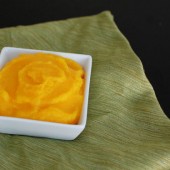
But then we got a couple sugar pumpkins in the last few weeks of our CSA. And I wasn’t sure exactly what to do with them. Hubby had requested some pumpkin desserts, so I figured I’d try out making my own puree. It’s really really easy to do. All you do is roast the pumpkin, then throw it into the food processor and you’re done. And just look at that color! It’s so vibrant. The taste is definitely different than store bought pumpkin puree as well. The best I can describe it is just that it tastes more fresh.

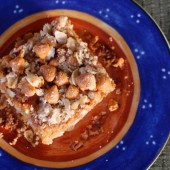
Remember that if you make your own pumpkin puree, you want to use it up within a week or it will go bad. It can be frozen for a couple months though. If you made some tonight, you’d be able to use it in that Pumpkin, Cranberry, and Pecan Pie I posted last week (that’s how I used some of mine).
Two Years Ago: Cranberry Apple Pumpkin Muffins
Three Years Ago: The Ultimate Chewy and Soft Chocolate Chunk Cookies


Homemade Pumpkin Puree
Ingredients:
1 sugar pumpkin
olive oil
salt, optional
Directions:
Preheat oven to 400 degrees. Line a large baking pan with aluminum foil. Remove the stem of your pumpkin by snapping it off with your hand.
Using a large knife, cut the pumpkin into quarters. Scoop out the pulp and seeds with a spoon (be sure to roast the seeds for a delicious snack).
Place pumpkin quarters on baking sheet, flesh side up. Drizzle with a small amount of olive oil and rub it around to coat the flesh. Sprinkle with salt if using.
Roast in the oven for 30-40 minutes until the flesh is soft and the skin has started to wrinkle.
Allow pumpkin to cool long enough to be able to handle it.
Using a spoon, scoop the flesh out of the skin and into a food processor. Puree until completely smooth. Store in the fridge for a week or freeze for up to four months.


 I am Jen the Beantown Baker. Engineer by day and baking maven by night. Hubby serves as my #1 fan and official taste tester. We got hitched back in 2006. Barefoot. In the sand. With the waves crashing behind us. It was one of the best decisions we’ve ever made.


