


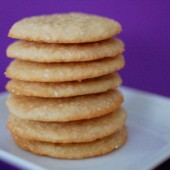
Sesame Crisps
Hubby’s mom always makes the cookie platter for the family holiday celebration. Last year I got to help her out with the cookie platter. It was fun to get to try some of Hubby’s family favorites. These cookies are Hubby’s mom’s favorite. They have little black and white sesame seeds in them (I made them with only white seeds). These are very delicate cookies and need to be served the day they are baked.
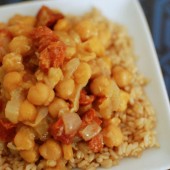
 One Year Ago: Crockpot Beef and Peppers


Sesame Crisps
Ingredients:
6 Tbsp butter, softened
2/3 c sugar
1 tsp vanilla extract
1/4 tsp salt
1/4 tsp baking powder
1 egg
1/2 c plus 2 Tbsp flour
4 tsp white sesame seeds, toasted
4 tsp black sesame seeds
Directions:
Toast white sesame seeds on a cookie sheet for a few minutes. Watch careful and only toast until lightly browned.
Preheat oven to 350 degrees. Spray 2 large cookie sheets w/nonstick cooking spray or brush with butter.
In large bowl, beat butter, sugar until light and fluffy. Add vanilla, salt & baking powder and beat. Add egg, beat until well combined. With a spoon, stir in flour.
If you’re using the black seeds, spoon half the batter into a small bowl; add toasted white seeds to half the batter and the black seeds into the other half of batter.
Drop by rounded teaspoons, about 3” apart, onto cookie sheets. Bake about 8 minutes, rotating sheets halfway through the baking time, until cookies are set and edges are golden. Let cookies remain on sheets for only about 30 seconds before removing to racks to cool.
Wipe sheets clean and butter again, repeat until all is done.
*Note- if you inadvertently leave the cookies on the sheet too long and they are hard to remove, just place in oven for a minute to warm/soften them again.
Recipe from Hubby's mom


 I am Jen the Beantown Baker. Engineer by day and baking maven by night. Hubby serves as my #1 fan and official taste tester. We got hitched back in 2006. Barefoot. In the sand. With the waves crashing behind us. It was one of the best decisions we’ve ever made.


