


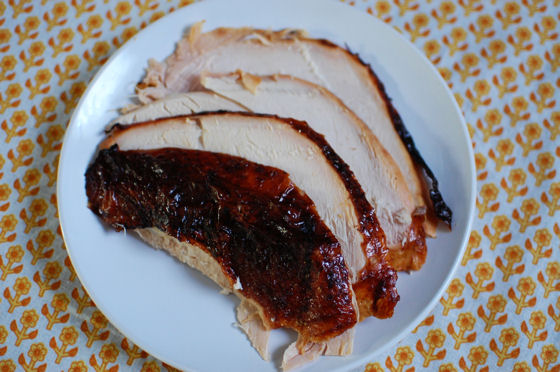
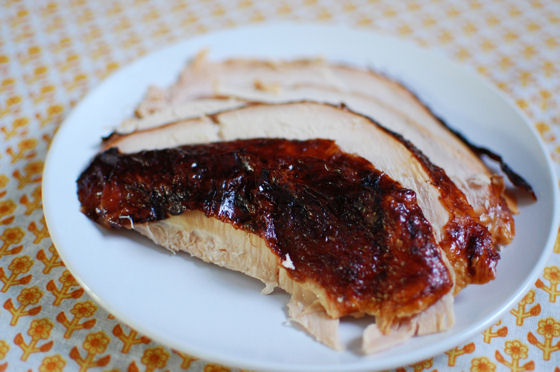
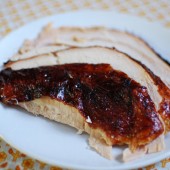
Brined and Roasted Turkey
Brining a turkey ensures full flavor and juiciness. It only requires a few extra steps and the payoff is well worth it!
Turkey. It’s an obvious choice when it comes to planning a Thanksgiving menu. I mean, can you imagine Thanksgiving without it?!? Blasphomy! But there are a variety of ways in which you can prepare a turkey. You can fry it, roast it, cover it in bacon and roast it, stuff it, leave the stuffing outside the bird, the options are endless.
When I roasted my first turkey a couple years ago, I turned to my cooking hero, Alton Brown, for the recipe. For those of you who me on Instagram, you’ll remember that I just saw AB again recently. I have met him before, at a book signing in Boston, and when I found out he was touring this year, I knew I had to go. The best way to describe his show was that it was a variety show which consisted of AB doing things he loves. Cooking demos on huge scales. Singing original songs about food (including a song about dry pork chops and one about Easy Bake ovens). And yeast puppets burping. And farting. The show was awesome, and I’d love to see it again. If you have the chance, I highly recommend it.

But back to the turkey. A couple years ago, Hubby and I weren’t traveling for Thanksgiving so we did a mini Thanksgiving meal for the two of us. Alton Brown’s cookbooks are a constant reference for us and that’s where we turned to find a recipe. His brined and roasted turkey comes out perfectly every time. Instead of using a cooler, we simply buy one of the huge ziplock bags that are intended to hold sweaters under your bed and pour the brine in the giant bag. Then put the turkey in the bag, seal it up, and store in the fridge. It works like a charm every time. Obviously you can use a cooler if you want, but we found this method easier.
If you’re still searching for the perfect turkey recipe, or if you have one but you’re not in love with it, I highly recommend this one. There’s a reason it’s the most reviewed, most viewed, most popular recipe on the Food Network website. To watch AB make this recipe, check out the Good Eats video here.


Brined and Roasted Turkey
Brining a turkey ensures full flavor and juiciness. It only requires a few extra steps and the payoff is well worth it!
Ingredients:
1 (14 to 16 pound) frozen young turkey
For the Brine
1 cup kosher salt
1/2 cup light brown sugar
1 gallon vegetable stock
1 Tbsp black peppercorns
1 1/2 tsp allspice berries
1 1/2 tsp chopped candied ginger
1 gallon heavily iced water
For the Aromatics
1 red apple, sliced
1/2 onion, sliced
1 cinnamon stick
1 cup water
4 sprigs rosemary
6 leaves sage
Canola oil
Directions:
2 to 3 days before Roasting
Begin thawing the turkey in the refrigerator or in a cooler kept at 38 degrees F.
Combine the vegetable stock, salt, brown sugar, peppercorns, allspice berries, and candied ginger in a large stockpot over medium-high heat. Stir occasionally to dissolve solids and bring to a boil. Then remove the brine from the heat, cool to room temperature, and refrigerate.
Early on the day or the night before you'd like to eat
Combine the brine, water and ice in the 5-gallon bucket. Place the thawed turkey (with innards removed) breast side down in brine. If necessary, weigh down the bird to ensure it is fully immersed, cover, and refrigerate or set in cool area for 8 to 16 hours, turning the bird once half way through brining.
Preheat the oven to 500 degrees F. Remove the bird from brine and rinse inside and out with cold water. Discard the brine.
Place the bird on roasting rack inside a half sheet pan and pat dry with paper towels.
Combine the apple, onion, cinnamon stick, and 1 cup of water in a microwave safe dish and microwave on high for 5 minutes. Add steeped aromatics to the turkey's cavity along with the rosemary and sage. Tuck the wings underneath the bird and coat the skin liberally with canola oil.
Roast the turkey on lowest level of the oven at 500 degrees F for 30 minutes. Insert a probe thermometer into thickest part of the breast and reduce the oven temperature to 350 degrees F. Set the thermometer alarm (if available) to 161 degrees F. A 14 to 16 pound bird should require a total of 2 to 2 1/2 hours of roasting. Let the turkey rest, loosely covered with foil or a large mixing bowl for 15 minutes before carving.
Recipe from Alton Brown, via Food Network

 I am Jen the Beantown Baker. Engineer by day and baking maven by night. Hubby serves as my #1 fan and official taste tester. We got hitched back in 2006. Barefoot. In the sand. With the waves crashing behind us. It was one of the best decisions we’ve ever made.


I am really very terrible at frosting/decorating cake :\ This came out way better than anything I could make!
beantownbaker — March 25th, 2013 @ 1:18 pm
Ha – I’m pretty bad too. That’s why I love putting stuff on the sides. Coconut does a good job of hiding my sloppy decorating skills.
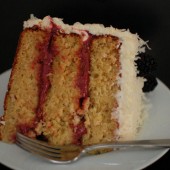
Coconut and almond, you’ve already got me reeled in 🙂 two of my favorite flavors rolled into what looks like a moist, fluffy cake. YUM
This cake looks so beautiful and the texture is perfect! I love curd as a filling between cake layers but i never knew the trick for preventing it from seeping out – thanks!
beantownbaker — March 25th, 2013 @ 1:19 pm
Yea, it’s definitely very helpful. Even more so when you ACTUALLY do it 😉
We’ve all had those cake experiences. It looks like it turned out well in the end! And it sounds delicious!
beantownbaker — March 25th, 2013 @ 1:20 pm
Glad to hear I’m not the only one. I think it’s easy to get wrapped up in thinking we all need to project that all of our baking/cooking endeavors are hugely successful…
Regardless of any kitchen mishaps, this cake looks divine! Layer cakes always look so special, and the addition of fruit here makes me swooooon!
beantownbaker — March 25th, 2013 @ 1:20 pm
I agree. Layer cakes always look special 🙂
Oh this looks amazing. And aren’t we all our own worst critics when we bake? I can’t tell you how many times I say something is terrible and my husband looks as me like I’m crazy.
beantownbaker — March 25th, 2013 @ 1:21 pm
I agree. At the end of the day, it tasted delicious and no one knew about all the issues I had with the cake. I did want to keep it real on the blog and not give anyone any false sense that things are always easy for me…
I always shy away from layer cakes – yours always come out well, I need some more practice I think! Your “mistakes” are great learning points – did not know about the frosting damn, but it makes so much sense!
beantownbaker — March 25th, 2013 @ 1:23 pm
That’s why I wanted to talk about them. I definitely could have posted about this cake without mentioning any of the issues I had. I’m hoping they’ll help someone (myself included) to learn something for the next time they tackle a layer cake. Yours will definitely improve with practice. Mine surely are. I really want to make that coconut cake you just posted!
i’m always hard on myself too, but you wouldn’t know by the taste i’m sure! looks absolutely wonderful, not to mention i’m drooling over the flavor combo 🙂
beantownbaker — March 25th, 2013 @ 1:24 pm
I agree, I think we all are. I wanted to keep it real with this post in case anyone else found it to be a difficult set of recipes…
Yum, your cake looks so delicious and I really love the sound of the blackberry lime curd!
beantownbaker — March 25th, 2013 @ 1:27 pm
Thanks!
I love coconut cake, and blackberries are my favorite fruit. Such a great idea to put them together. This cake is gorgeous! I would happily take a large slice . . . or maybe the whole thing 😉
beantownbaker — April 27th, 2013 @ 10:02 am
Then you would definitely love this cake!
Could anyone post the blackberry lime curd recipe? The link is no longer working.
Thanks!
beantownbaker — August 12th, 2013 @ 7:39 pm
Sorry about that. I updated the recipe link, but here it is as well: http://www.beantownbaker.com/2013/03/blackberry-lime-curd.html