


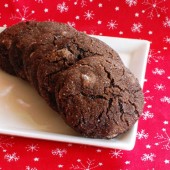
Chocolate Mousse Cupcakes
I’ve had my eye on this chocolate mousse cupcake recipe for quite some time. The cupcakes finally made their way to the top of my must-bake list recently when I needed to bring a dessert to a cookout. The host requested something chocolate and these definitely fit that bill.

The great thing about this recipe is that the batter and the frosting are basically the same thing, so you don’t have to worry about making frosting in addition to the cupcake batter. Everyone really enjoyed the chocolateness of these guys. My favorite part was the mousse frosting. It was ridiculous. Even Hubby agreed that it was awesome, and he’s quite the chocolate mousse fan.

In the end, the mousse didn’t hold it’s shape very well after being piped onto the cupcake. Next time (and I’m positive there will be a next time), I think I’ll just spread the mousse on the top of the cupcakes with a spatula.


Chocolate Mousse Cupcakes
Ingredients:
4 heaping Tbsp all-purpose flour
2 1/2 tsp baking powder
1/2 tsp salt, plus good pinch for the egg whites
10 ounces dark chocolate
1 cup (2 sticks) unsalted butter, room temperature
6 eggs, separated
1 cup sugar
Directions:
Preheat oven to 350°F.
Mix flour, baking powder, and salt together and set aside.
Melt the chocolate and butter in a double boiler or microwave. Don't cook -- the chocolate and butter should be just melted. Stir and set aside.
Beat egg yolks and sugar until light yellow and foamy. Beat in the melted chocolate until totally blended.
Beat egg whites with a pinch of salt until stiff but not dry. Gently fold into chocolate mixture. Divide mixture into two parts and put one of them in the refrigerator to be used later to frost cupcakes. Gently whisk flour mixture into other half until it is completely absorbed.
Fill cupcake papers about 2/3 full with batter and bake for 15-20 minutes. Don't overcook. Cupcakes should be just cooked and moist in the center. Remove from oven and cool.
When cupcakes are cool, frost with remaining chocolate mousse.
Recipe as seen on How to Eat a Cupcake, originally from Cupcakes Galore by Gail Wagman


 I am Jen the Beantown Baker. Engineer by day and baking maven by night. Hubby serves as my #1 fan and official taste tester. We got hitched back in 2006. Barefoot. In the sand. With the waves crashing behind us. It was one of the best decisions we’ve ever made.


