


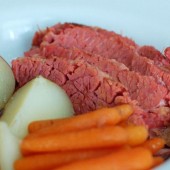
Turkey Chili
A lot of people have been asking what Hubby and I have been eating throughout the kitchen renovation. As I explained on demo day, we packed a mini-freezer full of foods to keep us from eating out. This chili is one of the things in that freezer. We’ve made it probably 6-7 times in the last year, I just never got around to blogging about it. For the kitchen renovation, I made one pot for Hubby and one that was not so spicey for me.
 This chili is so good and so filling. And I love that it’s healthy (and colorful) too. It’s basically just a collection of ground turkey, canned tomatoes, and a ton of veggies (feel free to use whatever you like or have on hand). When we’re not eating this out of the freezer/microwave, I like to serve Hubby’s with a dollop of fat free Greek yogurt (so much healthier than sour cream) and some fresh cilantro.


Turkey Chili
Yield: 10-12 servings
Ingredients:
2 lbs ground turkey
2 medium onions, diced
1 green pepper, diced
1 red pepper, diced
2 tsp olive oil
4 tsp cumin
2 tsp smoked paprika
2 tsp chili powder
1 tsp cayenne pepper
1 Tbsp oregano
1 Tbsp salt
1 Tbsp ground mustard
6 cloves garlic (finely chopped or minced)
2 cans kidney beans, drained
1 can beer, more or less to taste and consistency
16 oz can of tomato sauce
2 cans diced tomatoes
1 bag frozen corn - no need to defrost
1 large bag frozen diced butternut squash - no need to defrost
Directions:
In a large stock pot, brown the turkey until cooked through. Remove turkey onto a plate and drain all liquid from the pot.
Heat the oil over medium heat. Add onions and peppers and cook until slightly softened, 6-7 minutes. Add the garlic and all of the seasonings and stir to coat the onions and peppers. Allow to cook 1-2 minutes.
Add remaining ingredients, return to boil, then simmer for 20 minutes. Add more beer if the consistency is off. It can be served immediately or simmer all day to continue to meld the flavors together.
This chili freezes very well.
Recipe adapted from Cooks.com


 I am Jen the Beantown Baker. Engineer by day and baking maven by night. Hubby serves as my #1 fan and official taste tester. We got hitched back in 2006. Barefoot. In the sand. With the waves crashing behind us. It was one of the best decisions we’ve ever made.


This looks great!
I just have to say that I visit your blog often and LOVE all of these great recipes!!
Thanks guys! This stuff is really yummy and cheesey!
mm…looks wonderful..what a great combination!
Marye
bakingdelights.com
This looks delicious–but I’m confused as to how it is dairy-free, since it clearly includes cheeses.
Great point Mariah. At the time of this post, I had recently found out that I was lactose intolerant. Since I can eat sheep and goat milk cheeses, my definition of dairy free is just anything without cow’s milk in it. I am changing the title of the post to be Lactose-Intolerant Friendly Mac and Cheese to avoid any confusion.