


12 Days of Cookies – Snickerdoodles
 Turns out that Snickerdoodles are my sister’s favorite holiday cookie. This might not seem weird to anyone else, but to me, I was shocked when she told me. I don’t think my mom has ever made Snickerdoodles. I know that I haven’t ever made them. So I guess I’m not sure where she got this unexpected love of Snickerdoodles… But since they’re her favorite (and since she’s my favorite older-younger sister), I had to include them in my 12 Days of Cookies. Hi Brookie-Cookie!
I got this recipe from an insert that came with my Martha Stewart silicone baking mat. My dad gave me the mat for my birthday and I love it. Does just as well as my Silpats and I love the bright red color. You can see it in the picture of my Sugar Cookie post. Due to the large number of baked goods in our house, I decided to half this recipe. The dough comes together so easily, you could make these in a pinch. My half batch made exactly 2 dozen with my cookie scoop. I realized as I was looking at the recipe that I forgot to halve the amount of sugar used to roll the cookies in. Woops.
 Snickerdoodles – from Martha Stewart – makes 4 dozen
2 3/4 c all-purpose flour
2 tsp baking powder
1/2 tsp coarse salt
1 cup (2 sticks) unsalted butter, softened
1 1/2 cup + 2 Tbsp sugar
2 large eggs
2 tsp ground cinnamon
Preheat oven to 350F. Sift together flour, baking powder and salt; set aside. Put butter and 1 1/2 cups sugar in the bowl of an electric mixer fitted with the paddle attachment. Mix on medium speed until pale and fluffy, about 3 minutes. Mix in eggs. Reduce speed to low; gradually mix in flour mixture.
 Stir together cinnamon and remaining 2 tablespoons sugar in a small bowl. Shape dough into 20 (1 3/4-inch) balls (I just used my cookie scoop); roll in cinnamon sugar. Space 3 inches apart on baking sheets lined with parchment paper.
Bake cookies, rotating sheets halfway through, until edges are golden, 12 to 15 minutes.
My 12 Days of Cookies:
Day 1: Lumberjacks
Day 2: Peppermint Sandies
Day 3: The great Sugar Cookie Debate
Day 4: Fudge
Day 5: Cranberry Orange Cookies
Day 6: Chocolate Chip Snowballs
Day 7: Peppermint Chocolate Cookies


 I am Jen the Beantown Baker. Engineer by day and baking maven by night. Hubby serves as my #1 fan and official taste tester. We got hitched back in 2006. Barefoot. In the sand. With the waves crashing behind us. It was one of the best decisions we’ve ever made.







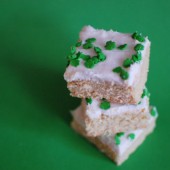
Mmmm sugar cookies bars! What an awesome combo!
http://www.brisbanebaker.blogspot.com
Top o’ the mornin’ to ya! These bars look fabulous!
http://www.simplysweeter.blogspot.com
Oh – YUM! I want to go home immediately and bake these!
I love baking that has simple recipes and turn out delicious! These look great for any occasion 🙂
LOVE THOSE!!! They are super cute. And you can’t go wrong with green sprinkles! 🙂
Oooooh! These sound delicious, I am definitely going to make these. Thanks for sharing, have a wonderful day! Denise@cottagesisters
I’m newer to the blogging scene so these bars are new to me! Thanks for posting it again.
They may have been all the rage last year but they are new to me! I wasn’t able to find any st. patricks day sprinkles … bummer. Yummy looking pictures
Happy St. Patty’s Day! What yummy sugar cookie bars – love the sprinkles!
mmmm…mmm…mmmm… making these right now for my nephew and niece! =)
Thank you for sharing! =)
I love this recipe – and I know what you mean about the supermarket sprinkles. I have a huge tub of heart shaped ones leftover from a purchase last year and I think there’s enough to last me for the next twenty years of Valentine’s day treats.
I made these the other evening for a picnic and they were all that you had promised! Oh my! One of my new favorites for sure. Thanks for sharing this and for the rec for a half batch!
Just made these. My kids are loving them.