


Watermelon cupcakes
I saw these Watermelon cupcakes in my Google Reader and I thought they were so cute. Like the perfect summery treat. We were going to a cookout last weekend and I immediately thought of these cupcakes. I wanted to be able to pipe the frosting, so I opted not to flavor them with watermelon. I also didn’t think chocolate and watermelon really go together… So I guess mine are just watermelon look-alike cupcakes.
 I made the same chocolate chip cupcakes that I made for the 4th of July, but this time I used mini chips and added some pink and red food coloring to the batter. For the frosting, I made my favorite buttercream. I actually made two shades of green that I wanted to swirl together. The swirling didn’t go as planned, so really all you can see is dark green frosting, not the lighter lime green frosting. Everyone enjoyed the summery (looking) cupcakes.
  Chocolate Chip cupcakes – adapted from Vanilla cupcakes from Crazy Delicious – original recipe from Martha Stewart – makes 24
1 3/4 cups cake flour, not self-rising
1 1/4 cups unbleached all-purpose flour
2 cups sugar
1 tablespoon baking powder
3/4 teaspoon salt
1 cup (2 sticks) unsalted butter, cut into 1-inch cubes
4 large eggs
1 cup whole milk
1 teaspoon pure vanilla extract
1 cup mini chocolate chips + 1 Tbsp flour (toss to coat chocolate chips)
Few drops pink and red food coloring Mix the dry ingredients
Add butter
Whisk eggs, milk and vanilla
Add wet ingredients 1/3 at a time to the dry ingredients
Stir in food coloring and chocolate chips – be sure to coat the chips with flour so they don’t all sink to the bottom while baking
Bake for 17-22 minutes at 325 degrees or until a toothpick comes out clean
 Vanilla and Buttercream
2 sticks butter
7 cups powdered sugar, sifted
1/4 cup milk – I used whole milk
1 teaspoon vanilla
Few drops green and yellow food coloring
Beat butter until creamy, scrape bowl
Add 5 cups of sifted powdered sugar, milk, and vanilla, beat until combined. Add food coloring until desired color is reached.
Add more powdered sugar until you get to the consistency you want (not too stiff so that its hard to pipe)


 I am Jen the Beantown Baker. Engineer by day and baking maven by night. Hubby serves as my #1 fan and official taste tester. We got hitched back in 2006. Barefoot. In the sand. With the waves crashing behind us. It was one of the best decisions we’ve ever made.


Cute idea and they look so easy to make. Must try.
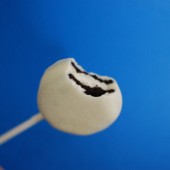
And the stick makes them perfect for milk dipping.
oh my…i’ve tried my hand at these and just about every oreo ended up cracking when i tried to insert the stick. *frowny face* not even dipping the sticks first seemed to help? do you have any suggestions on how to slide them in without any hiccups. *wink*
thank you SO much for your help…yours came out adorable!
Wow, these are such a great favor idea! They look easy, but impressive (and delicious)!
Sues
I am loving all of these new parents/new baby posts, because friends of ours just had a baby boy last week and I can just do everything you’re doing! 🙂
Jess@pen – are you using Double Stuffed Oreos? If you’re using regular Oreos, maybe the center isn’t thick enough to support the lollipop stick between the cookie ends. Or maybe the lollipop stick isn’t thin enough (do they even make different sizes?). Just thinking out loud. Good luck. 🙂
jen@pen – I agree with Sarah, be sure to use double stuff Oreos and thin sticks. You’ll notice that the craft store has at least two thicknesses of sticks. You want the thinnest ones. I did slide the sticks in slowly but didn’t have any issues with breaking cookies.
Why must this kind of thing be posted when I’m trying to lose weight? 😉
YUM! I love the idea of doing the initial on them!
Kim @ http://frostmeblog.blogspot.com
party inspiration
Just choose to tell you a piece of writing is really as awesome. All of the picture quality in your own place is definitely fascinating and are able to feel you’re an experienced for this idea. Fantastic along with your agreement i can to seize ones give food to to continue modified together with upcoming publish. Thx one million and you need to maintain this worthwhile succeed.
Awesome post.
How far ahead can you make these and will the Oreo get soggy ?
beantownbaker — February 23rd, 2014 @ 8:45 pm
We made them a week in advance and the Oreos did not get soggy.
I can totally see the hiccups @jess, the Double Stuf Oreos have a far more thin and brittle cookie than the original Oreos. They crumble, split and crack very easily, I would imagine irregardless of stuffing volume, the structural integrity of the original Oreo cookie would hold up better for this project.
Can u freeze them?
Hi just wanted to say I have made these every year since 2009 when you posted them, still love them just as much!