


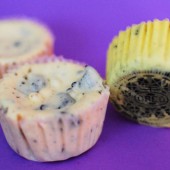
Cookie Dough Chocolate Ice Cream Cupcakes
 I love ice cream. I mean I really love ice cream. Hubby loves it too. When we do our weekly shopping we always grab a pint for each of us. That’s our evening snack throughout the week. It seriously breaks my heart when I have to watch him eat amazing flavors like Ben and Jerry’s Cinnamon Roll or Caramel Sutra and I’m stuck with Soy dream something.
Don’t get me wrong, there are some decent dairy-free ice creams out there, but the texture just isn’t the same. Whether it’s made from tofu, rice, or soy, there’s always a grittiness and not as much creaminess. Sometimes I just suck it up and suffer through the pain of eating ice cream (even with Lactaid pills) because it’s just worth it sometimes. I decided that this blogging event was worth a stomach ache. And boy am I glad I did.
 Hubby picked his favorite ice cream – cookie dough. I picked my favorite cupcake – chocolate. Together we made one amazing treat. When I was little, I used to love to take a piece of cake and a scoop of ice cream and mix them together until it was one uniform bowl of mush. It always grossed my dad out, but it’s great. I added a layer of mush to my cupcakes as well and topped with some chocolate cream cheese frosting.
 Here are the steps I took to make these treats:
Send hubby to the store for ice cream 🙂
Make my go-to chocolate cupcake. I filled the liners a little less than 1/2 full and baked for 8 minutes.
Once the cupcakes cooled, I popped the whole tray into the freezer and took out the ice cream.
 Mix about 4 of the cupcakes with a couple scoops of ice cream. Using a spatula, spread some of the cake/ice cream mixture onto the cold cupcakes. Pop back into the freezer.
Using a spatula again, spread some of the softened ice cream into the top of the cupcake mixture and pop back into the freezer until ice cream is hard again.
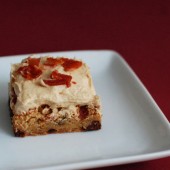
Pipe my favorite chocolate cream cheese frosting (without the chili powder) on top of the ice cream.
Enjoy!!


 I am Jen the Beantown Baker. Engineer by day and baking maven by night. Hubby serves as my #1 fan and official taste tester. We got hitched back in 2006. Barefoot. In the sand. With the waves crashing behind us. It was one of the best decisions we’ve ever made.


I discovered these about a month ago right after my husband suggested getting some pretzels…I told him that pretzels are only good when dipped in chocoalte and BAM! we stumbled across these! LOL! The Reeses cookie wafers are good too, they taste like a nutty bar! 🙂
I know what you mean- I manufacture chocolate covered pretzels. Visit my blog spot for more info. They are delicious
http://louciouspretzels.blogspot.com/