


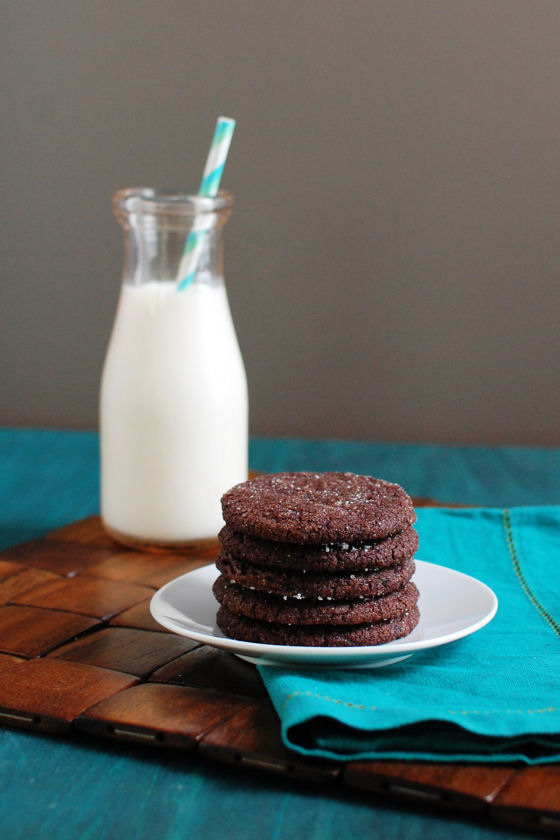
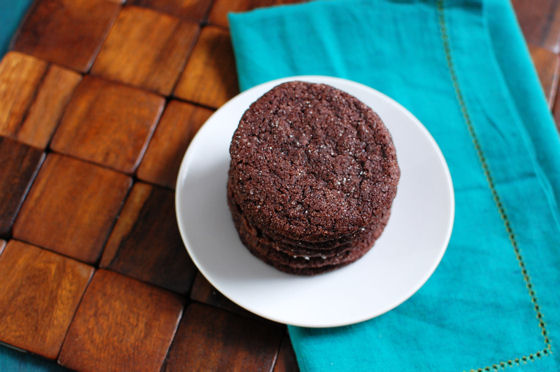
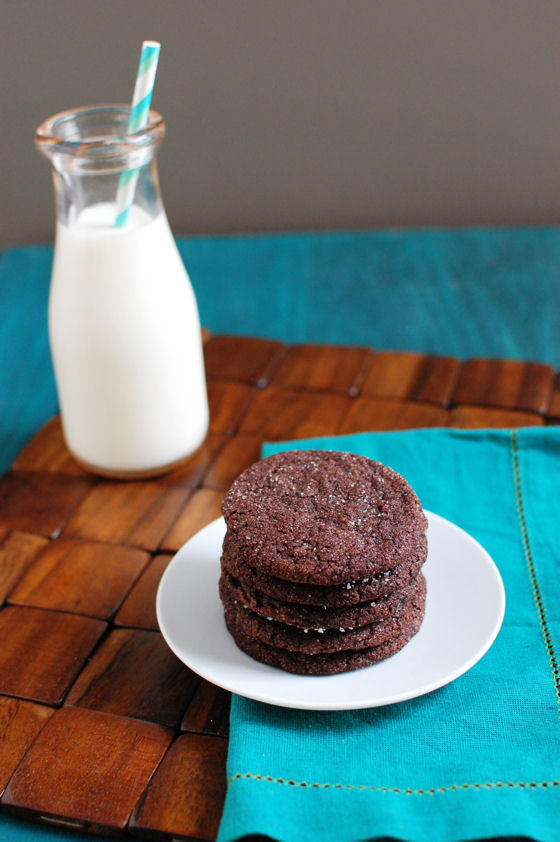
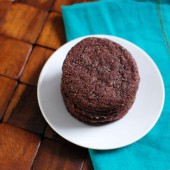
Chocolate Sugar Cookies
Chocolate sugar cookies. Why didn’t these come in to my life sooner?!? They’re chocolatey and soft with a crispy edge. Basically, exactly what you expect in a great sugar cookie, but made even better with the addition of chocolate.
It’s good to be back here on the blog some more. Sure, I’m not back up to my 3x/week posting schedule that I was doing for months and months. But, it’s good to be back! I have gotten a few questions about whether I plan to turn this blog in to a baby blog or a baby food blog… I don’t. Obviously having a baby is going to be a life changing event, so you’ll hear me talk about the baby on here some. Keep me posted if you have thoughts or want to hear more (or less) about the little ninja.
Sorry for the sidebar. Back to these cookies. I know the holidays seem like FOREVER away, but I’m thinking I’ll add these to my holiday baking list. I might add a pinch of cinnamon to them when I do that… In the mean time, I’ve been enjoying these crumbled up in some homemade ice cream or with a dollop of peanut butter or cookie butter. If you’re looking for a classic crowd-pleasing cookie to bake up, be sure to give these a shot.
One Year Ago: Spicy Tomato Jam
Two Years Ago: Blueberry Coffee Cake Bundt
Three Years Ago: Baked Zucchini Sticks with Caramelized Onion Dipping Sauce
Four Years Ago: Raw Summer Vegetable Pasta
Five Years Ago: Steak Fajitas with Chimichurri and Drunken Peppers
Six Years Ago: Squash and Turkey Lasagna
Seven Years Ago: Chocolate Chip Cookies


Chocolate Sugar Cookies
Chocolate sugar cookies are chocolatey and soft with a crispy edge. Basically, exactly what you expect in a great sugar cookie, but made even better with the addition of chocolate.
Yield: 3 dozen cookies
Ingredients:
1/3 cup (2 1/3 oz) sugar
1 1/2 cups plus 2 Tbsp (8 1/8 oz) flour
3/4 cup (2 1/4 oz) unsweetened cocoa powder, sifted
1/2 tsp baking soda
1/4 tsp baking powder
14 Tbsp unsalted butter, divided
1 3/4 cups packed (12 1/4 oz) dark brown sugar
1 Tbsp vanilla
1/2 tsp salt
1 egg plus 1 yolk
Directions:
Preheat oven to 350 F. Line 2 baking sheets with parchment paper.
Add the sugar to a wide, shallow dish (a pie plate works well). In a medium bowl, whisk together the flour, cocoa powder, baking soda, and baking powder.
Add 10 tablespoons of the butter to a microwave-safe bowl and microwave in 20 or 30-second bursts until melted. Stir in the remaining 4 tablespoons of butter until it is completely melted. Set the butter aside for 5-10 minutes to cool until lukewarm, about 90-95 F on an instant-read thermometer.
Add the brown sugar, vanilla, and salt and whisk until incorporated.
Mix in the egg and egg yolk until well combined. Switch to a rubber spatula, and stir in the dry ingredients just until combined.
Shape the dough into balls, each ball should be about 2 tablespoons of dough. Roll the balls in the sugar you put in the shallow dish earlier, coating them on all sides.
Place on the prepared baking sheets, leaving several inches of space in between them. Use the bottom of a glass to press the balls down so each of the cookies has a diameter of about 2 inches. Sprinkle the tops of each cookie with a few pinches of the remaining granulated sugar.
Bake, one sheet at a time, until the cookies are slightly puffy and the edges are just barely set, about 12-13 minutes (the cookies may look slightly undercooked in the center, that's ok). Transfer the baking sheet to a wire rack and let the cookies cool for a few minutes, then remove to a wire rack to cool completely. Continue baking with the remaining dough.
Recipe from Cook's Country, as seen on Tracey's Culinary Adventures


 I am Jen the Beantown Baker. Engineer by day and baking maven by night. Hubby serves as my #1 fan and official taste tester. We got hitched back in 2006. Barefoot. In the sand. With the waves crashing behind us. It was one of the best decisions we’ve ever made.


These look SO delicious! I love cookies, especially as the holidays approach. Always on the lookout for new ideas! Thanks for sharing this one!
These look great! I did a S’mores brownie not to long ago and since then I have been craving more! There is something about S’mores that is just soooo awesome 🙂
These beauties not look any cuter. And of course, they look super delish as well.
I’ve had these kind of cookies before. (Someone else baked them, not me!) they are so good!
Over here in the UK we know that you all love S’mores and we are jealous as we dont have them!
I am a newish follower and enjoying ur blog so much.
I have an award for u on my blog.
carol
They look great! What a fun idea. I love S’mores everything! Over the summer, I had a very casual party, just days before my wedding, and made a bunch of toaster s’mores. They were so easy and a big hit!
I LOVE smores and will be trying these soon!!!
I’m getting ready to make these tomorrow and I’m just wondering how many cookies this makes…
Jes – It makes around 3 dozen. I updated the post to say that as well. Hope you enjoy them.