


Chocolate Mousse Cupcakes with Chocolate Dipped Strawberries
 Remember those chocolate mousse cupcakes I made recently? Remember how I said I’d be making them again? Well here they are again. This time they’re all dressed up for the holidays. I saw these festive strawberries on The Rookie Chef blog last 4th of July and I immediately starred the recipe and put it in my Holiday folder so I’d remember to make them this year.

I got so many compliments on the strawberries and they were so easy to make. I really like the dark blue candy melts that I found for the Colts cupcakes I made for the Superbowl this year. It’s much closer to the classic red-white-blue than the normal aqua color of the Wilton candy melts. (For anyone who’s wondering, I found the dark blue candy melts at an ACMoore).
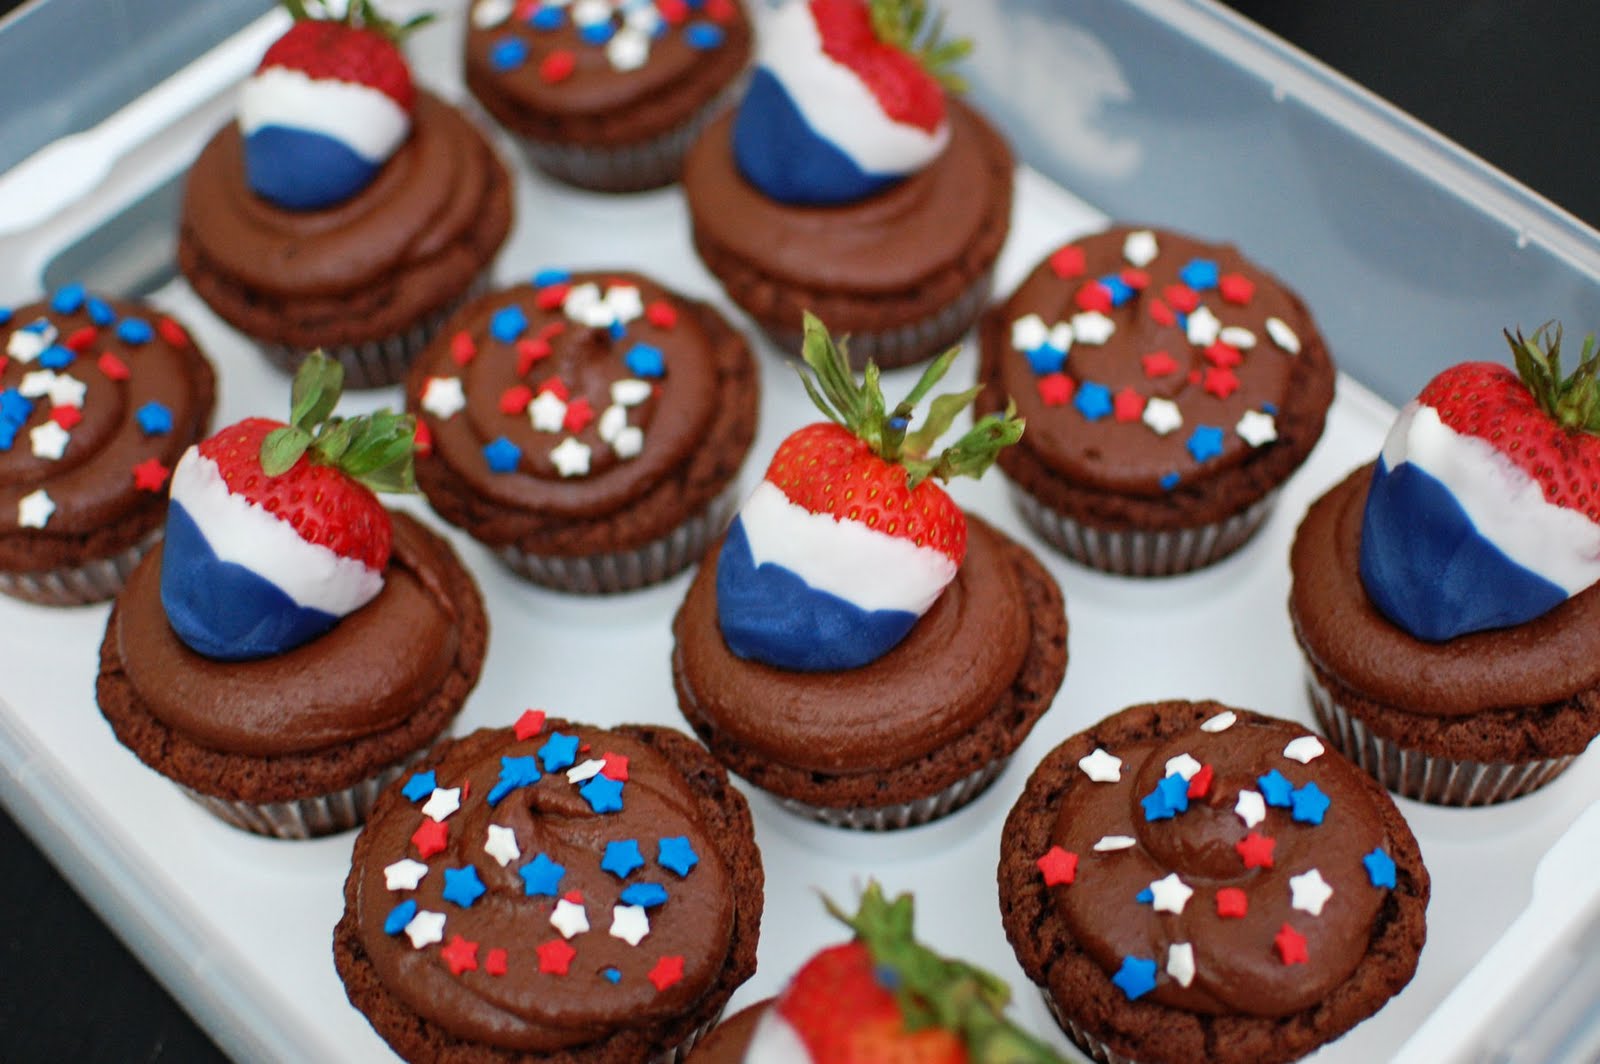
Half of my cupcakes got red white and blue star sprinkles and the other half were topped with the red white and blue strawberries. Next year, I’ll also make a bunch of the strawberries for people to enjoy without the cupcakes as well.
Be sure to check the righthand sidebar for other cookout favorites ———->
And here are some festive Red White and Blue Desserts I’ve made in the past:
Layered Cookie Cake
4th of July Red Velvet Cupcakes
4th of July Chocolate Chip Cupcakes
Red White and Blue No Bake Frozen Cupcakes
Check out my SECOND week of Strawberry Recipes HERE


Red White and Blue Dipped Strawberries
Ingredients:
Strawberries, washed and dried
Almond bark or white candy melts
Blue candy melts or blue gel food coloring to mix with the white
Directions:
Wash strawberries and dry on paper towels
Melt almond bark. You can do this in the microwave like I did by just putting it in a bowl, microwaving for 30 seconds, stirring, and then continuing to microwave for 15 second intervals. Make sure and stir between intervals. Or you can do this on a low heat stove top. Just be careful not to burn it!
Dip your strawberries in the almond bark so that it covers about 2/3 of the strawberry. Repeat for all strawberries. Set them on wax paper and allow for them to completely cool.
While your strawberries are cooling, melt your blue candy melts or add your blue coloring to the rest of the almond bark.
Once cooled, dip your strawberries into the blue candy melts but only to the bottom third. Again, transfer to wax paper and allow them to cool.


 I am Jen the Beantown Baker. Engineer by day and baking maven by night. Hubby serves as my #1 fan and official taste tester. We got hitched back in 2006. Barefoot. In the sand. With the waves crashing behind us. It was one of the best decisions we’ve ever made.







Holy Yum. This looks amazing!
I’m thinking about making another one so I can take pics of slices. But since it’s for a contest I couldn’t… And we have a no camera policy at work… Yep, it’s decided, I’ll just have to make another one.
Another pie is definitely in order! I’m thinking I’ll have to take this to the family Thanksgiving.
So I think I’ll be using this one – given it combines my two favorite desserts (chocolate chip cookie bars and pie) into one tasty looking combo! Good work 😉
Yes, this was very good. The inside was like a gooey just barely under cooked cookie. AWESOME.