


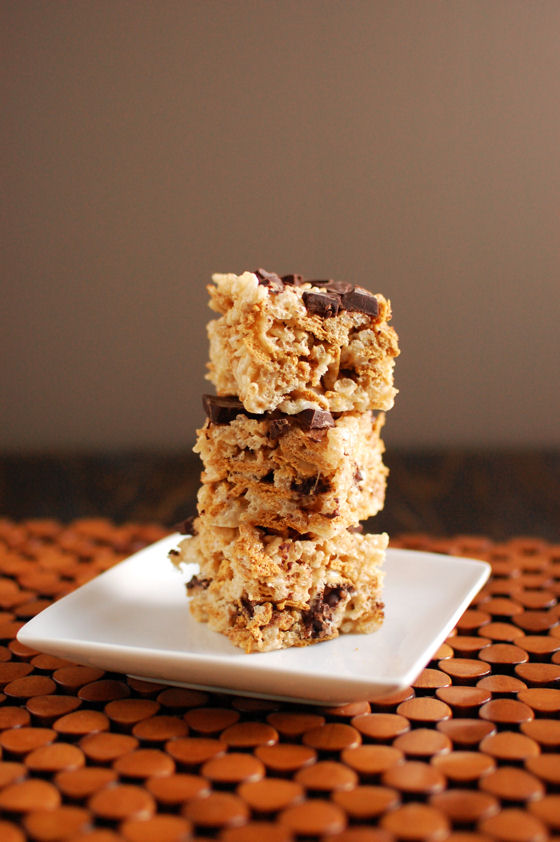
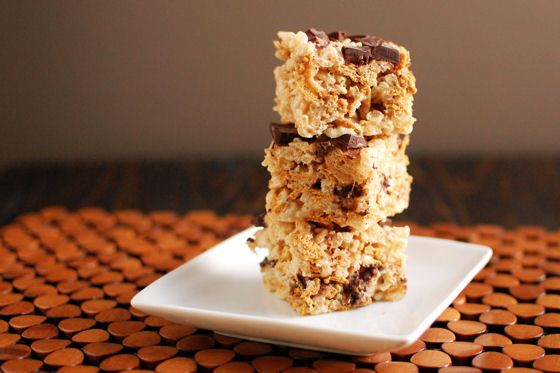
S’mores Rice Krispies Treats
This is the last recipe I made while my sisters and mom were in town a couple weeks ago. You see, my family is a family of snackers. We like to sit around playing cards, board games, or watching movies and enjoying some delicious snacks.
Which is basically what our girls weekend consisted of for the majority of the time. Sure, we did some touristy Cincinnati things (including lunch at a local brewery, the National Underground Railroad Freedom Center, and a riverboat cruise), but we also vegged out watching Hunger Games, playing Euchre, and a fun dice game called Greedy outside on the patio.
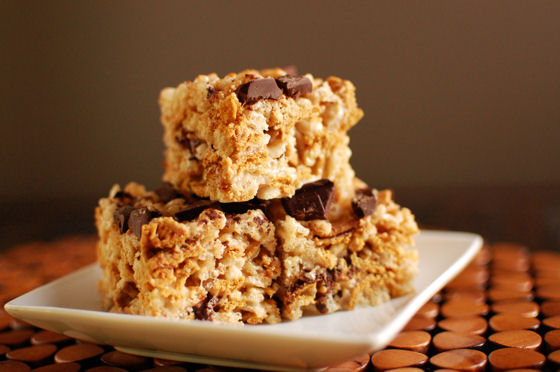
So we had plenty of opportunity for snacking. And this sweet snack was a big hit. By mixing Golden Grahams cereal and chunks of chocolate in to a standard Rice Krispies treat recipe, it’s no surprise that everyone loved it. Especially since my youngest sister LOVES s’mores and it was WAY too hot out to make a fire in the fire pit (although we did make s’mores over the gas stove one night, since I had the supplies).
Three Years Ago: San Francisco Trip, Days 5-6
Four Years Ago: Salmon with Yellow Pepper Cilantro Pesto and Monkey Bread
Five Years Ago: Champagne Cupcakes


S'mores Rice Krispies Treats
Ingredients:
4 Tbsp butter
6 cups marshmallows
1 tsp vanilla
3 cups Rice Krispies
2 cups Golden Grahams
1 cup graham cracker crumbs
4 oz bittersweet chocolate, chopped
Directions:
Mix together the Rice Krispies, Golden Grahams, and graham cracker crumbs. Set aside.
Lightly grease an 8x8 pan.
Melt the butter in a saucepan over medium heat. Turn the heat down to the lowest setting and add the marshmallows. Stir until almost totally melted, then add the vanilla extract. Continuing stirring until the marshmallows are all melted.
Once fully melted, take them off heat and pour over the Rice Krispies mixture. Stir lightly to combine.
Dump half of the mixture into pan. Sprinkle with half of the chopped chocolate.
Pour the remaining Rice Krispies mixture into the pan. Press down with lightly greased hands. Sprinkle the remaining chocolate on top. Allow to cool completely before cutting.
Recipe adapted from Mallow and Co


 I am Jen the Beantown Baker. Engineer by day and baking maven by night. Hubby serves as my #1 fan and official taste tester. We got hitched back in 2006. Barefoot. In the sand. With the waves crashing behind us. It was one of the best decisions we’ve ever made.


This comment has been removed by the author.
I am sending this to my friend Julie. She is always trying to come up with ways to get her hubby to eat veggies. Genius!
Yea, I’m glad my hubby eats veggies. I’m sure that if I had used the right chocolate these would have been awesome. They were just okay due to the unsweetened chocolate…
When I tried these last year I was so disappointed. Yours look much better. I think your “bumping up” helped to create a better product. Well done.
http://www.dobetter.wordpress.com