


Red Velvet Cupcakes & My New Favorite Way to Frost Cupcakes
I wanted to make something festive to take into work for Valentine’s Day. I decided on red velvet cake for a couple reasons. My friend Amy had asked me about red velvet about a month ago. She made cupcakes for her sister’s birthday party. Having never tasted, let alone baked, red velvet cake, I sent her a couple recipes that I thought looked good. After looking into it, I noticed how much food coloring is in red velvet cake. The thought of it kinda skeeved me out. But I’ve been trying to step out of my comfort zone lately, so I decided to try the red velvet cake for Valentine’s Day.

I wanted a recipe that didn’t use a ton of food coloring. I decided on a recipe from Kelsey at Apple A Day because it only (ha! only) takes 1 oz of food coloring. That’s a whole bottle of food coloring! And believe it or not, I saw recipes that called for up to 3 oz. I also liked this recipe, because the coloring is added to the liquid ingredients and then you add the dry ingredients to that. I would be worried about staining something if it was the other way around…

I loved how these came out. Very moist and very red. I really enjoyed the taste of the red velvet cupcake and I’m glad I made them. AND, I got to use my new favorite way to frost a cupcake (see details at end of post). I can’t explain why I like it so much, I just do. It does give you more frosting without piling it on really high.

As an added bonus, I sat down while my cupcakes were in the oven only to find this Red Velvet cake comparison on The Way the Cookie Crumbles in my Google Reader. Bridget compared 4 red velvet cupcake recipes, including Kelsey’s from Apple A Day, Deb’s from Smitten Kitchen, and two others. I was very interested in her results since I had chosen the Apple a Day recipe and Amy had made the Smitten Kitchen recipe. If you’re looking for a Red Velvet cupcake recipe, definitely check out the comparison post. I am proud to say that Bridget recommends the Apple A Day recipe that I chose for my cupcakes! I agree that they come together easily, are very moist due to the oil in the recipe, have a bright red color, and have a sweet but tangy flavor.

For the frosting, I know most people put cream cheese frosting on red velvet cake/cupcakes. When I was searching for cupcake recipes, I came across one on Joy the Baker’s blog. It looked a little different than the other recipes I had been looking at and she opted for a brown sugar cream cheese frosting. I was intrigued by the frosting so I decided to go with it. And I’m so glad I did. I read her post about how to prevent curdling cream cheese frosting. I did make a silly mistake in making my frosting before my butter was at room temperature, resulting in a slightly lumpy frosting. But it tasted delicious which is all that matters, right!?!
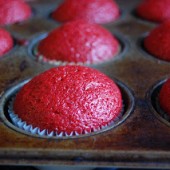


Red Velvet Cupcakes
Yield: 24 cupcakes
Ingredients:
For the Cupcakes
2 1/2 cup cake flour
1 1/2 cup sugar
1 tsp baking soda
1 Tbsp cocoa powder
1 tsp salt
2 eggs
1 1/2 cups vegetable oil
1 cup buttermilk
2 Tbsp (1 oz.) red food coloring
1 tsp vanilla
1 tsp white distilled vinegar
For the Brown Sugar Cream Cheese Frosting
3/4 cups butter, softened
4 oz cream cheese, softened
2 Tbsp light brown sugar, packed
1/2 tsp vanilla
pinch of salt
2-3 cups powdered sugar
1-2 Tbsp milk, depending on desired consistency
Directions:
For the Cupcakes
Preheat oven to 350 F.
Sift together flour, sugar, baking soda, cocoa, and salt into a medium bowl.
Beat eggs, oil, buttermilk, food coloring, vanilla, and vinegar in a large bowl with an electric mixer until well combined. Add dry ingredients and beat until smooth, about 2 minutes.
Divide batter evenly between 3 greased and floured 8" round cake pans (or a lined cupcake pan).
Bake cakes, rotating halfway through, until a toothpick inserted in the center of each cake comes out clean, 25–30 minutes. Let cakes cool 5 minutes, then invert each onto a plate, then invert again onto a cooling rack. Let cakes cool completely.
For the Brown Sugar Cream Cheese Frosting
Cream the cream cheese in an electric mixer for 1 minute. Scrape down the bowl and add the butter, beating for 1-2 minutes, or until incorporated.
Add the brown sugar, pinch of salt and vanilla extract, and beat until incorporated.
Turn off mixer and add 1 cup of powdered sugar. Turn the mixer on a low speed so the sugar doesn’t fly out of the bowl. Slowly add more sugar alternately with the milk until you reach your desired consistency.
To Frost the Cupcakes
Using the cone method, remove a cone from the top of the cupcake. Discard cones.
Using a piping bag with a large round tip, pipe frosting into hole of cupcake. Continue frosting in a fat swirl.
Cupcake recipe from Apple A Day, Frosting recipe from Joy the Baker


 I am Jen the Beantown Baker. Engineer by day and baking maven by night. Hubby serves as my #1 fan and official taste tester. We got hitched back in 2006. Barefoot. In the sand. With the waves crashing behind us. It was one of the best decisions we’ve ever made.







Looks great and festive! 🙂
Boy, you had a busy cupcake weekend. Love the happy look
Adorable and so festive. I bet they tasted awesome.
These look beautiful and delicious!