


Homemade Oreo Cookies Again
 For my last Oreo recipe of the week, I’m featuring homemade Oreos, again. You may remember that I have made homemade Oreos before. The ones that I made last year had a spot-on filling taste, but the cookie part seemed a bit off to me. The texture wasn’t quite was I was hoping for and that totally threw it off for me.

So when I saw this recipe in my Food Network Magazine recently, I added it to my to-bake list. The main reason I chose the recipe I did last year was because I didn’t have round cookie cutters and I didn’t want deal with rolling the cookies out. Luckily, my dad got me this circle cookie cutter set for my birthday last year. I know he said I had some random things on my list that he didn’t understand how often I’d use, but let me promise you, I’ve used these little guys a BUNCH over the past year. So thanks Dad!

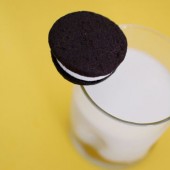
Another thing that makes this recipe so sweet is that I got to spend some quality time in the kitchen with my little sister L. She and my mom came to meet our baby nephew and L spent a day with me. I asked her what she wanted to do and she said bake! Of course I was excited. Our original plan was to make these cookies and then use them in a cheesecake. But then we decided we wanted to eat them the classic Oreo way, with a glass of milk.

L and I had a hard time rolling the dough to a consistent thickness. So we ended up with a variety of thicknesses in our cookies. We paired them up based on thickness and put a corresponding amount of filling in. We also didn’t pipe the filling on the top of the cookie like the recipe says. We thought the bottoms of the cookies were uglier than the tops, so we did what we thought was best.

One Year Ago: Coconut-Lime Cupcakes
Two Years Ago: Dairy Free Mac and Cheese with Broccoli and Cauliflower
See all of my Week Of Oreo Recipes here.


Yield: 30
Ingredients:
For the cookies
1 1/3 cups Dutch-process cocoa powder
1 1/2 cups flour, plus more for dusting
1/4 tsp salt
2 sticks unsalted butter, softened
2 cups sugar
2 eggs
1 tsp vanilla extract
For the filling
1/4 cup room-temperature, unsalted butter
1/4 cup vegetable shortening
2 cups powdered sugar
2 tsp vanilla extract
Directions:
Prepare the cookies
Sift together the cocoa powder, flour and salt in a large bowl.
Using a mixer, cream the butter and sugar. Add the eggs one at a time, then the vanilla, incorporating each ingredient before adding the next. Add the dry ingredients and mix just until incorporated, scraping the bottom of the bowl with a rubber spatula.
Divide the dough into 2 pieces; place one piece between 2 lightly floured sheets of parchment paper and roll into a 1/4-inch-thick rectangle. Repeat with the other piece of dough. Refrigerate both rectangles, covered with the parchment sheets, until firm, at least 1 hour or up to several days.
Using a 2-inch round cutter, cut the dough into 64 circles. (You can reroll the scraps once.) Place the cookies about 2 inches apart on ungreased baking sheets and chill for 20 minutes. Preheat the oven to 325 degrees.
Bake the cookies until they are set and slightly darker around the edges, about 20 minutes. Cool completely on wire racks.
Meanwhile, prepare the filling
Place butter and shortening in a mixing bowl, and at low speed, gradually beat in the sugar and vanilla. Turn the mixer on high and beat for 2 to 3 minutes until filling is light and fluffy.
To assemble the cookies
In a pastry bag with a 1/2 inch, round tip, pipe teaspoon-size blobs of cream into the center of one cookie. Place another cookie, equal in size to the first, on top of the cream. Lightly press, to work the filling evenly to the outsides of the cookie. Continue this process until all the cookies have been sandwiched with cream.
Cookie Recipe from Food Network Magazine
Filling Recipe from Smitten Kitchen


 I am Jen the Beantown Baker. Engineer by day and baking maven by night. Hubby serves as my #1 fan and official taste tester. We got hitched back in 2006. Barefoot. In the sand. With the waves crashing behind us. It was one of the best decisions we’ve ever made.







I too didn’t have a pan big enough for a water bath. I just cooked it for 1 hour and 30 minutes and then let it cool on a wire rack for 30 minutes. I didn’t even cool it in the oven. I haven’t tasted it yet, so I don’t know if it turned out ok…but it looks just like my other that I made.
Hey if it tastes good who cares what it looks like?!
Regardless of how it looks, it’s the taste that matters! My cheesecakes look similar when I don’t do a water bath. Another idea with cheesecake is to make cheesecake truffles with leftovers (that is, if you even have any!) 🙂
If you get an answer to your cake running over problem would you mind sharing it? I had the same problem, despite the fact my pan met Dorie’s requirements. I’m also curious where I went wrong.
I’ve had similar problems, especially with the cracking, which I believe is from cooking too long. Once I started taking cheese cakes out based on time and not appearance the problem went away. I think a lot of cooking still takes place from the internal heat…just a theory…BTW, great marble effect on your cake!
Aawwww poor little cheesecake. To be honest I am not sure why your cheesecake fell but I know when I make cheesecake mine always bakes more evenly when I use a water bath also if the internal temperature reaches 160F (don’t quote me) it starts to make the cheesecake crack. Maybe next time don’t bake it as long? Either way taste is the most important IMO. 🙂
Clara @ iheartfood4thought