


Tasty Tools: Lemon & Key Lime Curd
 I just found out in January that I love lemon curd. Who knew!?! I had never eaten it let alone made it prior to the DB Lemon Meringue Pie. When Joelen announced her new blogging event, Tasty Tools, I instantly thought of lemon curd. This event encourages you to use the specified tool to create anything you want. Then when the round-up occurs, you can learn some new recipes to make using your various kitchen tools. Very creative event Joelen! The inaugural tool is the microplane/zester.
I love my microplane. Right now the only things I really use it for is to zest citrus fruit. I can’t wait to see the round-up to learn all the creative things that other food bloggers do with their microplanes.
 I decided to make lemon curd again, but I didn’t want to cheat the event by just recreating a recipe I’ve already tried. So I decided to try a new recipe. I also decided to make lemon curd and key lime curd this time around. I made a 1/2 batch of lemon curd and a 1/4 batch of the key lime curd.
I used this calculator to get my grams to cups conversion.
 Lemon Curd – from Cherrapeño – originally from Delia Smith
grated zest and juice 4 large juicy lemons
4 large eggs
12 oz (350 g or 1 3/4 cup) golden caster sugar
8 oz (225 g or 16 Tbsp) unsalted butter, at room temperature, cut into small lumps
1 level dessertspoon (2 tsp) cornflour
Begin by lightly whisking the eggs in a medium-sized saucepan, then add the rest of the ingredients and place the saucepan over a medium heat. Now whisk continuously using a balloon whisk until the mixture thickens – about 7-8 minutes. Next, lower the heat to its minimum setting and let the curd gently simmer for a further minute, continuing to whisk. After that, remove it from the heat.
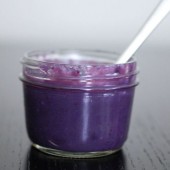
 Now pour the lemon curd into the hot, sterilised jars, filling them as full as possible, cover straightaway with waxed discs, seal while it is still hot and label when it is cold. It will keep for several weeks, but it must be stored in a cool place.


 I am Jen the Beantown Baker. Engineer by day and baking maven by night. Hubby serves as my #1 fan and official taste tester. We got hitched back in 2006. Barefoot. In the sand. With the waves crashing behind us. It was one of the best decisions we’ve ever made.


These look good! It’s such a perfect muffin for Fall. Yum 🙂
definitely going to make these asap! they were just what i’ve been looking for.
oh i love these very original