


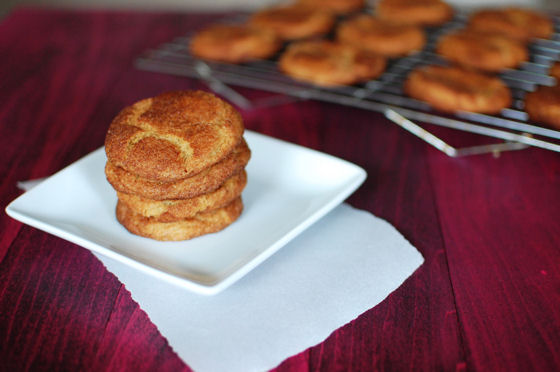
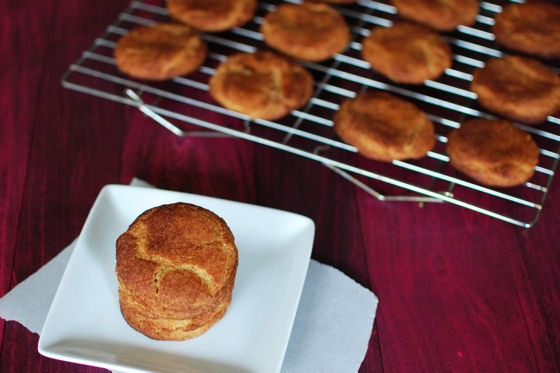
Browned Butter Snickerdoodles
Browned butter is one of those magical ingredients. It’s like liquid gold. It just makes everything better. I have yet to meet a recipe using browned butter that I don’t like.
If you haven’t ever browned butter, it’s quite simple, although it does take some patience. Just melt the butter on low. Once the butter starts to foam, I start whisking. From here things can be tricky, although I’ve never had any issues. My secret? Using my nose. I stir the butter constantly until it smells nutty and almost caramely. That’s it.

I only have dark bottomed pans, so I can’t follow the instructions about when you see flecks vs when you don’t. But my nose has yet to fail me. Believe me, you’ll know when it’s ready. Once cooled to room temperature, browned butter can be used in just about anything.
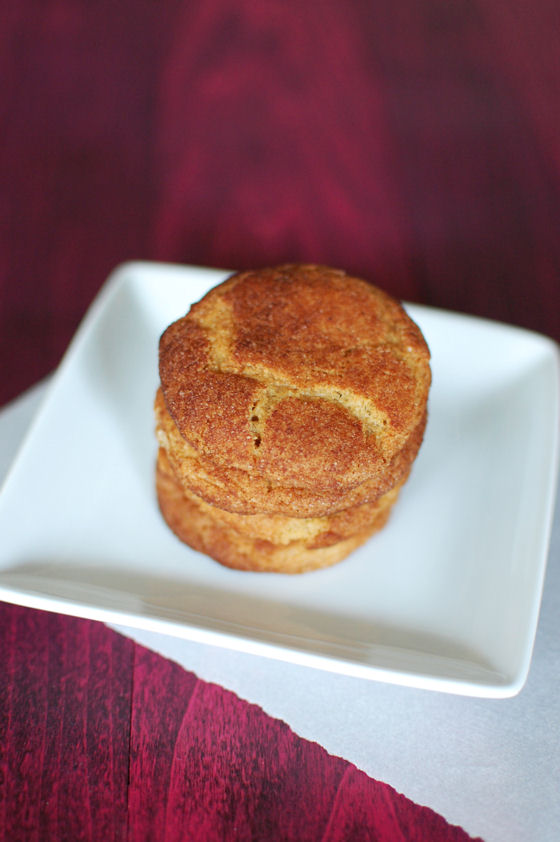
Since my favorite chocolate chip cookie recipe has browned butter in it, I was not at all surprised that I loved these snickerdoodles. Don’t get me wrong, I like regular snickerdoodles enough (in cookie or bar format), but with browned butter, they were downright addictive!
One Year Ago: Roasted Blueberry Cupcakes and Two-Berry Coconut Macaroons
Two Years Ago: Hummingbird Cupcakes with Pineapple Flowers
Three Years Ago: Fresh Strawberry Cupcakes with Cream Cheese Frosting and Meal Idea for New Parents (or Anyone else you want to take a meal to)
Four Years Ago: Roasted Red Pepper Dip and Samoas Bars


Browned Butter Snickerdoodles
Yield: 3 dozen cookies
Ingredients:
1 cup (2 sticks) unsalted butter
2 3/4 cups flour
2 tsp cream of tartar
1 tsp baking soda
5 tsp cinnamon, divided
1/2 tsp salt
2 large eggs
1 Tbsp whole milk
1 cup plus 3 Tbsp granulated sugar, divided
1/2 cup packed light brown sugar
Directions:
Add the butter to a medium skillet set over medium heat and let it start melting. Continue cooking, swirling the pan occasionally, until the butter becomes golden brown and smells nutty (be patient and watch carefully, it can go from brown to burnt quickly). Pour the butter into the bowl of a stand mixer fitted with the paddle attachment. Mix on medium-low speed for 5-7 minutes to cool the butter to room temperature (or alternatively, you could just let it sit until it cools down - it'll just take longer).
Meanwhile, whisk the flour, cream of tartar, baking soda, 1 teaspoon of the cinnamon and the salt together in a medium bowl. Whisk the eggs and milk in a medium measuring cup until combined.
When the butter has cooled, add 1 cup of the granulated sugar and the brown sugar to the bowl. Beat on medium speed for 2-3 minutes, scraping down the sides of the bowl as necessary. With the mixer on low, slowly add the egg mixture beating until well combined. With the mixer on low speed, add the dry ingredients in 3 additions, beating just until the dough comes together. Cover the bowl and chill the dough in the refrigerator for at least 1 hour or up to 24 (I chilled mine for close to 24).
When you're ready to bake, preheat oven to 400 F. Line two baking sheets with parchment. Add the remaining 3 tablespoons of sugar and the remaining 4 teaspoons of cinnamon to a wide, shallow bowl and stir to combine.
Using a small cookie scoop (about 2 tablespoons), portion the dough into balls. Roll the balls in the cinnamon-sugar mixture then transfer to the prepared baking sheets spacing the cookies about 1 1/2-2 inches apart. Bake for about 10 minutes (rotating the pans halfway through) until the tops of the cookies are cracked and the edges are just set (just a minute or two of extra baking will take these from chewy to more crisp so keep an eye on them). Transfer the pans to wire racks and cool the cookies for a few minutes then remove to the racks to cool completely. Store in an airtight container at room temperature.
Recipe seen on Tracey's Culinary Adventures, originally from Baked Elements


 I am Jen the Beantown Baker. Engineer by day and baking maven by night. Hubby serves as my #1 fan and official taste tester. We got hitched back in 2006. Barefoot. In the sand. With the waves crashing behind us. It was one of the best decisions we’ve ever made.


Great job! You’ll be hooked into the magic of caramel now!!
Perfect swirls on top! I am so impressed! Great job!
Mmmm… cupcakes and caramel! YUMMY! I totally have to star this one for my baking bucket list!
/Clara
Congratulations on a successful Db month – these cuppers look delicious!
I love that you chose to do cupcakes rather than a cake. (I prefer cupcakes and smaller portions anyday!) As for adding the salt – love the idea too! Great job 🙂
Beautiful cupcakes. Thanks for baking with us this month!
Your cup cakes are simply beautiful. I love the swirly frosting on top.
Natalie @ Gluten A Go Go
Your swirls are perfect! Great job.
Absolutely fantastic! They look great. Makes me wish I had made cupcakes 🙂
Thanks everyone. These qere quite tasty. Hubby said they were his favorite cupcake I’ve ever made!!
OOh, I love your swirly cuppy cakes! I wish I’d salted my caramal, too…
Your cupcakes look delicious! Congratulations on a successful challenge.