


How to Roast Garlic
Today kick’s off Hubby’s birthday month! The crazy thing is that he’s not a big birthday person. But I am. I would celebrate my birthday the entire month of June if he let me. Usually I’m lucky to get just the one weekend of my birthday dedicated to me. But that’s ok. I like making a big deal out of other people’s birthdays almost as much as my own.

So this month, I’m going to feature some of Hubby’s favorite foods. Or foods containing his favorite foods.
It’s pretty easy to predict if Hubby is going to like something. For one, he’s not a picky eater at all, so really, there are very few things he won’t like. I don’t think there’s anything he absolutely won’t eat. He claims to not like peanut butter in desserts, but he still eats them… I’ve been told that as a boy, he often requested liver and onions for dinner. I can tell you one thing. If you serve something with one of these foods, he’s going to love it:
- lobster
- caramel
- coffee
- creme brulee
- garlic
- bacon
- blueberries
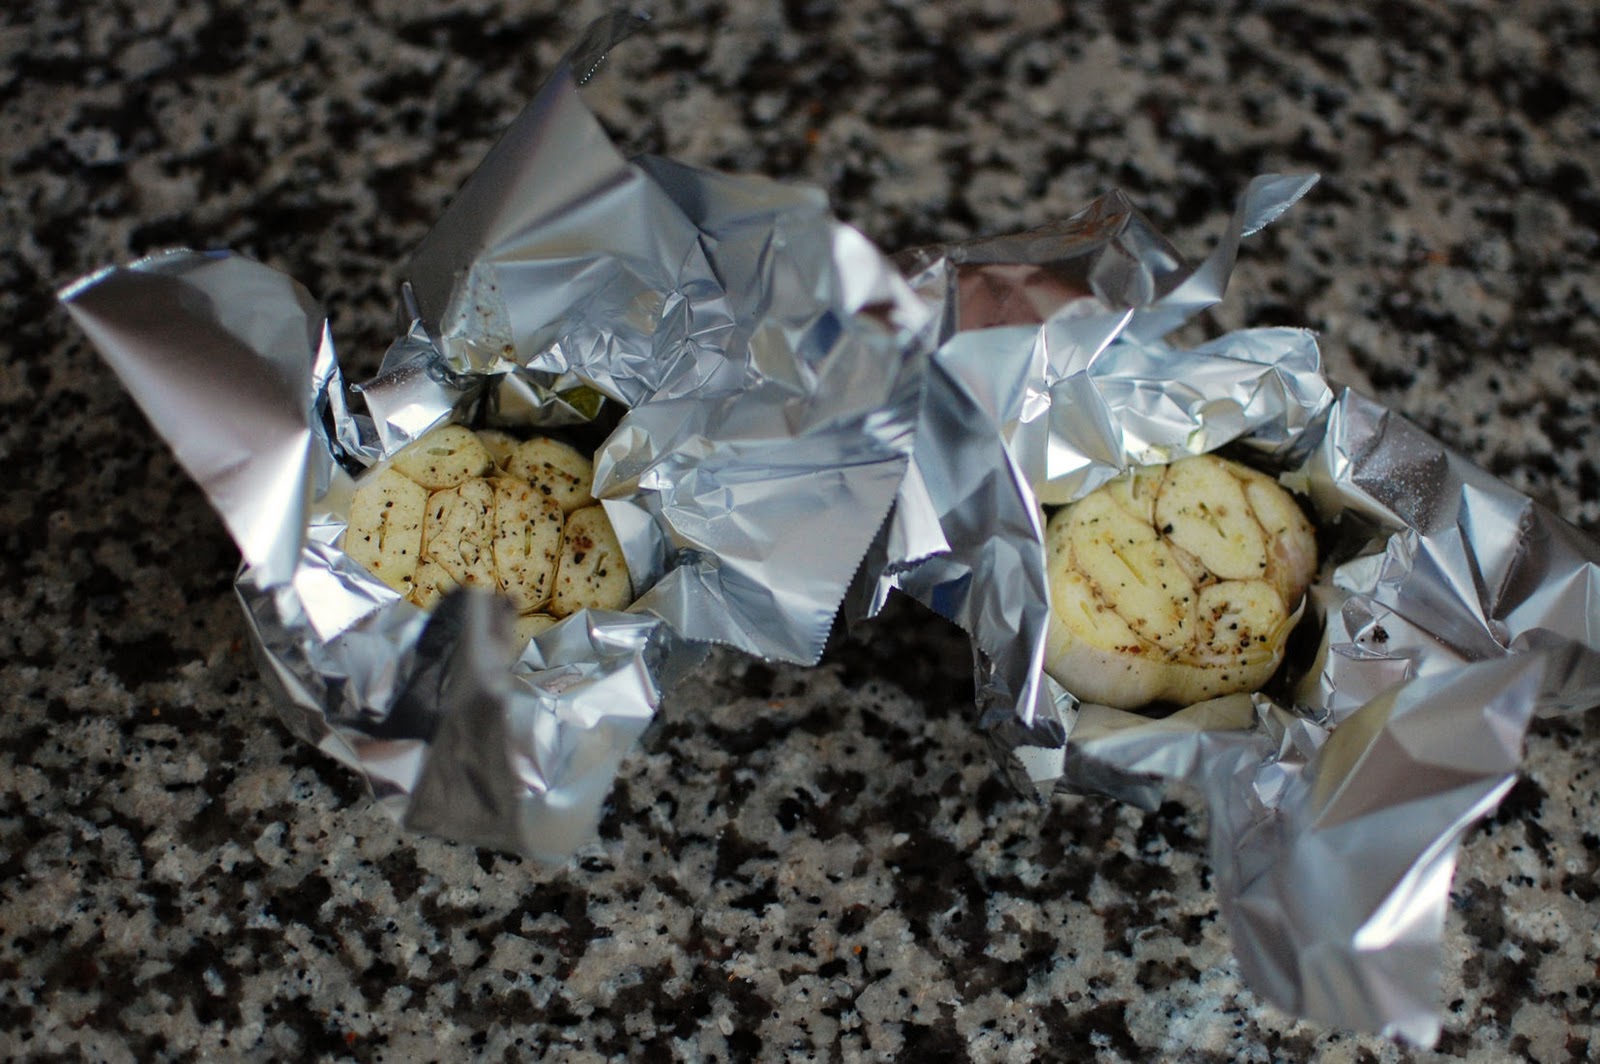
So to kick things off today, I’m going to show you how to roast garlic. It’s quite simple and roasted garlic is so sweet and fragrant, it’s worth the small amount of effort that it requires. Hubby would bathe in this stuff if I let him. Instead, I let him smear it on bread by the spoonful.
One Year Ago: Oven Roasted Chickpeas
Two Years Ago: Chocolate Overdose Cake


How to Roast Garlic
1 head roasted garlic
Yield: 1 head roasted garlic
Prep Time: 5 minutes
Cook Time: 45 minutes
Total Time: 50 minutes
Ingredients:
1 head garlic
1 Tbsp olive oil
salt and pepper
Directions:
Preheat oven to 400 degrees. Cut the top of the garlic head off to expose a portion of each of the cloves.
Place the head of garlic on a small piece of aluminum foil. Cup the foil in your hand to create a small foil bowl that holds the garlic.
Drizzle olive oil on top of exposed garlic cloves. Sprinkle with salt and pepper.
Finish wrapping the garlic with the foil to seal it into the foil. Place foil wrapped garlic on a rimmed cookie sheet.
Bake for 45 minutes and allow to cool. Cloves can be squeezed out of the head of garlic.


 I am Jen the Beantown Baker. Engineer by day and baking maven by night. Hubby serves as my #1 fan and official taste tester. We got hitched back in 2006. Barefoot. In the sand. With the waves crashing behind us. It was one of the best decisions we’ve ever made.


YUM YUM YUM!
These look so good. Can’t wait to make these once it finally starts feeling like spring around here!
I love veggie burgers, this looks like a fantastic dinner option!
definitely delicious! i’ve been meaning to make a batch of burgers that I can stash in the freezer… these might have to be it 🙂
Dam from the look is so yummy .Cant wait to get it in my stomach.Thanks mate for such a dish…
This is a wonderful idea. I have never thought of using sweet potatoes in veggie burgers and I am thinking about it now.
beantownbaker — September 2nd, 2014 @ 7:10 pm
Definitely check them out. Sweet potato veggie burgers are where it’s at!
I’ve tried these and love them! however, how do you make them look so good and stay together? Mine are really wet (even after adding a lot more flour) and stick like crazy to my skillet. Any suggestions?
Craving Something Sweet and Delicious?
If you’re a fan of exotic flavors, why not add some Indian Mangoes to your cart? The season for these tropical delights is here! Get ready to enjoy the authentic taste of Indian Mangoes and make your fruit bowl extraordinary.
Check out our Indian Mangoes collection and order today!