


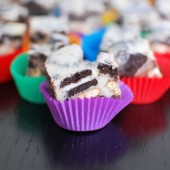
Oreo Pretzel Fudge
 Clearly we love Oreos in the Beantown Baker household. I’ve made them from scratch, used them in brownies and cupcakes, made truffles out of them, and even put them in Rice Krispies treats. Even with all of this baking with Oreos, I still look for new recipes to feature these classic cookies. This week I’m going to highlight five more recipes using Oreos. Get out a glass of milk and be sure to check back to see what I’m baking up.
I’ve had my eyes on this fudge for a while now. I love the simplicity of the recipe. And we all know I’m a huge fan of salty/sweet combos and layered bars!
This fudge combines the best of both of those worlds. One layer has the pretzels that provide some saltiness and a bit of crunch. The top layer provides a contrast because of the sweetness of the Oreos. I cut these into pretty small pieces, because like most fudges, this one is pretty intense!
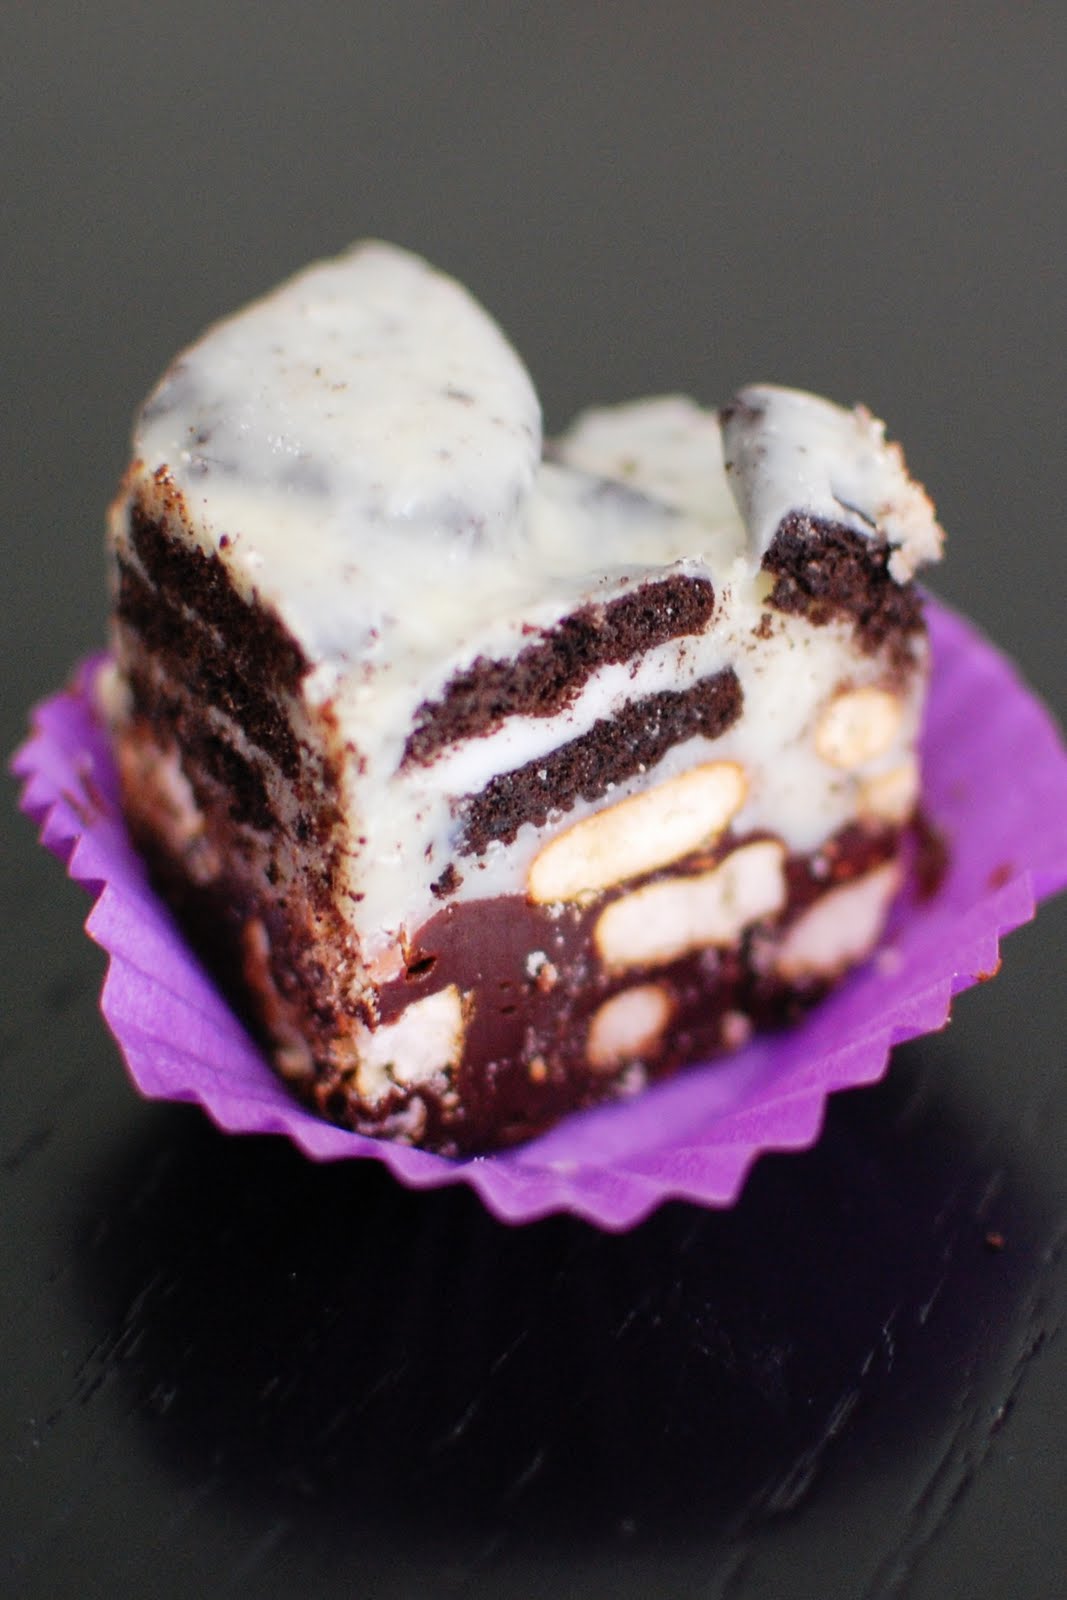
I have to admit I wished that the bottom layer was a bit saltier. Next time I might even sprinkle some salt on top of that layer with the layer of pretzels. Don’t get me wrong, this fudge is amazing, but it didn’t provide the salty/sweet ratio that I was hoping for.

See all of my Week Of Oreo Recipes here.


Oreo Pretzel Fudge
Ingredients:
100 grams dark chocolate
100 grams white chocolate
2 cans of condensed sweetened milk
20 Oreos, quartered
45 salted pretzels, 20 separated out and crushed
Directions:
Microwave the dark chocolate with one can of condensed milk for 2 to 3 minutes, or until chocolate is nearly all melted, stirring thoroughly after each minute. Stir in the 20 crushed pretzels.
Spread the mixture into a square 8-inch pan lined with parchment paper. Top with remaining 25 whole pretzels. Press the pretzels slightly into the fudge.
Repeat melting the white chocolate with the second can of condensed milk.
Break the cookies into quarters, and stir into the white chocolate mixture. Spread that on top of the dark chocolate and the pretzels.
Refrigerate until firm – about 2 hours. Cutting is easiest with a knife dipped into hot water.
Recipe adapted from Chocolate Fool


 I am Jen the Beantown Baker. Engineer by day and baking maven by night. Hubby serves as my #1 fan and official taste tester. We got hitched back in 2006. Barefoot. In the sand. With the waves crashing behind us. It was one of the best decisions we’ve ever made.


I’ve had my eye on these for a while now! They look fabulous!
These sound great, I love coconut!
Those look delish! I’ll bet my husband would love those.
Loving the cupcake creation and the filling looks SO good!!
I have cupcake envy – this looks fantastic!
These look amazing!!
HOLY COW!!! I just stumbled upon your blog and am I ever glad I did!
From one Massachusetts “sista” to another….these look AMAZING, Jen.
I can’t WAIT to try them. I’m enjoying all of your other delicious dishes too!!! 🙂
Hello Dear, are you truly visiting this website regularly,
if so aftr that you will absolutely get good knowledge.