Week of Kitchen Renovations: Before and After Pics
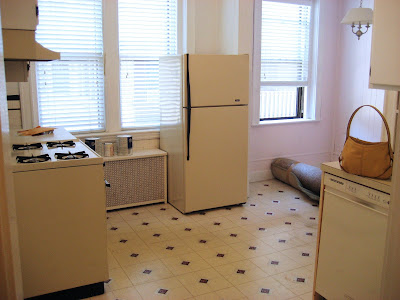
To wrap up my week of kitchen renovations, I wanted to highlight some overall before and after pics of our kitchen and dining room. It’s still hard to imagine that we lived with our old kitchen for two full years before the renovation started. I sometimes can’t even remember what it used to look like. To me, that means our renovation was a success. We definitely had sleepless nights debating what to do, what we could afford, and various other discussions about the renovation. But at the end of the day, it was worth every penny and every ounce of stress before and during the renovation process.
So without further ado, here are the before and after pics…
This is the view coming in the back entry of our condo. We use this entry 95% of the time, so this is what Hubby and I come home to every day. Before (on demo-day) and After:
Most people who don’t live in the condo would enter the kitchen through the hallway towards to front of the condo. You can see the fridge over in the dining area in these pics. Here are those before (one from move-in day and one from demo-day) and afters:
Here are the before and afters from the sink area:
Looking towards the stove area from the dining room (again the first before is from move-in day and the second before is from demo-day):
And last but not least the dining room:
We still have a couple unfinished projects that we’d like to get done for the kitchen to really feel completely done, but it feels good to be at the point we are. I’ll be sure to post any of these projects as we finish them.
Check out my Week of Kitchen Renovations here.


 I am Jen the Beantown Baker. Engineer by day and baking maven by night. Hubby serves as my #1 fan and official taste tester. We got hitched back in 2006. Barefoot. In the sand. With the waves crashing behind us. It was one of the best decisions we’ve ever made.


I love the tiles behind the stove. Are those tin? It’s all beautiful. I’m totally jealous, and can’t wait to start projects of our own.
Jaime – It’s actually faux tin. There’s a whole post about it coming up tomorrow!
Looks beautiful; I love those counter tops! Can’t wait to see the rest of it.
We have the exact same set up with the stove, near the radiator which is under a window. I sent my husband a link. We want to gut our kitchen and start over someday
Gorgeous! So creative and functional. LOVE it! 🙂
Love what I see so far! The cabinets are beautiful and any extra counter space-even lower-is a bonus!
~Nancy
Love what I see so far! The cabinets are beautiful and any extra counter space-even lower-is a bonus!
~Nancy
Looks awesome!!!
We redid our kitchen this summer as well and I love how it turned out! It’s so much more fun cooking in there now 🙂 Yours came out great!! I love the idea of moving things around to get more light and counter space 🙂
We’re thinking of possible implementing something similar for a radiator under our kitchen counter. One question. How have the cabinets handled the heat and humidity from the radiator over time?
I believe this is among the such a lot vital information for me.
And i am happy studying your article. But wanna statement on few basic things,
The website taste is ideal, the articles is really excellent
: D. Excellent task, cheers
I have the faucet that I got from Home Depot. If you still have the part number and manufacture of this product could you please send it to me. Little note if you have a leak above the nozzle take the nozzle off a replace the wiring
Thanks
Carsten