


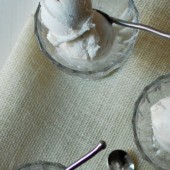
Daring Bakers POP! (Dairy-free cheesecake pops with recipe)
 I’ve had a lot of fun with every Daring Baker challenge I’ve participated in. I’m still an amateur baker and each month I’ve had to do something I’ve never done before.
First, I tackled my biggest baking fear – yeast. Next, was the first time I had ever made Swiss meringue buttercream (which I now make on a regular basis). In January, I made my first lemon meringue pie including my first time making lemon curd. And last month, I made my first layer cake.
 This month is no exception for the list of firsts. Cheesecake. I happen to love cheesecake, but I haven’t had any since finding out I was lactose intolerant. I just figured cheesecake would be one of those things I wouldn’t have again without being in extreme pain (or taking an entire box of Lactaid crushed over the cheesecake).
With the help of the NEW Daring Bakers site, I was able to get my questions answered and made the cheesecake completely dairy free. And it’s delicious! The pops are so cute and an easy way to bring cheesecake to a party. Thanks to this month’s hostesses: Deborah from Taste and Tell and Elle from Feeding My Enthusiasms. Be sure to check out the DB blogroll to see all the other cheesecake pops.
 Cheesecake Pops
Adapted from Sticky, Chewy, Messy, Gooey by Me (halved the recipe and made it dairy free)
Makes ~35 pops
2 1/2 8-ounce package of Toffuti Better than Cream Cheese – at room temperature
1 cup of sugar
2 tablespoon of flour
1/8 tsp salt
2 1/2 large eggs
1 egg yolk
1 teaspoon of vanilla
2 Tbsp full-fat soymilk + 2 tsp Earth Balance margarine – melted, mixed and cooled to room temp
1/2 pound dark chocolate
1 tablespoon of shortening
straws & sprinkles
Preheat oven to 325F. Set some water to boil.
In a large bowl, beat together the cream cheese, sugar, flour, and salt until smooth. If using a mixer, mix on low speed. Add the eggs and the egg yolk, one at a time, beating well (but still at low speed) after each addition. Beat in the vanilla and cream mixture (milk + butter).
Pour the batter into 8-inch pan, coated with cooking spray. Place the pan in a larger roasting pan. Fill the roasting pan with the boiling water until it reaches halfway up the sides of the ramekins. Bake until the cheesecake is firm and slightly golden on top, 35 to 45 minutes. (Mine took 50 minutes.)
Remove the cheesecake from the water bath and cool to room temperature. Cover the cheesecake with plastic wrap and refrigerate until very cold, at least 3 hours or up to overnight. (I refrigerated overnight.) When the cheesecake is cold and very firm, scoop the cheesecake into 2-ounce balls (My cheesecake was very firm. I just cut the cheesecake into squares and triangles) and place on a parchment paper-lined baking sheet. Carefully insert a straw into each cheesecake ball. Freeze the cheesecake pops, uncovered, until very hard, at least 1 – 2 hours.
 When the cheesecake pops are frozen and ready for dipping, prepare the chocolate. In a double boiler (I use a bowl over a pan of boiling water), heat the chocolate and the shortening, stirring often, until chocolate is melted and chocolate and shortening are combined. Stir until completely smooth. Do not heat the chocolate too much or your chocolate will lose it’s shine after it has dried.
Quickly dip a frozen cheesecake pop in the melted chocolate, swirling quickly to coat it completely. Shake off any excess into the melted chocolate. If you like, you can now roll the pops quickly in optional decorations. Place the pop on a clean parchment paper-lined baking sheet to set. (I let held the pop for a minute or so to let the chocolate set so that I wouldn’t have a “footprint” on my pops)
Refrigerate the pops for up to 24 hours, until ready to serve.


 I am Jen the Beantown Baker. Engineer by day and baking maven by night. Hubby serves as my #1 fan and official taste tester. We got hitched back in 2006. Barefoot. In the sand. With the waves crashing behind us. It was one of the best decisions we’ve ever made.


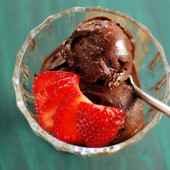
Is there any way to make this without an ice cream maker? I love the idea of this chocolate sorbet and was totally on board until the last part. Now I’m very curious and might have to do some googling after my daughter goes to bed.
beantownbaker — April 22nd, 2013 @ 5:32 pm
I just started making ice cream after getting the ice cream attachment for my mixer. So I don’t personally have any experience making ice cream without an ice cream maker. I’m sure it’s been done. If you do make this without an ice cream maker, let me know how it turns out!
Great idea! Love chocolate ice cream and I love you don’t need cream or eggs! Going to try this recipe!
beantownbaker — April 23rd, 2013 @ 7:44 am
Let me know what you think of it. We really enjoyed it!
I added 1/4 tsp salt and 1 tsp vanilla. It was delicious.
beantownbaker — May 12th, 2014 @ 4:53 pm
So glad you enjoyed it! I love adding salt to desserts. I will definitely have to do the same next time I make this.